Welcome to our GarageBand tutorial, where we’ve assembled a comprehensive guide for anyone looking to venture into song production on GarageBand. As an intuitive digital audio workstation, GarageBand has revolutionized how we create music, turning our devices into virtual studios that house all the tools needed to produce our next great track.
Whether you’re a seasoned songwriter or just starting out, our easy-to-follow steps will show you how to make a song on GarageBand. With this user-friendly application, which transforms your ideas into reality, the process of developing and refining your musical creations becomes as enjoyable as the final performance. Follow along as we dive into the exciting world of GarageBand music production.
Introducing GarageBand for Aspiring Musicians
As we explore the realm of music creation on GarageBand, it’s essential to acknowledge the sheer potential this application offers to aspiring musicians. A beacon for both beginners and professionals, GarageBand provides a seamless, user-friendly platform that simplifies the complex process of creating a song on GarageBand. It’s about turning that tune in your head into a track in the real world.
GarageBand’s allure lies in its accessibility—it’s designed to ensure that every step, from brainstorming melodies to the final stroke of production, is both intuitive and rewarding. With our GarageBand song making tips, you’ll find that crafting a compelling piece of music is less about navigating daunting equipment and more about letting your creativity flow.
Recognized for its robust features, GarageBand empowers you to start new projects with a single tap, record high-quality audio, and arrange your compositions with professional flair. Whether you’re laying down a catchy beat or overlaying harmonious chords, the journey of music creation on GarageBand is as smooth as it is exhilarating.
We understand the symphony of curiosity and ambition that plays within every aspiring artist. This is why we’ve made it our mission to harness the full spectrum of GarageBand’s capabilities to guide you through each chord, riff, and melody. Let us open the door to a world where music production is not just accessible but profoundly enjoyable.
Essential Equipment for Making Music in GarageBand
Embarking on the journey of composing with GarageBand opens up a universe of musical possibilities. To truly capture the essence and depth of your creations, it’s vital to understand the importance of incorporating the right equipment into your setup. In our music-making adventures, we’ve learned that certain tools are indispensable for achieving professional-sounding results.
The Role of MIDI Keyboards and USB Microphones
One of the keystones in the foundation of a high-caliber GarageBand studio is the use of MIDI keyboards. Why, you may ask? Well, MIDI keyboards in GarageBand unlock a level of precision and control that’s a game-changer for both novice and seasoned composers. They enable us to manipulate GarageBand’s vast library of software instruments with tactile responsiveness, resulting in a more dynamic and humanized performance.
Similarly crucial is the power that USB microphones for recording bring to the table. Unlike the default microphones embedded within our Macs or iOS devices, these USB microphones specialize in delivering uncompromised audio clarity. They hone in on the finer nuances of vocal performances or acoustic instruments, assuring that every breath or strum enhances the GarageBand audio quality to meet professional recording standards.
Maximizing Sound Quality: The Importance of Good Equipment
Let us not underestimate the vast impact that essential GarageBand equipment has on the final tapestry of our musical projects. The crisp audio captured by a polished USB microphone, or the breadth of expression provided by a sensitive MIDI keyboard, are not mere luxuries but necessities. Together, these elements play a pivotal role in maximizing sound in GarageBand, ensuring that our artistic intent is encapsulated with clarity and professionalism. Investing in reliable equipment means committing to the integrity of our sound, paving the way for recordings that truly resonate with their listeners.
We witness time and again how quality gear can elevate our music from merely good to spectacular. It is the vessel that carries our melodies, beats, and chords, delivering them to the ears of our audience, unscathed by noise or distortion. As we continue our exploration of the vast musical landscape that GarageBand offers, let us arm ourselves with the tools capable of rendering the richness of our creativity with the high fidelity it deserves.
Starting a New Project in GarageBand
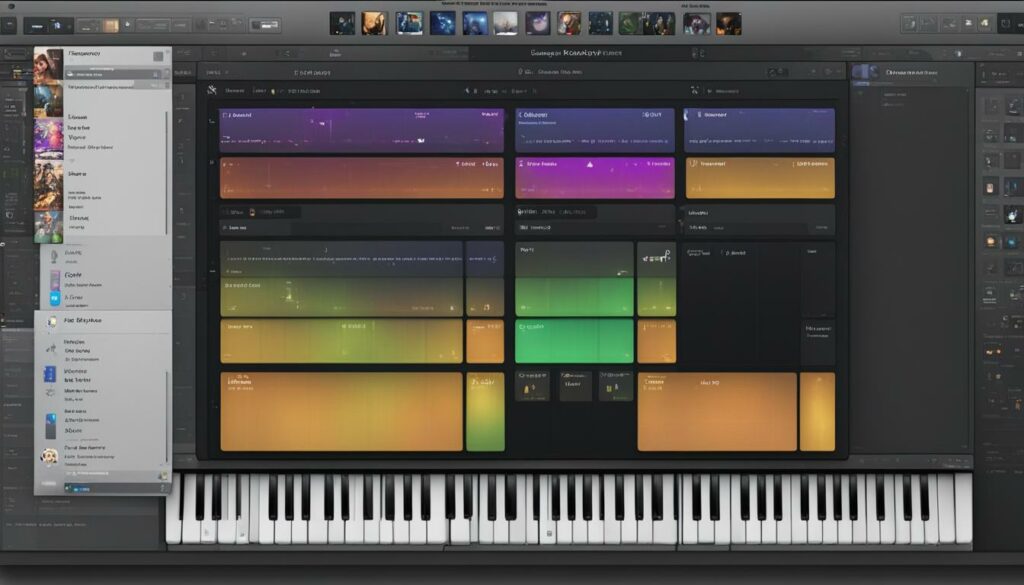
When we dive into the process of beginning a GarageBand project, we’re greeted with an interface that’s as inviting as it is functional. For music enthusiasts looking to unleash their creativity, setting up GarageBand is a straightforward affair. It all starts with the welcome sight of an easy-to-navigate home screen, where dreams of GarageBand new song creation start to take form.
Indeed, initiation into the world of music production couldn’t be more welcoming. GarageBand presents us with a clean slate—a platform from where we can start fresh with new ideas or refine and rework previous musical endeavors. It’s akin to stepping into a studio that’s been meticulously set up, awaiting our command to commence the symphony of songwriting.
We’re empowered from the outset with choices that cater to our immediate musical aspirations. Whether it be captivating melodies or compelling beats, GarageBand stands ready to assist. We’re just a tap away from selecting the Audio Recorder, designed for capturing vocals and live sounds with ease, or we could dive into the exotic array of Touch Instruments, each providing a unique palette of sonic textures.
GarageBand’s genius lies not just in its robust features but in its ability to make sophisticated music production accessible. Between the tactile engagement of touch instruments and the high-fidelity recording capabilities on offer, we find ourselves equipped with the right tools to begin our auditory adventure in earnest.
With GarageBand, our journey through music creation is one of discovery and delight. We chart a course through harmonies and rhythms, setting the stage for what could very well be the next hit song. And as we shall see, the journey is as enriching as the destination when armed with the right application and a dash of inspiration.
Navigating the Interface: A Beginner’s Guide to GarageBand
Embarking on your journey of song creation within GarageBand starts with understanding the intricacies of its digital layout. As we stride into this realm, let us explore the user-friendly environment that makes GarageBand a go-to for musicians around the world. The GarageBand user interface offers an intuitive starting point for those just beginning their musical ventures, ensuring each beloved feature is only a tap away.
Understanding the Law of the Digital Layout
GarageBand’s sophisticated digital layout is designed with you in mind, bringing a streamlined approach to music-making. It affords us the ease of accessing recent projects, organizing files, and managing recordings, all from its main interface. This simplicity is key to an efficient song creation in GarageBand, allowing you to concentrate on unleashing your creativity rather than getting bogged down by a complex setup. The intuitive My Songs browser is your command center, from which the pulse of your music emanates.
Customizing Your Workspace for Efficient Song Creation
When it comes to arranging your musical workspace, GarageBand is as adaptable as it is capable. The ability to configure your setup to fit your unique workflow is what makes GarageBand workspace customization an invaluable feature. We recognize that no two musicians are the same, and GarageBand respects this diversity by providing tools and options for personalizing your space. Whether it’s pinpointing the perfect sound loop or adjusting the on-screen mixer, the power of optimizing your GarageBand setup stands at the ready to serve your musical ambition.
Our guide is here to walk you through every twist and turn of GarageBand’s user interface. Transform your device into a haven of musical exploration as we lay down the foundations of song production together. Stick with us as we unveil the secrets to mastering GarageBand’s workspace and maximizing your creative potential. ‘Cause once you do, there’s no telling what kind of auditory masterpieces you’ll craft.
Choosing the Right Instruments for Your Song
Embarking on the GarageBand songwriting process is an exploratory journey where the selection of instruments can dramatically sculpt the sonic character of your masterpiece. As we dive into the GarageBand instrument selection, we’re confronted with an extensive array of options, each with its own textural color and emotive power.
Finding the right instruments for your song is more than a matter of personal preference—it’s about choosing the tools that align with the mood and genre of the track you envision. Are you crafting an upbeat pop tune? Perhaps the built-in synthesizers and punchy drum machines will serve as the heartbeat of your production. Or, suppose you’re painting an acoustic ballad? In that case, the rich tones of GarageBand’s grand pianos and the warm strum of its acoustic guitar samples might underpin your lyrical message.
One might liken this process to being a chef in a kitchen filled with diverse ingredients, each ready to contribute its unique flavor to the dish. Within GarageBand, every instrument holds the potential to add a distinct layer to your musical concoction. Whether it’s the resonant low end of a bass guitar that underpins the harmony or the crisp clarity of an electric guitar lead to carry your melody, the possibilities within GarageBand’s repository are virtually limitless.
But how do we know which instruments will best serve our song? It’s a blend of experimentation, knowledge of the instruments’ sonic profiles, and an ear tuned to the demands of the track. As we navigate the rich libraries of GarageBand, let’s consider not only the traditional uses of these instruments but also the innovative ways they can be repurposed to craft unique sounds. This attentiveness to both melody and harmony, rhythm and timbre, ensures that the instrumentation elevates our song, resonating with the emotions we strive to express.
Whether you’re laying down a sultry saxophone to pour emotion into the blues or using a peppy ukulele to brighten a folk tune, your instrument selection is paramount. It’s the foundation upon which your song’s identity is built, and with GarageBand, we have the power to choose wisely and craft a soundscape that’s authentically ours. By carefully selecting each instrument, we harmonize our artistic intention with the technical prowess of GarageBand, setting a strong cornerstone for the mesmerizing tapestry of our song.
Laying Down Your First Tracks: Creating a Beat
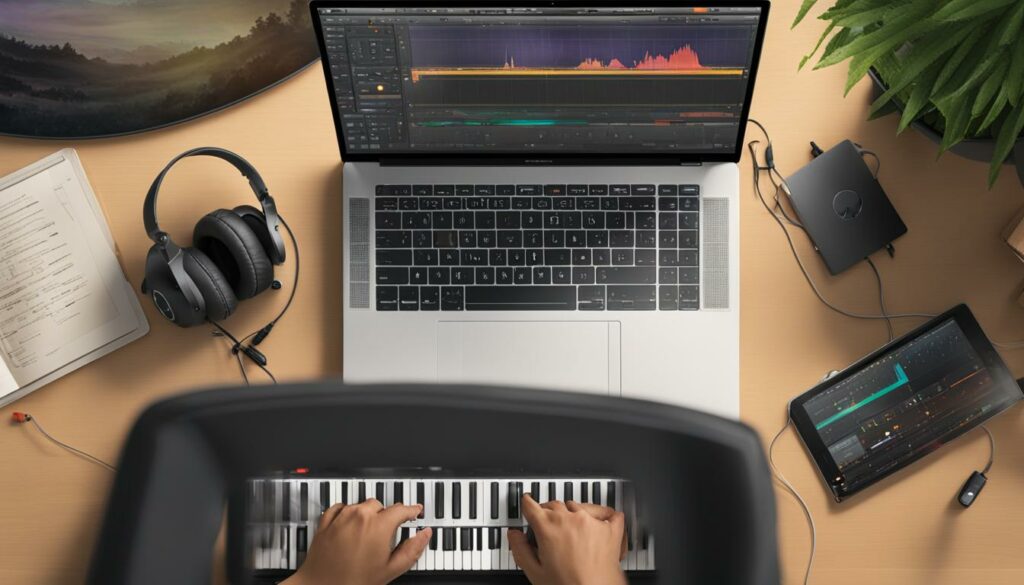
As we step into the realm of laying down tracks in GarageBand, the initial approach is often to start with a beat. This backbone of rhythm is what sets the tempo and mood for our entire track. For us who are venturing into beginner’s GarageBand beat making, simplicity meshes with capability in the form of GarageBand’s Smart Drums. By presenting an accessible interface, anyone can begin creating a beat on GarageBand with ease.
Digging into GarageBand’s toolkit, we come across a grid-based drum machine that allows us to intuitively place drum samples in sequence. These Smart Drums transform complex rhythms into simple taps and drags. Without any prior drumming experience, we find ourselves able to construct a beat that’s both complex in sound and professional in quality.
Create a rhythmic base layer by selecting from a diverse range of drum sounds and electronic beats. GarageBand’s array of options ensures we have the sounds we need to complement the style we’re envisioning. Whether our intentions lie with a soft, jazz brush or a hard-hitting electronic kick, the right tools are at our fingertips.
As we progress on our sonic journey, overlaying percussive elements becomes second nature. We learn that a well-crafted beat is not just heard, but is felt—it’s the invisible hand that guides the listener through our musical narrative. Through GarageBand’s streamlined interface, we tap, slide, and craft, bringing our rhythmic ideas to life.
Through laying down tracks in GarageBand, we begin to understand the unity of melody and rhythm. We take pride in knowing that, as beginners, our tools empower us. They distill complex musical philosophies into touchable, playable experiences. And so, the beats we lay down today are the stepping stones to the intricate productions we’ll build tomorrow.
Recording Vocals and Live Instruments on GarageBand
When we talk about recording vocals on GarageBand or engaging in live instruments tracking, we are delving into one of the most thrilling aspects of music production. We know that capturing the essence of a performance is critical, and GarageBand offers a suite of tools to make this possible for artists on any level.
Our objective is clear: we want to harness the raw emotion and energy of live sound. To do this effectively, the initial step involves setting up our microphones. A USB microphone is often preferred for its ease of use and superior sound quality over built-in device mics. We take care to connect our mics correctly, ensuring they are recognized by GarageBand. This simple yet crucial action lays the groundwork for high-quality audio captures.
Setting Up Your Mic and Managing Audio Inputs
To master managing audio inputs in GarageBand, we navigate through the app’s settings, adjusting input levels and monitoring to avoid any unwanted latency. It’s a delicate balance, one we perfect over time as we tweak GarageBand’s controls to suit the specific needs of each recording session.
The beauty of GarageBand is that it simplifies what was once a daunting process. Now, with our equipment in place and our settings configured, we’re ready to let the tape roll. As we press the record button, we’re not just capturing audio; we’re encapsulating moments of musical magic that will soon become part of our larger audio canvas.
We’ve walked through the necessary steps, and with our microphones primed and our fingers steady on GarageBand’s controls, we delve into the heart of our craft. The result? Recordings that breathe life into our compositions, filled with the clarity and depth that only well-managed live input can convey.
Editing and Arranging Your Song: GarageBand Tips and Tricks
As we delve into the heart of editing songs in GarageBand, it’s clear that a well-arranged track is critical. It’s about more than just laying down parts; it’s the intricate process of cutting, moving, and aligning pieces that truly brings a song to life. With GarageBand, we’re granted an array of powerful tools that turn these tasks into simple swipes and taps.
When we talk about arranging music tracks, the key to success is the ability to experiment freely. GarageBand’s user-centric interface facilitates this perfectly, enabling us to pull apart and piece together sections until they resonate with our creative vision. The freedom to adjust timings and tweak the performance brings a new level of precision to our work.
In our journey to craft the perfect song, GarageBand editing tips often become our compass. Learning the shortcuts for splitting and joining tracks, utilizing the copy-paste functionality, or mastering the automation features can make a world of difference. With these capabilities, there’s nothing to stop us from manipulating the project timeline to our whim.
GarageBand’s magic lies in its ability to render professional results from our explorations and experiments. Our malleability in the editing phase is pivotal—you can transpose a section, nudge it to fit the groove, or layer it with effects until it sparkles. It’s a canvas for our musical imaginations, where every adjustment serves the grander picture of our composition.
We encourage you to dive into these GarageBand editing tips with gusto. Start by picking apart our demos, understanding the bones of each track, and then applying that insight as you orchestrate your symphony. It is this fusion of technology and creativity that empowers us to realize our songs, just as we envisioned them—full-bodied, nuanced, and evocatively arranged.
Enhancing Your Song with Loops and GarageBand’s Sound Library
As we immerse ourselves in the world of music production, using loops in GarageBand allows us to enrich the texture of our songs effortlessly. These pre-made loops provide a depth that can transform a basic melody into a lush soundscape, enticing the listener’s ear with every beat and rhythm. They are an essential component in expanding our sound palette, letting us paint our sonic masterpiece with broad, colorful strokes.
Experimenting with Pre-Made Loops for Richer Textures
Imagine having at our disposal a treasure trove of musical patterns and rhythms that can instantly elevate our tracks. That’s exactly what the GarageBand sound library offers. By simply dragging a loop from the extensive collection into our project, we begin enriching the texture of our song. It doesn’t just end there; the ability to experiment with different combinations and overlay these loops ensures that each piece we create resonates with originality and vibrance.
Whether we’re building a pulsating beat for a dance track or a serene backdrop for a soulful ballad, the abundance of loops in GarageBand is nothing short of inspiring. We encourage every artist to explore, to blend, and to harness GarageBand’s instrument library, which opens the door to infinite possibilities.
Expanding Your Sound Palette with Virtual Instruments
The vast universe of virtual instruments in GarageBand stands ready to infuse our compositions with character and distinction. With an array of options that mimic real-world instruments, we find ourselves empowered to infuse our tracks with everything from the delicate timbre of strings to the raw power of synthesizers. Each virtual instrument brings its own personality, its own story, contributing to a richer, more compelling narrative within our music.
Employing these virtual instruments is akin to inviting a myriad of talented musicians into our studio, each bringing their unique voice to the mix. The ease with which we can expand our sound palette is a testament to GarageBand’s design philosophy—putting the power of a full band at our fingertips. It’s more than just making music; it’s about crafting a sonic experience that captivates, moves, and thrills.
So let us dig into this digital treasure chest, and let the myriad of sounds inspire us. From the deep grooves of a funky bassline to the celestial sweep of a digital pad, every note we conjure with GarageBand’s instruments is a step closer to realizing our musical vision. We’re not just producers; we’re alchemists, transforming simple chords and rhythms into gold.
Adding the Finishing Touches: Mixing and Mastering on GarageBand
As we approach the culmination of our creative process in GarageBand, we arrive at the pivotal stage of mixing and mastering. This critical phase is where we apply the finishing touches in music production, taking our raw song and transforming it into a polished final product.
The art of mixing involves adjusting and blending the individual tracks in our project to achieve a harmonious balance. We carefully tweak the volume levels to ensure that each instrument complements the others, rather than competing for attention. The application of audio effects like reverb, equalization, and compression further sculpts our sound, providing depth, clarity, and punch to the mix.
With our mix sitting just right, we delve into mastering, the process that gives our song its final sheen. Mastering on GarageBand serves as our last opportunity to refine the sonic profile of our track. It’s here that we scrutinize the overall levels, ensuring consistency and balance across the entire frequency spectrum.
GarageBand’s array of mastering tools comes into play, welcoming us to enhance the dynamics and polish the soundscape of our composition. We’re equipped to iron out any remaining sonic creases and to endow our track with the richness and volume it needs to stand out. Whether it’s a subtle touch to brighten the high-end or a careful boost to warm up the lows, we infuse our song with the sonic qualities that it deserves.
In our collective journey of mastering garageband song production, we’ve discovered that patience and attention to detail make all the difference. It’s in this final stretch where our song truly comes to life. So when we finally share our work with the world, we do so with the confidence that every note, every beat, and every harmony reflects our dedication to the craft of music production.
Exporting Your Song: Share Your Music with the World
After the meticulous process of mixing and mastering within GarageBand, we stand at the threshold of sharing our creative endeavors with listeners everywhere. With GarageBand’s streamlined exporting songs from GarageBand feature, our carefully crafted tunes can be converted into a variety of formats suitable for distribution across diverse platforms.
Utilizing GarageBand’s intuitive interface, we find the options for audio export are designed to simplify our transition from music creation to sharing music worldwide. Whether it’s a high-quality WAV file for fellow musicians and producers, or a more compressed format like MP3 for general listenership, the GarageBand export settings ensure that our audio is ready to make its mark on the global stage.
Our commitment to providing accessible, user-friendly insights remains unwavering as we guide you through the export process. Meticulously, we pore over the encoding options, mindful that the choices we make here serve as the final step in the creative process—a defining moment that ensures our music is received in its best light.
Moreover, GarageBand’s capability to share directly to social media not only streamlines the workflow but also amplifies our reach, connecting our music with an audience that spans the globe. It’s a powerful feeling, knowing that a song that began as a spark of inspiration in our minds can now resonate through speakers and headphones in countless corners of the world.
The satisfaction we derive from exporting our final piece is a testament to the journey we’ve embarked on—a journey of translating emotion into sound, and sharing it for the world to hear. And as we sign off on the last export, we know that the experiences we’ve gained through GarageBand will echo far beyond the last note of our songs.
Exclusive Tips for GarageBand Song Creation
Embarking on a quest for faster song production and artistic excellence in GarageBand, we’ve unearthed a trove of GarageBand efficiency tips to enhance your musical craft. By mastering GarageBand shortcuts, you gain the ability to navigate the digital audio workstation with agility, transforming your workflow and allowing creativity to take center stage. It’s about working smarter, not harder, carving out more space for that spark of inspiration that drives each composition.
Yet, complexity in music often breeds richness, making the task of combining tracks in GarageBand a crucial skill. We’ve delved into layering tracks in GarageBand, revealing the secrets to creating complex music compositions. Whether it’s blending sultry guitar licks with pulsating synths or harmonizing backing vocals, layering is the essence of a soundscape that captivates and enchants. It’s a multi-dimensional chess game, where each move enriches the sonic story being told.
Of course, no song can truly shine without the fine-tuning of its mix, and that’s where the prowess in utilizing the equalizer in GarageBand emerges as vital. With precision, we command the EQ to sculpt the frequencies, perfecting the mix and ensuring stellar audio balancing in GarageBand. It’s not merely tweaking dials; it’s the art of drawing out the soul of the music, ensuring every low-end thump and high-end shimmer contributes to the auditory journey we intend for our listeners. Through these pillars of production, we turn raw melodies and rhythms into polished anthems ready to resonate across the airwaves.
FAQ
What are the initial steps to make a song on GarageBand?
The initial steps include selecting ‘Create New’ after opening GarageBand, choosing an instrument or audio interface, and setting up a project with the desired tempo, key signature, and time signature. Begin by laying down your beat or melody as a foundation for your track.
Can beginners easily use GarageBand for creating music?
Yes, GarageBand is designed with a user-friendly interface that makes it accessible for beginners. The software offers a range of tutorials and intuitive instruments like Smart Drums to help novice users start making music right away.
What equipment do I need to make music in GarageBand?
While you can start with just a Mac or iOS device, it’s recommended to use MIDI keyboards for composing melodies and USB microphones for recording high-quality audio. Good equipment enhances the overall sound and recording quality of your songs.
How do I start a new project in GarageBand?
When you open GarageBand, select ‘New Project’ and choose the type of track you want to create, whether it’s an empty project, a specific instrument, or from a wide selection of templates.
What are some tips for navigating GarageBand’s interface?
Start by familiarizing yourself with the main sections: the Library, the Tracks area, the Smart Controls, and the Editors. Use the My Songs browser to organize and manage your projects. Customizing the toolbar and utilizing key commands can speed up your workflow.
How do I choose the right instruments for my GarageBand song?
Consider the genre and mood of the song you wish to create. Use the Sound Library to explore and audition different Software Instruments and select the ones that best match your creative vision.
What is the best way to create a beat on GarageBand?
For beginners, Smart Drums are an excellent tool to start creating a beat. Drag and drop drum sounds onto the grid and experiment with rhythm patterns. More experienced users can use the Drum Machine or record their rhythms with a MIDI controller.
How should I set up my microphone for recording on GarageBand?
Connect your USB microphone to your Mac or iOS device and select it as the input source in GarageBand’s settings. Check the levels to make sure the audio isn’t peaking, and use headphones to prevent feedback.
What are some editing tips for GarageBand?
Utilize GarageBand’s cut, copy, paste, and loop features to arrange your song. Explore the automation features to create dynamics, and don’t be afraid to trim and splice tracks to perfect your sound.
How can I enhance my song with loops and GarageBand’s sound library?
Drag loops from the Loop Browser into your project to add layers and textures. Use the Sound Library to download additional sounds and instruments to diversify your sonic palette and give your song unique character.
What are the final steps in mixing and mastering a song on GarageBand?
Adjust the levels of each track to ensure a balanced mix, use panning to create space, apply effects for depth and color, and equalize your tracks to establish clarity. Finally, use the Master Track to give your song a cohesive sound.
How do I export my finished song from GarageBand?
Once your song is complete, go to ‘Share’ in the menu and choose ‘Export Song to Disk.’ Select your preferred audio format and quality settings, name your file, and choose a save location to export your song.
Are there any shortcuts to speed up song production in GarageBand?
Yes, mastering keyboard shortcuts can drastically increase efficiency. For example, Command-C to copy, Command-V to paste, and using the Spacebar to start and stop playback are just a few shortcuts that can speed up production.
How can I achieve a more complex composition in GarageBand?
Layer multiple tracks with different instruments and vocals to add complexity to your composition. Experiment with harmonies, counter-melodies, and varied instrumentation to enrich the texture of your song.
What’s the best way to use the equalizer (EQ) in GarageBand?
Use the EQ to adjust the frequency levels of your tracks to balance the mix. Cut or boost frequencies to ensure each instrument is clearly audible and no frequency range is too dominant or too subdued.
