Embracing the transformative power of autotune can be the game-changer in your music production endeavors. As we explore GarageBand tutorials aimed at refining the art of pitch perfection, it becomes evident that the GarageBand autotune effect is more than just a trend—it’s a necessary tool for modern producers. Understanding how to autotune in GarageBand opens up a world where every vocal line can be crafted to near-perfection, without detracting from the emotive essence that gives music its resonance.
In the journey of vocal tuning in GarageBand, we uncover the subtleties of pitch correction in GarageBand, where the differentiation between a botched note and a harmonious one is meticulously fine-tuned to achieve the desired sound. Whether you’re polishing a home recording or adding that signature autotune flair to your track, GarageBand provides an accessible platform to make your vocals shine with clarity and precision.
Understanding Autotune’s Role in Music Production
In our exploration of music production essentials, we quickly find that autotune has become a cornerstone in crafting contemporary music. From hip hop to pop and even the subtle layers in indie productions, autotune’s versatility has carved out a niche in numerous genres. No longer seen as solely the harbinger of the iconic T-Pain effect, it now serves as the engineer’s scalpel, meticulously sculpting pitch to align with a song’s harmonic blueprint.
Let’s set the record straight—employing autotune is not about disguising a lack of talent but rather about ensuring pitch perfection. It’s akin to a photographer refining a picture in post-production; we use autotune to enhance and perfect the vocal take. In music production, just as sharpness and contrast are to images, pitch and tone are to vocals. Autotune provides us the means to ensure every note fits perfectly in the auditory image we’re composing.
For those of us who are new to autotune, GarageBand presents a user-friendly gateway. With its built-in pitch correction feature, we can dip our toes into the waters of vocal tuning without apprehension. This introductory tool reveals how even the slightest adjustment can elevate a vocal line from questionable to captivating.
Autotune’s role in different genres is multifaceted. In some cases, it’s applied with transparency, its presence almost imperceptible to the untrained ear. In other genres, autotune becomes an instrument in its own right—a bold statement that defines the sonic landscape of a track. But at its core, whether flagrant or discreet in its application, autotune in music production is about fulfilling the artist’s vision for their sound.
The more we delve into autotune tutorials and practice its application, the more proficient we become in using this tool to our advantage. Like any instrument, autotune demands respect and understanding to be used effectively. With time and tuning, we learn to create with intention, using autotune not as a crutch, but as an extension of our creative expression in the digital music era.
Introducing Pitch Correction in GarageBand
As we immerse ourselves in the nuances of music production, we recognize the significance of pitch correction in GarageBand—an indispensable feature for refining vocal performances. Whether you’re a budding artist or an established producer, understanding the mechanics of vocal tuning in GarageBand is crucial for delivering pristine vocals that resonate with your audience.
To initiate the process, simply access the pitch correction controls in GarageBand by pressing ‘E’ on your keyboard or clicking the scissors icon. This action reveals a suite of autotune settings within the Track Editor, a realm where the tuning of your vocal tracks can be meticulously adjusted. Here, you’re presented with a slider that adjusts the intensity of the correction from subtle to pronounced, allowing you to tailor the vocals to the song’s emotional context and genre.
As we contemplate the proper autotune settings in GarageBand, it’s imperative to note that the goal is to enhance the natural qualities of the vocal recording. Striking a balance between the artistic intention and the production standards can be achieved by fine-tuning the pitch correction slider. With careful listening and a discerning ear, you can sculpt the autotune effect to either gently guide the vocals back on track or boldly shift them for a stylized finish.
Granted, the realm of pitch correction in GarageBand may seem daunting at first glance. However, once you embrace the capabilities of this powerful tool, you’ll find yourself wielding the ability to transform raw, unpolished vocal takes into harmonious elements that elevate your music. As we continue on our journey of music production, remember that autotune is not merely a corrective measure but an artistic one, offering us the opportunity to venture beyond the confines of natural vocal limitations.
Setting Up Your Autotune Plugin for GarageBand
When we embark on enhancing our music production with GarageBand, the addition of an autotune plugin can drastically improve the quality of our vocal tracks. Not only does it polish the vocals, but it also affords us greater creative freedom. In this section, we’re going to walk through the steps of adding plugins in GarageBand, specifically focusing on the industry-standard Antares Autotune.
First, ensure that you’ve located the plugin section within GarageBand. This is where you’ll have the ability to add new dimensions to your music. If you’re at the beginning of your journey with GarageBand, you might not be fully familiar with the procedure for adding plugins in GarageBand. However, don’t let this deter you. The process is surprisingly straightforward.
To add an autotune plugin, like Antares Autotune, you’ll want to navigate to the ‘Smart Controls’ area. Here, you’ll find the option to manage your plugins. Position your cursor just below the current plugins list, click to reveal your options, and select ‘Audio Units’ followed by ‘Antares’ from the dropdown menu. Once selected, Antares Autotune will integrate seamlessly into your GarageBand workspace.
Antares Autotune is renowned for its capacity to give vocals that finely polished edge. It’s not just about correcting off-key notes; it’s about refining the overall performance. Within the Antares plugin, ensure you’ve selected the correct key for your track. This is critical for effective autotuning, as it aligns the pitch correction with the harmonic structure of your piece.
One of the standout features of plugins like Antares Autotune is their additional controls—’humanize’ being a notable one. This setting allows us to dial back the robotic effect autotune can sometimes impose, giving a more natural feel to the vocals. Moreover, the tuning speed control lets us decide how swiftly the autotune responds to pitch deviations. These controls are paramount in tailoring the autotune effect to suit the style and emotional tone of the track.
We invite you to take the time to experiment with the different settings within your autotune plugin for GarageBand. Adjust the humanize feature, fine-tune the speed, and play around with the intensity. It’s through this hands-on approach that we can truly understand the plugin’s potential and how it can serve our music production purposes.
Remember, the possibilities are vast, and the creative control is in your hands. Whether you’re seeking subtle pitch correction or aiming for a more pronounced effect, GarageBand, paired with a premium autotune plugin, offers an accessible path to achieving professional-grade vocals that stand out in the mix.
Fine-Tuning: Adjusting Autotune Intensity and Parameters
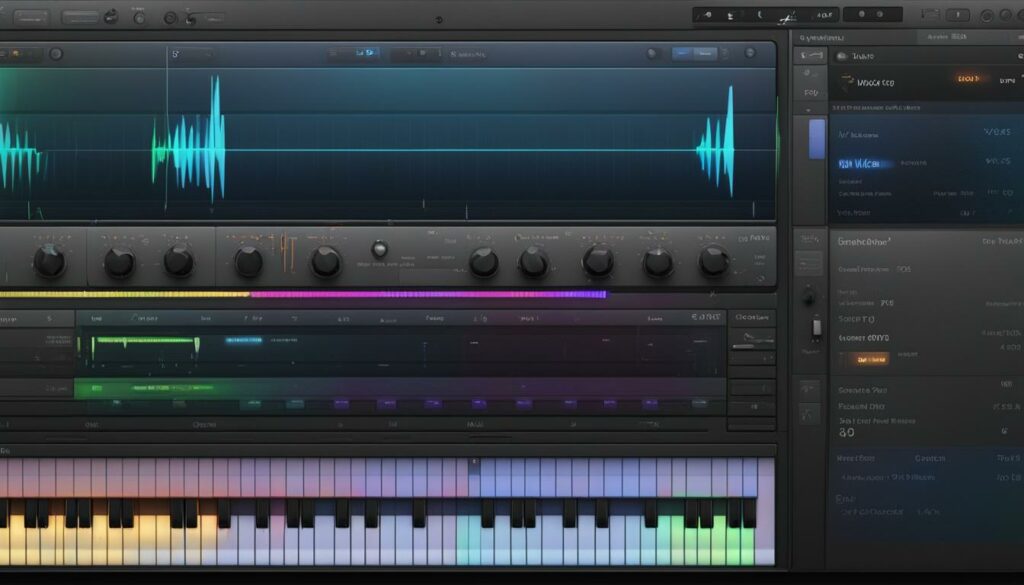
Our grasp of music production elevates as we comprehend the intricacies that come with adjusting autotune intensity and parameters. The art of vocal tuning within GarageBand is about striking the perfect chord between transparent pitch correction and an unmistakable autotuned sound. Mastering this skill hinges on our ability to manipulate the features such as tuning speed control and the option to humanize autotune.
Let’s delve into the mechanisms that allow us to fine-tune these autotune parameters. The ‘Limit to Key’ feature plays a pivotal role in ensuring any adjustments made are in harmony with our song’s scale, preventing any discordant mishaps. By tweaking the intensity, we can decide how subtly or aggressively we want the pitch correction to interact with our vocals. This control can vary significantly, from a gradual, almost imperceptible tuning ideal for ballads, to a swift and salient correction more commonly heard in pop or hip-hop tracks.
Understanding how to nuance the autotune intensity is akin to an artist knowing just how much pressure to apply to a paintbrush. A delicate touch can yield a masterpiece, whereas too heavy a hand can mar the canvas. Similarly, the tuning speed control allows us to dictate how quickly the autotune effects take hold, offering a range from the rapid, robotic cadences of contemporary urban music to the more natural warbles of acoustic genres.
Moreover, when we select the ‘humanize autotune’ feature, we add a layer of authenticity to the vocals. This ingenious parameter lessens the mechanical feel autotune can sometimes create, blending the tuned vocals seamlessly into the organic fabric of the song. It’s essential for keeping the soul of the music intact while still benefiting from the precision of modern production techniques.
As we harness these tools within GarageBand, our music transforms. The voice becomes an instrument that we can shape and mold with precision, without losing the essence of human touch thanks to our ability not just to correct, but also to humanize. With this knowledge, we invite you to experiment and embrace the full potential of autotune, using it not simply as a corrective tool but as a means to enhance and enrich your musical endeavors.
The Importance of Recording Quality Vocals Before Autotuning
As we delve deeper into the realm of music production, it is pivotal for us to acknowledge that the foundation of effective autotune hinges upon the **recording quality vocals**. It’s often thought that autotune can salvage any vocal, but in reality, it’s the clarity and expression of a pre-autotune **recording** that sets the stage for the most impactful **vocal performance**. So, let’s explore the critical elements that contribute to a superior vocal take, well before autotune is ever employed.
Key Factors Affecting Vocal Takes
Several key factors lay the groundwork for a compelling vocal track. The prowess of the vocalist is, of course, paramount—their ability to project, enunciate and express emotion with precision is the bedrock of any great **recording**. But equally essential is the **recording environment**; an acoustically treated space can prevent unwanted echoes and reverbs that might muddy the clarity of a vocal take. And let’s not forget the **microphone quality**; a high-grade microphone can capture the full spectrum of the voice, ensuring that the finest details of the performance are preserved.
How to Capture the Best Vocal Performance
When it comes to capturing that spellbinding vocal performance, preparation is non-negotiable. We encourage artists to immerse themselves in their material, rehearsing until each note is second nature. Our **GarageBand recording setup** needs to be primed to perfection—a quality microphone positioned just right, phantom power engaged if necessary, and pop filters in place to arrest any plosive sounds that might compromise the recording.
Equally, artists should feel comfortable and focused in the **recording environment**. This is where the magic happens, where the alchemy of vocal prowess and technical precision comes together. Ensuring that the space is conducive to performance, free from distractions and ambient noise, can make a world of difference. After all, we’re not merely aiming to capture sound; we’re striving to bottle lightning.
In our pursuit of **recording quality vocals**, we must always remember that the human voice is an instrument like any other—it requires the same level of diligence and attention to detail in its recording. A meticulously captured vocal is one that can be shaped by autotune to stunning effect, lending itself to both subtle enhancements and radical transformations. It’s our duty, then, to ensure that our pre-autotune **recording** is the best it can possibly be, serving as a robust foundation for the artistry of pitch correction.
Subtle vs. Noticeable: Finding the Right Autotune Balance
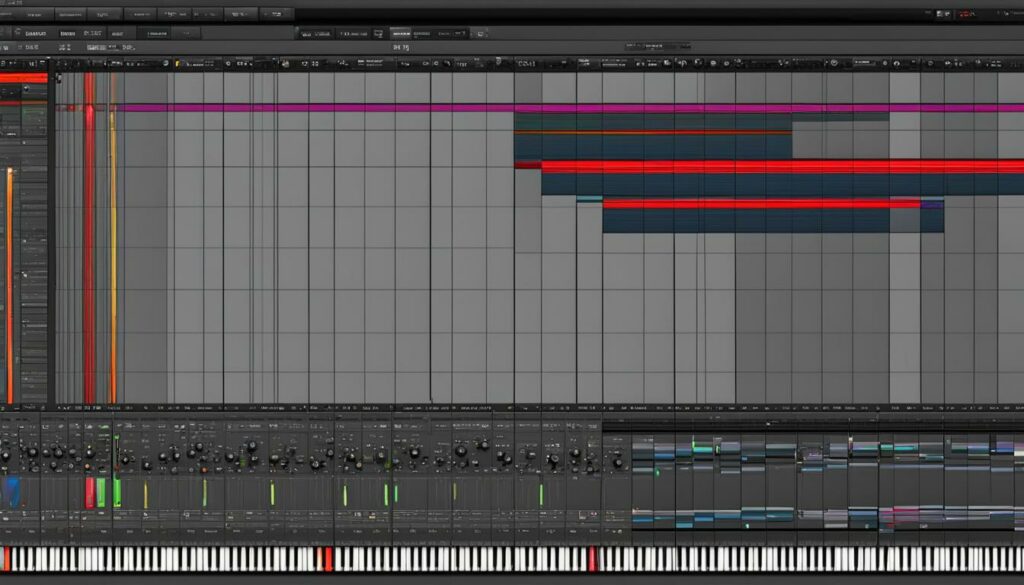
In the diverse world of music production, the distinction between subtle autotune and a noticeable autotune effect is often a hot topic among artists and producers. Our exploration into the realm of vocal tuning compels us to strike a delicate balance that not only respects the genre’s demands but also upholds the integrity of the vocal performance.
The journey to find that perfect vocal tuning balance starts with acknowledging the artistic direction of each track. If the goal is authenticity and the conveyance of raw emotion, then subtle autotune should be our aim. This approach gently corrects pitch deviations in a way that’s nearly undetectable, maintaining the natural inflections and nuances of the voice.
On the other end of the spectrum, a noticeable autotune effect might be embraced intentionally to imprint a song with a modern, stylistic signature. Here, the autotune becomes a focal element of the track, coloring the vocals with a robotic charm that’s popular in genres like pop, trap, and hip-hop.
Our task as producers is to listen intently during the mixing process and adjust the level of correction as needed. Sometimes, the most subtle autotune adjustment can make all the difference to a vocal line, ensuring it seamlessly interweaves with the instrumental backdrop. Conversely, cranking up the autotune can inject a song with the kind of punchy, distinct vocal character that hooks listeners. We ought to trust our ears and let the music guide the way to autotune usage that complements the project’s creative vision.
Whether it’s through trial and refinement or immediate recognition of the ideal setting, discovering the vocal tuning balance is an art form. It is our profound understanding of this craft that enables us to bend the pitches to our will, achieving a potent mix in which every note sits precisely where it belongs, creating a cohesive and resonant auditory experience for the listener.
Exploring Paid Autotune Plugins vs. GarageBand’s Native Feature
When we delve into the realm of music production, our experience teaches us that vocal precision can elevate a track from good to great. This is where autotune plugins come into play. GarageBand serves as an excellent starting point for many of us, thanks to its built-in pitch correction. However, for those looking to push the boundaries of vocal manipulation, third-party autotune software offers a more robust solution. Let’s take a closer look at professional autotune plugins and weigh the pros and cons of paid plugins against GarageBand’s native feature.
The Pros and Cons of Third-Party Autotune Software
Third-party autotune software like Antares AutoTune has become synonymous with professional-grade vocal processing, reputed for its precision and versatility. The benefits of such software are clear: unparalleled control over vocal tuning, the ability to manipulate individual notes, and enhanced vocal effects like formant shifting. Consequently, third-party plugins can yield results that are more refined and congruent with the artist’s vision. Furthermore, these plugins often provide a cleaner and more natural autotune experience.
On the flip side, investing in third-party autotune software presents some challenges. The cost is a significant consideration, as professional autotune plugins are a sizeable investment compared to the free inclusion of pitch correction tools in GarageBand. Moreover, the learning curve associated with such high-end tools must not be overlooked; these plugins require time and expertise to navigate effectively.
Nevertheless, for those of us aiming for top-notch production quality, professional plugins are an investment that can decipher between an amateur and a polished sound.
Why Invest in Paid Autotune Plugins?
The decision to invest in autotune plugins goes beyond the glamour of owning professional-grade tools. It’s an acknowledgment that we are serious about our craft and committed to achieving the best possible sound. The advantages of plugins like Antares Autotune are not just in the quality of vocal processing, but also in the array of creative opportunities they unlock. They offer nuanced features such as formant control, note-specific tuning, and flexible retune speeds—which can revamp the dynamism of any vocal performance.
Furthermore, for us who are already well-versed in music production, these plugins integrate seamlessly with our existing workflow, enhancing our efficiency and expanding our toolkit. Therefore, the benefits of Antares Autotune and other similar professional autotune plugins often justify the investment, propelling our productions into a sphere of professional authenticity that resonates with both the aficionado and the everyday listener.
Summarily, as we continue to explore and invest in our musical endeavors, the choice between enhancing our capabilities with third-party autotune software or sticking with GarageBand’s native offering is a pivotal one. Ultimately, it’s the pursuit of sonic excellence and the intent to craft vocals that truly connect with our audience that guides our decision.
Step-by-Step Guide to Using Autotune on Your Tracks in GarageBand
When we seek to enhance our tracks within GarageBand, the use of autotune can often be the bridge between a good take and a great one. Here, we’ll provide a step-by-step autotune tutorial tailored for GarageBand track editing, ensuring your vocals are not just good, but pitch perfect. This tutorial is designed to guide you through the process to autotune vocals in GarageBand, allowing you to elevate your music production with professional finesse.
Finding the Key of Your Track: To start, we must establish the musical key of the track. Knowing the key allows us to properly configure the autotune settings so that any pitch correction aligns harmoniously with your music. This step is imperative, as an incorrect key could lead to unintended pitch changes that detract from the song’s quality.
Recording Quality Vocals: The next step involves laying down the vocal track. This is where performance is king; even the most sophisticated autotune cannot fully compensate for a poorly sung line. We always strive for the best possible performance to ensure that autotune acts as a complement rather than a substitute.
Adjusting Project’s Key: Aligning the project’s key with that of your vocal recording ensures consonance. In GarageBand, this is effortlessly completed within the song’s settings, syncing the autotune to the desired scale and correcting vocals to the right pitches.
Navigating the Track Editor for Autotune: GarageBand simplifies pitch correction through its Track Editor, accessed by selecting the track and clicking the Track Edit button—a notation resembling scissors. Within this space lies the pitch correction slider which enables us to fine-tune the vocal take, moderated by the visually intuitive parameter controls.
Using ‘Limit to Key’ and Pitch Correction Slider: The “Limit to Key” function is our safeguard, constraining the corrected pitches within the established track key, while the pitch correction slider dictates the intensity of the autotune effect. Together, these tools give us the flexibility to apply autotune subtly for natural-sounding vocals, or to adjust for a stylized, more noticeable autotune effect depending on the song’s genre and our artistic vision.
Embracing the power of GarageBand’s built-in pitch correction features allows us to polish our vocals meticulously. By following these steps, the difference in the quality and impact of your music can be substantial. Autotuning is an art form, and with the right approach, we can transform a good vocal performance into a flawless harmonic contribution to any track.
Listening in Context: The Key to Effective Vocal Tuning
As we navigate the intricate process of mixing vocals, one principle remains clear—effective vocal tuning is best assessed when we’re listening in context. It’s tempting to focus solely on the vocal track when applying autotune, striving to attain that impeccable pitch in isolation. However, this approach can lead us to false conclusions about the abundance or scarcity of tuning needed. When we step back and listen to the vocals within the full mix, alongside drums, guitars, keyboards, and other elements, our perception shifts, often revealing that what we might have considered excessive autotune is, in fact, the ideal level for the track.
The temptation to tweak vocals to perfection in a silo undermines the very essence of mixing—that is to blend all elements of a song into a harmonious whole. It’s not about how the vocals stand alone, but how they sit within the broader soundscape. When we engage in mixing vocals, there’s a delicate balance to maintain between clarity, pitch accuracy, and the natural dynamics of the performance. Over-autotuning can strip away the emotion and rawness that gives music its human touch, whereas under-tuning might leave the vocals feeling disconnected from the polished instrumentation.
Therefore, our strategy encompasses a holistic approach to vocal tuning. As we refine our craft, we learn the art of stepping back and assessing our work not as isolated fragments, but as a cohesive, unified song. With every adjustment, we must continuously ask ourselves how it contributes to the overall emotional impact of the track. Does it enhance the narrative we’re conveying through our music? Does it uphold the integrity of the performance? Only through listening in context can we make informed decisions that serve the song and, ultimately, the listener.
Moreover, our mixing environment plays a crucial role in this process. The acoustics of our studio, the quality of our monitors, and our ability to discern subtleties in sound, all contribute to our capacity to tune vocals effectively. A well-treated space allows for a more accurate representation of how the vocals and instruments interact, leading to more confident and efficient decisions when it comes to vocal tuning.
In sum, while the allure of soloed tracks can be strong, we must resist the temptation and instead practice the discipline of listening in context. It is within the full mix that we discover the true character of our autotune adjustments. By valuing the totality of the musical experience over isolated perfection, we guide our tracks toward the excellence our listeners expect and deserve. And so, we diligently mix, tune, and listen—always in the service of the song.
Wrapping Up: Final Thoughts on Autotune in GarageBand
In summarizing our journey through the versatile world of autotune within GarageBand music production, we’ve scrutinized the mechanisms that guide our approach to achieving professional vocals in GarageBand. From the nuanced manipulation of built-in pitch correction to the strategic employment of third-party plugins, our exploration has equipped us with insights and skills vital for the contemporary producer. Autotune, when deployed with a discerning ear and a clear vision for the music’s narrative, is a formidable tool in our sonic arsenal.
At the core of our final thoughts on autotune is the philosophy that the technology is neither a shortcut nor a mask for lack of talent. Rather, it’s an enhancement, a means to polish and refine what is already there—a commitment to sonic excellence. Within the scope of GarageBand, the line between a raw vocal take and a polished, radio-ready performance narrows, bridging gaps for artists across experience levels.
The key takeaway as we close this chapter is understanding that, whether it’s through GarageBand’s native features or advanced third-party offerings, our end goal is to serve the song. A well-tuned vocal can elevate an entire piece, and it is our responsibility—our privilege—to harness this technology responsibly and creatively. By balancing the technical aspects of autotune with our artistic intuition, we ensure that the vocals we produce resonate authenticity and impact, ultimately defining the success of our GarageBand music production endeavors.
FAQ
How do I autotune vocals in GarageBand?
To autotune vocals in GarageBand, first open the track you wish to tune. Use ‘B’ to open the Smart Controls, navigate to the ‘Pitch’ section and adjust the ‘Pitch Correction’ slider to your preferred level. For precise tuning, ensure you select the correct key for your track.
Can I achieve the T-Pain effect using GarageBand’s pitch correction?
Yes, by setting the pitch correction slider to 100, you’ll get a very pronounced, robotic autotune effect, similar to the famed T-Pain sound. Be mindful that this setting works best when the vocal track is in the correct key of the song.
Are there any third-party autotune plugins compatible with GarageBand?
Certainly, GarageBand supports a variety of third-party plugins, such as Antares Autotune. To use one, simply add it through the Audio Units section in GarageBand’s plugin settings.
What does the ‘Limit to Key’ function do in GarageBand’s pitch correction?
The ‘Limit to Key’ function ensures that any pitch correction applied to the vocals only adjusts notes within the specified key of your track, helping to preserve musicality and avoid out-of-key adjustments.
How important is the initial vocal recording quality when using autotune?
It’s very important. A clean, well-recorded vocal take provides the best starting point for autotune. This leads to more natural sounding pitch correction, as the tool doesn’t have to compensate for poor recording quality.
Should autotune be used subtly or can it be more noticeable?
This depends on the artistic vision and the song’s genre. Subtle use is beneficial for natural pitch correction, while a more noticeable effect may be used for stylistic purposes. Finding the right balance is key.
How do I add a third-party autotune plugin to my GarageBand project?
After installing the third-party plugin on your computer, open your GarageBand project, create a new audio track or click on an existing one, open the plugins section in the Smart Controls, and then select the installed autotune plugin from the Audio Units menu.
What are the benefits of using a paid autotune plugin over GarageBand’s native feature?
Paid autotune plugins often offer more advanced features such as note-by-note tuning, formant control, and different retune speeds, providing greater control over the tuning process and achieving a potentially more transparent and high-quality effect.
How can I ensure I’m using autotune effectively in GarageBand?
Listen to your autotuned vocals in the context of the full mix, as isolated vocals can be misleading. Adjust the settings incrementally during mixing to find the right balance that complements your track.
Is GarageBand sufficient for professional vocal tuning, or should I invest in additional software?
GarageBand’s pitch correction can produce good results and may be enough for casual or semi-professional work. However, advanced producers may find investing in professional autotune software beneficial for achieving the highest quality and having the most control over their vocal tuning.
