For musicians eager to utilize the full potential of their electric guitars, we’re showcasing an essential GarageBand tutorial. Mastering how to connect guitar to GarageBand unlocks a new realm of musical possibilities. We understand the synergy required between your instrument and your Mac, addressing the complexities of connecting electric guitar to Mac for a seamless creative flow.
Our GarageBand guitar setup guide dives into the specifics you’ll need to get your strings strumming through your speakers. Whether you’re recording your first riff or laying down a multi-track masterpiece, using guitar with GarageBand simplifies the intricate recording process. Join us as we demystify the technicalities, giving you the clarity to focus purely on your artistry.
Gearing Up for GarageBand: Essential Equipment for Guitar Connectivity
Embarking on your musical journey with a guitar to GarageBand setup requires the right hardware to seamlessly bridge your guitar and computer. In our collective pursuit to craft the ultimate digital sound, one must be equipped with essential guitar recording equipment. To ensure that your six-stringed ideas are captured with clarity and ease, we delve into the instruments of connectivity that serve as the crucial link in the recording chain.
The cornerstone of any GarageBand guitar interface setup is the audio interface—an indispensable tool in your arsenal. This device acts as the mediator between your guitar’s analog signals and the digital pathways of your Mac. Simply single them out by plugging the interface into either your computer’s USB or FireWire port. Then, proceed to connect your guitar using a durable 1/4-inch instrument cable. Ensuring an unbroken chain, your audio interface must be recognized by macOS and, if necessary, furnished with the latest drivers.
For those who prefer a more direct approach, the guitar input for GarageBand can also be established through an adapter cable, plugging directly into your Mac’s audio input port. Navigate to your track’s input source and opt for the ‘Built-in Input’ to establish this direct line of communication. This simplicity, however, comes at the price of potential signal reduction, remedied only by the inclusion of a preamplifier to boost your guitar’s voice.
Having completed the physical connections, the ballad of digital setup begins. This is where the configurable preferences take center stage, harmonizing GarageBand connectivity gear with your unique sound. Regardless of your chosen route—whether via bustling interface or modest adapter—our collective aim is to maintain fidelity while trimming away the noise, allowing you to record with confidence.
Now that we’ve tuned our equipment to the digital wavelengths, let us progress to the orchestration within GarageBand itself. As we continue, grasp the adjustments and settings that will render your strums into strokes of musical genius in the digital canvas of GarageBand.
Understanding GarageBand: Navigating the Interface for Guitarists
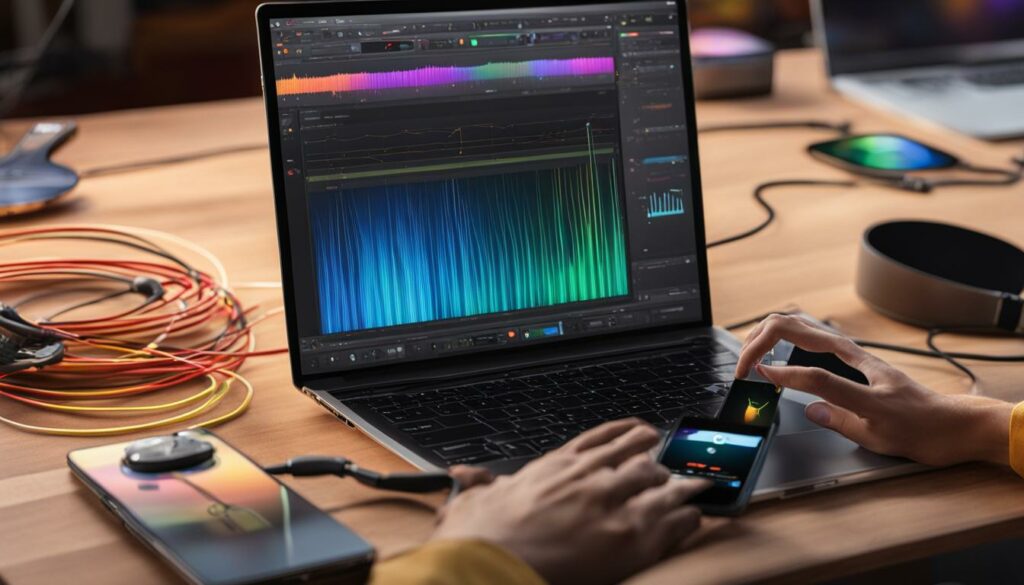
Embarking on the journey of recording guitar in GarageBand begins with effectively navigating the GarageBand interface. This interface provides an intuitive experience specifically tailored for guitarists, offering an array of smart controls and recording settings to harness your creativity. By selecting an audio track, we usher in the first note of this digital symphony, setting the stage for the dynamic range of our guitar’s voice to resonate through the virtual realm of GarageBand.
As we delve into the GarageBand setup guide for guitarists, we encounter the Smart Controls pane—a gateway to finessing our sound with surgical precision. Here, we discern the heart of our setup: the input source. Do we opt for the built-in input, straightforward and ready at a moment’s notice, or do we embark on a quest for higher fidelity with an audio interface? The choice in our hands shapes the future tonality of the tracks we’re about to unfold.
The multifaceted GarageBand interface for guitarists offers not just configurability but the indispensable feature of monitoring. Activating this feature is akin to holding a mirror to our music, allowing us to hear the live guitar play in tandem with other tracks. It aids in our synchronization efforts, bridging the gap between isolated riffs and cohesive compositions. When silence beckons, a single click restores tranquility within GarageBand, as monitoring can be just as swiftly turned off to curb the nascent echoes of feedback.
For those of us sculpting soundscapes, it’s recommended to don headphones. A sanctuary away from the potential perils of feedback that speakers might invite, headphones serve as the conduit for clarity. Together with GarageBand, they build an enclave where every nuance of our playing is captured and reflected with fidelity. As we press onwards, harnessing the richness and adaptability of GarageBand’s environment becomes second nature in our quest to create the ultimate guitar tracks.
Thus, our pathway through the realms of creating guitar tracks in GarageBand is marked by an understanding of its interface, the embodiment of our musical vision. Every adjustment within the Smart Controls pane translates our artistry into the digital domain, ensuring that what began as a stringed serenade ascends into the annals of auditory excellence.
Connecting Your Electric Guitar to Mac: The Basics

As we embark on the journey of connecting an electric guitar to a Mac, it is paramount to select an audio interface that melds with macOS. The nexus of GarageBand guitar connection is achieved through this intricate interplay. The audio interface, a hub of electric guitar connectivity, should snugly fit into your Mac’s USB or FireWire port, establishing a conduit for the guitar’s rich tones. After you’ve secured the interface to your Mac, the next step is to introduce your guitar into this musical equation through the medium of a reliable instrument cable.
For those of us fixated on quality, choosing the right audio interface for GarageBand is akin to selecting the perfect brush for a canvass; it shapes the texture of our sonic masterpiece. We conduct careful research, ensuring the interface’s compatibility with macOS and Core Audio standards. Before a note is even played, driver installations and updates are diligently pursued, granting us a symphony free from technological hindrances.
Choosing the Right Audio Interface
Our pursuit of the optimal guitar recording interface unveils myriad options, yet we are guided in our decision by steadfast benchmarks. We look for versatility, durability, and above all, audio fidelity. The interface, often lauded as the heart of modern recording, must seamlessly communicate with GarageBand, rendering our guitar riffs in sublime detail.
An integral facet of our audio interface setup for guitar is ensuring that the formats are aligned—the interface’s decision between the raw authenticity of mono or the immersive depth of stereo stands paramount. In this digital dance, our interface is our partner, propelling our musical vision into the realm of tangibility.
Setting Up Your Guitar and Interface with GarageBand
Navigating the vibrant ecosystem of GarageBand, we solidify our foothold by fixing our guitar to the desired audio track, selecting it with precision and intent. It’s within the Smart Controls pane that the magic unfurls, as we meticulously adjust the input source to accommodate our guitar’s tonal spectrum, whether it’s harvested from the built-in input or the virtual essence of a USB microphone.
The true equilibrium in our guitar to GarageBand setup lies in mastering the recording level slider, which lets us dial in the quintessential input volume. Herein, should the slider dim, our gaze turns to the interface’s own auditory command—adjusting the input volume directly. Striking a chord, we activate monitoring with a mere click, igniting the orange flame that signifies our real-time sonic reflection.
Entrusted with these foundations, recording electric guitar on Mac becomes a symphonic reality. With the intricacies of connection and configurations behind us, we are unburdened, free to envisage our next masterpiece nestled within the harmonious womb of GarageBand’s creative studio.
Optimizing GarageBand Settings for Guitar Recording
For those of us seeking to capture the essence of our guitar performances, optimizing GarageBand settings is the cornerstone to high-quality recordings. Venturing into the realm of GarageBand guitar recording optimization means beginning with the fundamental step of setting your input source correctly—whether it’s the built-in input for those plugging directly into their Mac, or through a USB or audio interface which may require specific selection within GarageBand’s preferences.
With the guitar properly connected, we turn our attention to the art of adjusting the guitar recording settings. A crucial component for preventing clipping and ensuring a crystal-clear signal is maneuvering the recording level. This is the dial that calibrates the input volume, ensuring that the soul of our guitar is captured, not marred by distortion or noise.
When configuring GarageBand for guitar, discerning the correct input format becomes our next stop. Are we ingraining a monophonic melody that thrives in mono, or strumming a chord that demands the spaciousness of a stereo track? This choice supports the integrity of our guitar’s story as it unfolds within the recording.
Achieving the GarageBand settings for best sound is more than just about volume levels and formats; it involves engagement with the monitoring function. Monitoring allows us to hear our guitar in real-time, preventing the temporal dissonance between strum and sound that can jostle the smooth sailing of our creative process. It sanctifies the relationship between the individual notes and the growing composition, guaranteeing that each string’s vibration finds its rightful place in the mix.
Yet, to truly dwell in an optimization sanctuary, we must become disciples of precaution against feedback—an unruly beast best tamed by the use of headphones. This singular shift from speakers to headphones can transform a cacophonous feedback loop into an intimate concert in our ears, where every subtlety of our performance is evoked with pristine clarity.
We share these nuances of optimizing GarageBand settings with a fervent hope that your guitar recordings will not only capture, but elevate each musical phrase you conjure. It is through these thoughtful adjustments and alignments that we empower you to craft a soundscape that is as rich and authentic as the music that pulses through your fingertips.
Guitar Setup for GarageBand: Getting the Perfect Sound

For passionate musicians aiming to produce professional-sounding tracks within GarageBand, guitar setup for GarageBand is pivotal. Our guide walks you through input level adjustments and the creative use of amps and effects to craft your ideal guitar sound. As we prioritize achieving clarity in guitar recordings, our insights direct you toward the best practices for a pristine audio capture which is the essence of GarageBand clarity optimization.
Adjusting Input Levels for Clarity
When recording guitar in GarageBand, the clarity of your tracks hinges heavily on the mastery of adjusting input levels in GarageBand. The recording level slider within the Smart Controls pane stands as your toolkit for finetuning the input volume. This level of control over your sound ensures that each string pluck resonates with precision and that the warmth of your chords is captured faithfully. If the slider isn’t available, look to your hardware for volume control, adapting it to the heart of your recordings.
A crucial factor in input level adjustments is real-time sound monitoring. By switching on the monitoring function, you infuse cohesion into your project, enabling the guitar to blend harmoniously with existing tracks. We encourage the use of headphones—a simple yet effective change that rules out the nuisances of feedback, giving you an intimate connection with the music.
Exploring Amps and Effects in GarageBand
Diving into GarageBand amps and effects opens up a trove of sonic possibilities, unleashing the true potential of your electric guitar. Whether you are using amps in GarageBand or applying guitar effects in GarageBand, the diversity offered by the Amp Designer tool and various modeled effects is sheer exhilaration for any guitarist.
The process of exploring GarageBand’s amp designer familiarizes you with a spectrum of sounds, ranging from crystal-clean twangs to the crunchiest, face-melting lead tones. Alongside this, the array of reverb, delay, chorus, and other effects contribute to customizing guitar sound in GarageBand to match the tune in your head. Through experimentation with different selections, you not only refine your recordings but also define your artistic signature.
We’ve outlined these steps in our guitar setup for GarageBand to empower you to seize the perfect sound. By tinkering with the input levels and toying with the plethora of amps and effects, you can shape your guitar’s digital voice into something that’s uniquely yours, while ensuring exquisite clarity and studio-quality texture in your recordings.
Activating Monitoring: Hear Yourself Play in Real-Time
When we set out to record guitar in GarageBand, hearing ourselves as we play is crucial. This is where activating monitoring in GarageBand becomes an essential step in our recording workflow. Monitoring is the process that allows for real-time guitar playback, creating an immersive experience as we lay down our tracks.
To start hearing guitar while recording, we engage the monitoring feature, which is easily accessible within the recording settings. A simple click on the monitoring button—an icon that illuminates orange when activated—serves as our gateway to auditory feedback. This facet of GarageBand live monitoring ensures that we’re not just playing in the dark; we become part of the band, integrated seamlessly into the mix. It’s akin to playing live, where every strum, every note, every dynamic expression is heard in concert with the rest of our project’s elements.
As with any power, there’s a responsibility to wield the monitor control in GarageBand wisely. It’s advisable to disengage monitoring when it’s not in use to prevent any unwanted feedback from disrupting our creative flow. Moreover, opting for headphones over speakers enhances the monitoring experience significantly. Headphones encapsulate us in the details of our playing, shielding our ears from external noise and eliminating those pesky feedback loops that can occur when microphones and speakers conspire against us.
We share this insight so that our fellow musicians can appreciate the simplicity yet proficiency that GarageBand provides for recording aspiring guitar tracks. Empower your sessions with real-time feedback; ignite your musical fervor by hearing guitar while recording. As we advance to the next stage in our GarageBand odyssey, let’s keep these learnings close, for they are the beat to our rhythm, the harmony to our melody, the clarity in our chorus of digital strings.
Guitar Tracking in GarageBand: Laying Down Your Parts
In our journey through creating music, the steps we take in guitar tracking in GarageBand are foundational. Here, our focus pivots to laying down guitar parts, a creative phase where melody and rhythm converge. Our exploration in recording guitar tracks allows us to articulate our musical thoughts, capturing electrifying ideas one layer at a time.
Essential to multi-tracking guitars in GarageBand, the delicate process of tracking ensures our harmonies intertwine elegantly. Whether tackling a soaring solo or solidifying a rhythmic backbone, we ensure every section of our composition is given due attention. Our role as architects of sound compels us to consider the intricacies of balance and timbre as we create guitar layers in GarageBand.
We begin by plugging our guitar into an audio interface, potent in its ability to translate analog strums into digital gold. With our instrument connected, we engage with GarageBand, where a myriad of track options awaits. From the clean chime of a freshly plucked string to the guttural growl of a distorted riff, we select the amp sound that resonates with our intention.
The calibration of gain levels is pivotal. Too low, and our music whispers when it should sing; too high, and it screams over subtle nuances. We fine-tune our settings, pursuing that sweet spot where every note is empowered to stand tall.
With amps dialed in and gain set, we activate monitoring to embrace an auditory reflection of our creativity. This real-time audio feedback is the linchpin of tracking—ensuring what we hear is what will be heard. Our ears, ever vigilant, stand as sentries against distortion, safeguarding the purity of sound.
Occasionally, the necessity arises to adjust input and output settings within GarageBand’s preferences. Perhaps the interface seeks a different setting or the sound demands an alternate output. Our adaptability here is as crucial as our creativity; both work in tandem to yield a harmonious recording environment.
Embracing each measure of this process, we solidify our tracks with the confidence of seasoned composers. We understand that the mastery of guitar tracking isn’t just about the notes we play—it’s also about the spaces we allow them to resonate within. It’s about perceiving a song not just as a series of individual sessions, but as a cohesive fullness ready to greet the ears of an expectant world.
Advanced Guitar Recording Techniques in GarageBand
Embarking on the path to advanced guitar recording, we uncover the depth that multiple track recording in GarageBand can bring to our music. This approach to layering guitar parts enriches our compositions, inviting a texture and complexity that single tracks can’t achieve alone. With each layer, we carefully manage the balance and interplay, ensuring that the intricacy of our complex guitar tracks in GarageBand contribute to a grander musical narrative.
Using Multiple Tracks for Layering Guitar Parts
Our exploration of intricate guitar recording techniques leads us to the utilization of multiple tracks. By recording different guitar parts on separate tracks, we can adjust volume levels and panning to create a landscape of sound that captures the listener’s imagination. The potency of layering guitar parts lies in the ability to build upon the foundation of a melody, reinforcing and enriching it with harmonies and counter-melodies, each resonating from its own carefully crafted place in the mix.
Experimenting with Plugins and Pedals in GarageBand
In the realm of GarageBand plugins, a world of sonic sculpting awaits us. We find ourselves experimenting with GarageBand plugins, toying with the vast offerings of built-in effects, and diving into the innovation that third-party plugins bring. Our creative appetite leads us to using guitar pedals in GarageBand, simulating a kaleidoscope of tones and textures. The customization with GarageBand effects elevates our guitar tracks, transforming them from mere recordings to artistic expressions.
By enhancing guitar tracks with plugins, we embrace the role of architect, shaping our sound with precision and vision. With each tweak and turn of a knob, our tracks evolve, enveloping us in an audio adventure where the only limit is the breadth of our creativity.
Connecting Guitar to GarageBand iOS: A Mobile Recording Studio
For musicians who find themselves in the thrall of creativity away from the traditional studio, connecting guitar to GarageBand iOS presents the ideal solution for capturing inspiration whenever it strikes. With the wide array of portable audio interfaces on the market, pushing the boundaries of music production has never been easier or more accessible. Harnessing the power of our iPhones and iPads, we turn our focus to the best interfaces for iOS recording.
iRig HD 2 and Apogee Jam Plus: Best Interfaces for iPhone and iPad
When considering a mobile recording studio with iPhone and iPad, two standout interfaces come to mind: the iRig HD 2 and the Apogee Jam Plus. The iRig HD 2 setup is streamlined for ease and efficiency, offering a budget-friendly option without compromising on quality. Meanwhile, the Apogee Jam Plus interface is a gem for those looking to invest a little more into their portable rig, boasting an impressive build quality and fidelity.
What’s common between these devices is their effortless compatibility with iOS. They come ready with lightning to micro-USB cables—a perfect fit for not just connecting your guitar, but for also delivering superior sound quality that rivals that of larger setups.
On-the-Go Recording: Tips for Using GarageBand iOS
The versatility of modern technology has given rise to on-the-go recording with GarageBand iOS, enabling us to set down tracks from virtually anywhere. Our top tips for mobile guitar recording techniques begin with keeping an eye on the LED indicator of your iRig HD 2 or similar interface. The LED light provides a visual cue for recording guitar with iPhone and iPad, ensuring the signal is strong but not overpowering to avoid clipping.
Furthermore, while the iRig HD 2 setup is simple, we should always remember to use headphones or studio monitors to properly monitor the sound levels. Since iOS device speakers aren’t designed for monitoring, this is a crucial step towards achieving professional-level sound.
As part of crafting a portable GarageBand setup, it’s also valuable to familiarize yourself with additional plug-ins and apps. The expanse of GarageBand iOS on offer provides a suite of tools that can greatly enhance your tonal palette, offering effects and amp models that breathe life into your compositions.
Ultimately, who would have imagined that a device as compact as the iPhone, paired with interfaces like the iRig HD 2 or Apogee Jam Plus, could serve as a mobile recording studio with iPhone and iPad? It stands as a testament to how far we’ve come in the digital music production landscape, making recording guitar with iPhone and iPad not just a possibility but a delightful reality.
Editing and Mixing Guitar Tracks in GarageBand for a Polished Sound
When we immerse ourselves in the realm of editing guitar tracks in GarageBand, it’s not just about slicing and dicing. It’s a meticulous process to refine guitar tracks for that clean, professional sound that every guitarist craves. Our journey begins with the basic yet critical task of trimming down riffs and finding the perfect alignment for each recorded section. From there, we enter the expressive world of mixing guitar recordings, fine-tuning each note to sit just right in the ear.
Central to our quest for a polished guitar sound in GarageBand is the delicate balance of volumes, where we grant each strum its deserved prominence without overshadowing the rest. By artfully panning individual tracks, we create a spacious soundstage that replicates the essence of a live performance. It’s this intricate balance that embodies the serenity in our final mix, where each guitar layer finds its corner in the auditory landscape we’re painting.
The tonal depth we seek isn’t complete without the nuanced application of equalization. With GarageBand’s equalizer, we shape the frequency spectrum, carving out space for all elements to breathe without competition. Similarly, compression becomes our ally, adding punch and presence to the guitar while ensuring dynamic consistency. This is where our sonic artwork really starts to shimmer, revealing subtleties that might otherwise remain hidden.
Exploring the treasure trove of GarageBand mixing techniques, we don’t shy away from the tasteful use of reverb and delay. These effects are the echoes in the hallways of our music, imparting dimension and a sense of place. Careful not to drown in our own reflections, we adjust each effect to enhance, not saturate—guiding our tracks towards that sweet spot enveloped in warmth and richness.
With each step of editing and mixing, we’re lending an ear to painstaking detail, employing critical listening to ensure our guitar tracks contribute to the mix authentically. It’s about striking the right chord between technical precision and the free-flowing spirit of music. Together, these techniques stitch a thread of audio clarity, inviting listeners into an experience that’s both refined and deeply resonant.
GarageBand for Windows: Unofficial Alternatives and Solutions
While GarageBand’s seamless interface and creative prowess have enchanted macOS and iOS users, those on Windows have longed for similar capabilities. Despite there being no official GarageBand download for Windows PC, we can still embrace the spirit of GarageBand by exploring unofficial alternatives that capture its essence. These solutions offer Windows users the means to dive into music production, empowering their creative processes without the confines of Apple’s operating system.
Our search for GarageBand alternatives for Windows leads us to an array of programs designed to mimic the click and play ease that GarageBand provides. These applications range from full-fledged digital audio workstations to simpler, user-friendly platforms. For those intent on using GarageBand without emulators, these alternatives propose a native Windows experience, honed to facilitate the recording, editing, and mixing processes Windows users eagerly seek. Whether it’s looping a catchy beat or mastering a fiery guitar solo, the selected program promises a bevy of tools to enhance the audial adventure.
As we journey through the world of music production on Windows, we bridge the gap left by the unavailability of GarageBand. We’ve unearthed and experimented with these unofficial offerings, ensuring they resonate with the quality and functionality one expects. Although official Apple software remains exclusive to its devices, the resourcefulness of these GarageBand alternatives for Windows tilts the scale, equipping us with instruments to orchestrate our musical dreams on any platform we choose.
FAQ
How do I connect my guitar to GarageBand?
To connect your guitar to GarageBand, you will need an audio interface or an adapter cable. Connect the interface to your computer’s USB or FireWire port, then plug the guitar into the interface using a standard 1/4-inch instrument cable. If using a built-in audio input port, an adapter cable may be necessary. Once connected, select the correct input source in GarageBand’s Smart Controls pane and adjust the input levels accordingly.
What equipment is essential for connecting my guitar to GarageBand?
Essential equipment for connecting your guitar to GarageBand includes an audio interface or adapter cable, a standard 1/4-inch instrument cable, and potentially a preamplifier to boost your guitar’s signal. You’ll also need a Mac or iOS device with GarageBand installed, and for the best experience, a pair of headphones or studio monitors.
How do I navigate the GarageBand interface for guitar recording?
In GarageBand, navigate to the Smart Controls pane to select the appropriate audio input source for your guitar. From here, you can enable monitoring to hear yourself play and adjust the recording level slider to control the input volume. The interface also offers a variety of amp models and effects to customize your guitar sound.
What is the best way to set up my electric guitar with a Mac for use with GarageBand?
For setting up an electric guitar with a Mac, choose a macOS and Core Audio-compatible audio interface. Connect the interface to your Mac’s USB or FireWire port, then connect your guitar to the interface using an instrument cable. You may need to install drivers for the interface. Once connected, select the appropriate input source in GarageBand, tune your guitar, and adjust the input volume level for clarity.
How can I optimize GarageBand settings for the best guitar recording quality?
To optimize GarageBand settings for guitar recording, select the correct input source (built-in input, USB, or audio interface), set the recording level to obtain a clear signal without clipping, and choose the appropriate format (mono or stereo). Use monitoring to refine your guitar’s place in the mix, and remember to use headphones to prevent feedback.
How can I adjust input levels in GarageBand to achieve clarity in my guitar recordings?
You can adjust input levels in GarageBand using the recording level slider in the Smart Controls pane to ensure your guitar’s signal is neither too low nor clipped. If the slider is disabled, set the input volume directly on your device. Employ headphones for monitoring to achieve a clear mix without interference.
How do I explore amps and effects for guitar in GarageBand?
In GarageBand, go to the Amp Designer or pedalboard to explore different amp models and effects. You can customize the sound of your guitar by adding distortion, reverb, modulation, and more. Experiment with settings to find the tone that best suits your piece or genre.
What is monitoring in GarageBand and how do I enable it?
Monitoring in GarageBand lets you hear your guitar in real-time as you play. To enable it, click the icon resembling an “I/O” button that becomes orange when activated. It’s useful for tracking along with other parts of your arrangement and should be turned off when not needed to minimize feedback.
What are some tips for laying down guitar parts in GarageBand?
When laying down guitar parts in GarageBand, ensure your guitar is in tune, choose the right track type for your desired tone, and use monitoring to avoid latency. Adjust the gain levels appropriately to prevent distortion, and explore different amp models to find the perfect fit for your project.
How can I use multiple tracks for layering guitar parts in GarageBand?
To use multiple tracks for layering guitar parts in GarageBand, record each guitar line separately on a new track. Adjust levels, panning, and effects for each track to ensure they blend together well. Layering adds depth and complexity to your songs, creating a richer sound.
Can I use external plugins and pedals with GarageBand?
Yes, GarageBand supports a range of built-in and third-party plugins and pedals. You can experiment with these additional effects by downloading them from the App Store or through plugin providers and integrating them into your GarageBand projects to expand your guitar tones and effects possibilities.
How do I connect my guitar to GarageBand on iOS devices?
To connect your guitar to GarageBand on an iOS device, you’ll need a compatible audio interface like iRig HD 2 or Apogee Jam Plus, which typically connects via a lightning-to-micro-USB cable. Open GarageBand, select your amp type, turn on monitoring to adjust levels, and connect your guitar to the interface. Use headphones or studio monitors for output, and manage input signal levels to prevent distortion.
What is the process for editing and mixing guitar tracks in GarageBand?
Editing and mixing guitar tracks in GarageBand involves trimming and aligning recorded sections, adjusting volumes, panning, and applying effects such as equalization and compression for balance and presence. Listen carefully to the mix to ensure the guitar complements the other instruments, and don’t hesitate to refine with reverb, delay, or other effects to enhance the track.
Is there a GarageBand version available for Windows?
Officially, GarageBand is not available for Windows. However, Windows users can explore alternatives that offer similar functionality or find resources that provide a secure download of GarageBand for Windows. These alternatives may have different setup processes, so it’s important to read the instructions specific to these solutions.