If you’ve ever aspired to mix your melodies or polish your podcasts with precision, knowing how to cut music on GarageBand is a pivotal skill that elevates your audio projects to new heights. Maybe you’re looking to trim a lengthy intro or swiftly split a session into multiple tracks – all of this is within your grasp through the dynamic GarageBand interface. For both budding and seasoned Apple device users, we are here to divulge essential GarageBand editing tips that go beyond the basics.
Editing audio comes with its own set of challenges, but with our step-by-step guide, you can learn to effortlessly trim music in GarageBand, tailor transitions, and craft your composition like a maestro. Whether you’re armed with a Mac or maneuvering on your mobile, cutting and editing is integral, and we’re here to streamline the process. Let us dive in together to uncover the techniques to cut and edit music on GarageBand, guaranteeing your tracks play out just as you envisioned – if not better.
Introduction to Cutting Music in GarageBand
Embarking on your musical journey with GarageBand can be as thrilling as it is daunting. But fear not, our beginner’s guide to cutting music on GarageBand is specially crafted to ease you into the world of GarageBand music editing. It’s crucial, whether you’re an iPhone, iPad, or Mac enthusiast – mastering the subtle art of music cutting in this versatile app is foundational for creating stunning audio projects.
Here, we unravel a step-by-step music cutting guide that simplifies what might initially seem complex. We aim not just to inform but to equip you with confidence as you soon realize that slicing, dicing, and sculpting tracks is within your reach. By following our guidance, you’ll be navigating GarageBand’s robust editing features with finesse in no time.
We recognize the importance of learning something new—like shredding a guitar solo or hitting that high note—so we present to you techniques not just to cut, but to perfect your tracks. Let’s prepare to dive deep into the mechanics of GarageBand, ensuring that every beat, note, and chord aligns perfectly with your vision.
Getting Started With GarageBand for Music Cutting

Welcome to the exciting world of audio crafting where our goal is to guide you through the early steps of GarageBand music editing. We’re here to unfold the methodical process of how to cut music on GarageBand, equipping you with knowledge for precise splicing and sound artistry. Let’s embark on this journey together, starting with the core fundamentals.
Firstly, ensure that GarageBand is installed on your Mac, iPhone, or iPad. Launch the application, greeted by its intuitive interface inviting creative exploration. Familiarize yourself with its layout – GarageBand’s simplicity is deceptive, hiding powerful tools within reach. Our focus today? Precise music cutting on GarageBand.
To begin, import your audio project into GarageBand. This can be a recording captured directly into the app or a file uploaded from your device. Hover the cursor over the audio region; the waveform is your canvas, ready for manipulation. This initial step sets the stage, preparing your materials before striking the editor’s chisel.
Select the track that contains the portion you want to excise. This process is about identifying the section that requires trimming – we encourage you to listen and relisten, ensuring accuracy in your selection. Precision here is key; an audio masterpiece awaits, but only if attentiveness accompanies each edit.
With our track chosen and mind tuned to the specifics of audio alteration, we are propelled to the next phase: the actual cut. Remember, whether it’s refining a podcast’s clarity or creating a custom ringtone, the power of GarageBand music editing lies at your fingertips. And it’s here, in precise music cutting on GarageBand, where that power thrives.
As you proceed, don’t hesitate to loop back to any step in this guide. Mastery comes through repetition – we encourage revisiting each phase, reinforcing your understanding of GarageBand’s capabilities. The power of stellar audio editing is poised to elevate your creative expressions, and we are honored to light your path to achieving it.
The Basics of Trimming Tracks in GarageBand
As we delve into the realm of audio refinement, GarageBand editing tips serve as your compass for navigating the vast seas of tracks and tunes. We are your guide on this voyage to trim music in GarageBand, ensuring every second of audio plays back exactly as you intended. A firm grasp of the navigating GarageBand interface is your first step towards becoming an adept editor within this potent Apple application.
Navigating the Interface for Efficient Editing
To begin the editing odyssey, becoming comfortable with the layout is paramount. With strategic design for intuitive interaction, navigating the GarageBand interface can appear straightforward—but its simplicity masks a depth of functionality. A proficient editor knows the interface like the back of their hand, recognizing each icon and slider as a tool to mold audio with ease. Embrace this landscape of creativity and watch as your music cutting abilities magnify.
Selecting the Perfect Segment for Cutting
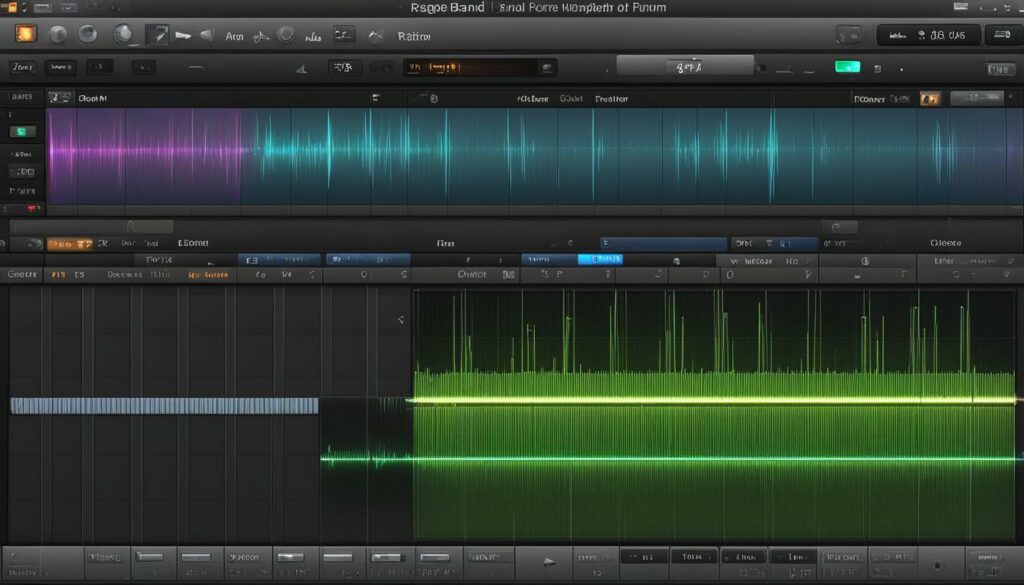
Choosing the precise sequence is crucial when slicing through the waves of audio. The act of selecting audio segments should be executed with surgical precision. Pay heed to the track’s waveform—an embodiment of sound that contains crests and troughs delineating your audio story. Accurate selection is akin to an artist’s first stroke; it sets the tone for the edit’s success. Learn to discern these patterns and the perfect cut segues from possibility to reality.
Zooming In for Precise Edits
Zoom features in GarageBand are like a magnifying glass for an audio detective. By leveraging these tools, the hidden details within a waveform spring to the forefront, allowing for precise editing techniques that ensure seamless harmony upon playback. Zoom in, and the edit becomes less of an educated guess and more a calculated maneuver—an indispensable trait of masterful GarageBand utilization.
As we equip you with the knowledge to capture every note’s essence, remember that patience is your ally. Frequent practice will embolden your skill, and the confidence to trim music in GarageBand will grow. Through the tips herein, your journey towards editing excellence is well underway.
Utilizing Keyboard Shortcuts for Quick Editing

As we journey through the art of cutting tracks, one fundamental truth remains: efficiency is key. That’s where GarageBand keyboard shortcuts become an editor’s best ally. By incorporating these shortcuts into your workflow, you’re not just saving time; you’re honing a skill that drastically enhances your editing agility. In this segment, let’s unlock a treasure trove of quick editing tips with a focus on keyboard shortcuts built into the very fabric of GarageBand’s functionality.
Imagine the scene: you’re deeply immersed in your project, your creativity flowing, when suddenly, the need to split a track arises. Instead of navigating through menus, simply press Command + T. In an instant, the track splits right at the playhead, leaving you stunned at the simplicity and speed of the process. It’s moments like these where shortcuts not only keep the creative juices flowing but also cut down on the potential frustration of menu diving.
But why stop there? Say you’ve split a segment and it’s not quite right, don’t reach for your mouse to undo the action – tap Command + Z instead. Seamless. You’ve just undone an action and are ready to try again. This reflexive command can be your savior, shaping a much smoother editing experience. Moreover, it’s a reminder of how essential it is to make these shortcut keystrokes second nature.
To streamline your editing process further, embrace the shortcut Command + C to copy a region, followed by Command + V to paste it elsewhere, molding your audio with copy-paste ease. And for swift deletion of unwanted sections? Simply press the Delete key after selecting the region. Each keystroke is a stepping stone towards an expeditious and fluid editing session.
Envision yourself moving through GarageBand with such efficiency that your creative output doubles, even triples. With the power of keyboard shortcuts, this can very well be your reality. Practice them until they become a reflex, and witness your productivity soar. We understand the value of your time, and it’s our aim to equip you with every tool necessary to ensure that when inspiration strikes, technical proficiency facilitates, rather than hinders, your artistic expression.
Remember, this is just the beginning. As you further explore the plentiful array of keyboard shortcuts available within GarageBand, every editing task becomes a quick command away. The goal is simple: minimize the mechanics and maximize the music. Go forth and trim, split, copy, delete, and conquer your audio landscape with the swift aid of keyboard genius.
So as we continue our exploration of GarageBand’s vast editing expanse, keep these GarageBand keyboard shortcuts close. They are the invisible conductors of your symphony, the silent partners in your production. Let them guide your hands as you paint with sound, swiftly and surely, towards the masterpiece that awaits within your creative mind.
Advanced GarageBand Music Editing Techniques
As we explore deeper into the powerful capabilities of GarageBand, let us focus on more complex editing maneuvers that can significantly improve the quality of your audio projects. By mastering advanced techniques such as applying fade effects and crafting audio structures, our tracks will not only sound professional but also deliver a compelling auditory experience. These methods are the key to sculpting a truly dynamic soundscape.
Applying Fade Effects for Smoother Transitions
One of the hallmarks of well-produced audio is the subtlety of its transitions. Applying fade effects in GarageBand is a technique that allows us to gradually introduce or remove elements within our tracks, providing a smoother transition that enhances the listener’s journey. Whether you are easing into a powerful chorus or drawing a soulful solo to a close, mastering the use of fade effects can significantly elevate the emotional impact of your music.
To apply a fade effect, select the region you wish to transition and adjust the fade handles to create a gradual increase or decrease in volume. This attention to the rise and fall of your track’s volume creates smoother audio transitions in GarageBand, ensuring a cohesive and polished final product.
Split and Rearrange: Crafting Your Desired Audio Structure
Another key aspect of advanced editing is the ability to split and rearrange tracks with precision. This powerful feature of GarageBand allows us to dice our project into manageable segments, giving us ultimate control over the structure of our audio narrative. Whether it’s moving a verse, adjusting the chorus, or creating a unique bridge, splitting and rearranging tracks provides us with the freedom to mold our music as we see fit.
By selecting the desired area and deploying the split command, we can isolate exact portions of a track for rearrangement. This is especially useful when crafting audio structures that may require experimentation with the order and arrangement of musical elements until the perfect sequence is achieved.
As we fuse these sophisticated techniques into our editing workflow, our proficiency with GarageBand transforms, allowing us to create complex, engaging, and memorable audio pieces that resonate with our listeners. These tools are the building blocks of great audio editing, and we’re excited to share this journey with you as we move towards professional-grade productions.
Saving and Sharing Your Edited Music from GarageBand
Once we’ve honed our tracks through meticulous cutting and editing within GarageBand, the next essential steps are to save and share GarageBand music with the world. Saving correctly ensures your hard work remains intact and sharing allows your melodies to resonate across various platforms, reaching eager ears everywhere. Through this process, we’ll cover exporting audio projects and delve into the specifics of file types and qualities that will make your music stand out.
To initiate the save sequence, you begin by heading over to the Share menu located in GarageBand’s toolbar. From here, one popular option is to select ‘Export Song to Disk’, which allows you to transform your project into a standalone audio file. This is where you can decide on the file format, such as MP3, AIFF, or WAV, tailored to your needs based on the balance between quality and file size.
Additionally, setting the audio quality becomes paramount, as it influences the fidelity of your final product. GarageBand provides options such as ‘High Quality’ or ‘Lossless’, which we must select keeping in mind where the track will be played. For instance, platforms like Apple Music or SoundCloud may have their own recommended settings for optimal audio performance.
Once we have our edited track polished and saved, sharing becomes our focus. GarageBand facilitates this with a variety of sharing options right within the app. You can directly upload your creation to platforms like YouTube, SoundCloud, and even Apple Music Connect, where a community of music lovers can access and enjoy your tunes. Additionally, sharing via email or AirDrop ensures your tracks reach colleagues or friends with ease.
It’s vital to remember that the same careful attention we applied to editing should also be assigned to this stage. Selecting the right channels and the most compatible file quality will define how our audience experiences the music we’ve worked so hard to perfect. It’s in these details that our audio projects come to life and shine with the highest brilliance.
Now that we’ve mastered the art of exporting audio projects, and learned how to save and share our music, it’s our chance to step into the spotlight. We watch with anticipation, pride, and maybe a flutter of nervous excitement as our tracks venture into the world, ready to be heard and appreciated by listeners near and far.
GarageBand Alternatives for Cutting Music Online
As avid audio editors, we always seek ways to diversify our editing toolkit. It’s why we’re exploring the vast digital landscape for GarageBand alternatives. Notably, online music cutter tools offer varied options that might just fit the bill for your editing demands. Whether you seek simplicity or crave the advanced features, these tools provide valuable resources, especially when you require editing capabilities on platforms other than iOS or macOS.
One such incredible option is the Online UniConverter. This widely accessible web tool lives up to its name, converting and editing multiple audio formats with commendable ease. The interface is as user-friendly as it gets, allowing even novice editors to trim, crop, and apply audio effects without breaking a sweat. And yes, it does include the option to add fade effects for that professional touch you’re aiming for. The compatibility of Online UniConverter spans across various devices since it operates on HTML5 browsers including Chrome, Firefox, and Safari. This makes it a top contender when looking for online GarageBand alternatives.
But the realm of online music cutter tools doesn’t end here. Audio Cutter Pro surfaces as another capable alternative that makes audio editing a breeze. Supporting formats like MP3, WAV, AAC, and more, this tool manages to deliver quality cuts while maintaining an interface that’s straightforward – ensuring your focus remains on crafting the audio piece rather than navigating through a complex system.
The convenience of online tools such as Online UniConverter and Audio Cutter Pro cannot be overstated – they are ready when you are, requiring nothing more than an internet connection. They free you from the limitations of a single editing platform, opening a world where GarageBand alternatives exist in rich abundance, compatible with numerous operating systems and devices.
Our exploration into these online audio-editing solutions substantiates that no matter the kind of project you’re working on, you can rest assured that there are tools available to make your workflow as seamless as possible. Embrace these alternatives for their unique strengths and discover new potentials in the way you cut and edit music online.
Maximizing GarageBand’s Tools for the Best Audio Edits
Delving into the world of audio editing can sometimes seem like steering a course through unchartered waters. Our quest to achieve garageband editing mastery often revolves around not just knowing, but deftly maximizing GarageBand tools. In this pursuit, we uncover the tactics and strategies that allow us to transform raw audio into polished masterpieces—ensuring every clip is carved to convey its intended narrative with clarity and impact.
Let us first acknowledge the significance of the undo function. Imagine this: as we finetune our tracks, a misstep occurs—an errant click or an overzealous edit. It’s here, in the mire of mistakes, that the undo function reclaims our fortunes. With a simple Command + Z, the canvas of sound resets, offering us a chance to correct our course without penalty. GarageBand’s forgiving nature empowers us to experiment without fear, inviting us to refine our craft with the safety net it provides.
Volume control in GarageBand is yet another instrumental feature—the equivalent of commanding the dynamics of an orchestra with a conductor’s baton. As we dial up the volume to infuse life into a soft recording or attenuate it to blend tracks seamlessly, we realize the potency housed within these virtual knobs and sliders. A tune mastered at the right decibel is an auditory delight, raising our edits from simple sound to symphonic harmony.
Attention to alignment is just as vital, ensuring our audio is not just a series of disjointed sounds, but a coherent symphony. GarageBand provides alignment guides—much like an artist uses a ruler—to make certain that every beat falls precisely into place. Overlaying audio regions, then, becomes less like guesswork and more akin to a well-timed dance, each movement purposefully choreographed for maximum effect.
As we navigate our way through these editing tools, the reality becomes clear—we are the sculptors of sound. Maximizing GarageBand’s tools is not merely about exploiting features; it’s about orchestrating them into a symphony of edits that elevate our audio to realms previously unimagined. And so, we continue to wield these tools not as mere instruments, but as extensions of our creative will.
Our journey into GarageBand’s vast repository of features is ongoing, each foray deepening our understanding and fortifying our editing arsenal. As we grow more adept, the bond between creator and creation strengthens, leading us to a mastery of edits that not only showcase technical prowess but also an intimate knowledge of the audible art form. And it is through this lens that our musical narratives are not only heard but fundamentally felt.
Embrace these features, hone your craft, and become the maestro of your audio universe. Whether cutting a track or fine-tuning a mix, every tool in GarageBand bends to the will of your vision, setting your stories free to soar and resonate. With each passing beat, let us chart the path to garageband editing mastery, ensuring that the only limit to our creations is the extent of our imaginations.
Conclusion: Refining Your Music Cutting Skills on GarageBand
Throughout our comprehensive guide, we’ve laid the foundation for you to refine music cutting skills using the versatile tools offered by GarageBand. This robust application, readily available on your Apple devices, serves as your creative ally, delivering a vast spectrum of editing functionalities that cater to both novice and experienced audio enthusiasts. As you immerse yourself in this journey, we encourage persistent practice; it is the cornerstone that will lead you toward mastering GarageBand edits with finesse and confidence.
Let the art of precision cutting become second nature to you, as you slice through tracks and execute edits with the proficiency of a skilled artisan. The steps outlined herein guide you aimfully from the initial splice to the concluding export, ensuring that your final composition resonates with the professional polish of studio-quality music. Forge ahead with these techniques, reinforcing them through iteration, and watch as your prowess in audio manipulation flourishes under your dedicated tutelage.
We have navigated together the intricacies of GarageBand, demystifying its interface, and revealing the shortcuts that expedite your editing process. Now, as we draw this guide to a close, it’s paramount to remember that every session within GarageBand is an opportunity to enhance your abilities, to master garageband edits, and to unveil the true potential of your musical creations. Embrace the journey of continuous learning, and take pride in every track that bears the hallmark of your growing expertise.
FAQ
How do I start cutting music on GarageBand?
To start cutting music on GarageBand, you need to open the program on your Mac or iOS device, create a new project, and import the audio file you wish to edit. You can then select the track and use the editing tools to cut, trim, and arrange your music.
Can you provide a step-by-step guide to cutting music in GarageBand?
Certainly! Begin by opening GarageBand and loading your project. Select the track you want to cut. Position the playhead where you want to cut the track and use the Command+T shortcut to split the section. You can then delete or move the cut section as needed. For more precise cuts, zoom in on the waveform and use the playhead to make finer adjustments.
What are some helpful keyboard shortcuts for editing in GarageBand?
Keyboard shortcuts can greatly enhance your editing efficiency in GarageBand. Some useful shortcuts include Command+T for splitting tracks, Command+C to copy a section, Command+V to paste it, and Command+Z to undo an action. These shortcuts can help speed up your music cutting workflow significantly.
How do I apply fade effects to my audio in GarageBand?
To apply fade effects in GarageBand, you need to show the automation pane by pressing ‘A’ or selecting ‘Mix’ > ‘Show Automation.’ Choose the ‘Volume’ option from the dropdown menu on the track you wish to apply the fade to and create points on the automation line to adjust the volume gradually, thus creating a fade effect.
What is the best way to save and share my GarageBand music project after cutting?
After you’ve finished cutting and editing your music in GarageBand, you can save your project by selecting ‘File’ > ‘Save As.’ To share your music, click on ‘Share’ in the menu bar and choose your preferred method of export, such as exporting to disk, to send your audio file via email, or to upload directly to platforms like SoundCloud.
Are there any alternatives to GarageBand for cutting music online?
Yes, there are several alternatives to GarageBand that allow you to cut music online. Some of the popular online tools include Online UniConverter, which supports a variety of formats and offers a simple interface, or Audio Cutter Pro, which provides quick cutting options and additional features like fade ins and outs.
What advanced features can I use to enhance my audio editing in GarageBand?
Advanced features in GarageBand include the ability to use equalizers, compression, and other audio effects to enhance the sound quality of your tracks. You can also use automation to adjust volume levels and panning during playback, and even match the timing of different tracks using the Flex Time feature.
How can I ensure my cuts are precisely in time with the music?
To ensure precise cutting in GarageBand, use the zoom function to get a closer view of the waveform. This will help you to see the individual beats and wave peaks clearly. Use the playhead and listen carefully to align your cuts exactly where you need them. You can also align edits with the built-in metronome or the beat grid for additional precision.
Can I rearrange cut audio segments in GarageBand?
Yes, you can easily rearrange audio segments in GarageBand. After cutting a section with the split tool, you can click and drag that piece to a new location within the track. If needed, you can cut and move segments to different tracks within the project to layer sounds or better organize your arrangement.
What should I do if I make a mistake while cutting music on GarageBand?
If you make a mistake while cutting music in GarageBand, you can undo the last action by pressing Command+Z or by selecting ‘Edit’ > ‘Undo’ from the menu bar. GarageBand allows you to undo multiple actions one by one, so you can step back through your edits until you reach the point before the mistake was made.