As enthusiasts for music production in GarageBand, we understand the transformative power of a well-executed fade out. Whether it’s the nostalgic draw of The Beatles’ “Hey Jude” that lingers in our minds or the contemporary tracks we adore, the art of fading out remains evergreen in the audio realm. Join us as we embark on a journey to refine our skills in audio editing in GarageBand, with a specific focus on the fade out effect—a feature that turns a simple song into a sonic masterpiece.
Mastering how to fade out in GarageBand not only signals a polished end to a musical piece but gives us the ability to smoothly transition between song sections, all while minimizing audio discrepancies like ‘clicks’ and ‘pops’. We’re here to guide you through unveiling the hidden master track—a crucial step to obtaining complete control over your GarageBand fade out and ushering your music production to the next level.
Understanding the Importance of Fade Out in Music Production
In the realm of music production in GarageBand, the fade out effect isn’t just an aesthetic choice—it’s akin to punctuation in literature, signaling the closing of a musical sentence with finesse. What might seem like a simple decrease in volume is, in fact, a pivotal moment that provides resolution to a song. Imagine a narrative without its final chapter, or a journey without a destination; that’s a song without a proper ending. As artists and producers using GarageBand, we have a treasury of audio effects at our hands, with the ability to conclude our compositions with elegance or carry them forward into silence.
Despite the shifting trends in contemporary music, where abrupt endings might have gained momentum, there remains an unwavering importance for the fade out—a technique that continues to be a mainstay in countless classics and modern tracks alike. Through a strategic GarageBand tutorial, we further our craft by seamless unifying sections of our tracks, molding separate audio landscapes into a singular, immersive experience. The fade out truly dignifies those final moments, ensuring each note weaves into the next with a sense of purpose.
Let’s not overlook the technical advantages either. Utilizing the fade out effect in GarageBand can be a saving grace for those pesky audio distortions that might lurk at the end of a recording session. You know the ones—those slight ‘clicks’ and ‘pops’ that beg for attention when you’re on the cusp of wrapping up your masterpiece. A well-placed fade out eases these imperfections out of the auditory spotlight, much like a soft curtain fall at the end of a theatrical performance.
With every fade out we implement, we’re not just ending a piece; we’re enhancing its storytelling, we’re refining the flow, and we’re cementing our intentions in sound. Understanding its importance guides us to produce music that not only resonates with our listeners’ ears but also with their emotions. It’s these nuances that make all the difference in crafting a memorable experience in music production in GarageBand.
Crafting the Perfect Fade Out in GarageBand
Embarking on a journey through audio editing in GarageBand invariably leads us to the fade out—one of the most essential audio effects in GarageBand. This subtle yet powerful tool adds a professional sheen to our tracks, guiding the listener into a musical denouement with grace and precision. As we delve into our GarageBand tutorial, we unveil the steps to create a fade out that perfectly encapsulates the emotion and storytelling of our musical composition.
Revealing the Master Track for Comprehensive Control
To achieve the nuanced garageband fade out effect, our first task is to reveal the master track. Within GarageBand’s workspace, this track is the command center for our song’s overall volume dynamics. To uncover it, we select Track > Show Master Track from the menu bar or use the handy shortcut SHIFT-COMMAND-M. With the master track’s automation curve at our disposal, we have a global view of the volume parameters, laying the foundation for the perfect fade out execution.
Implementing the Automatic Fade Out Feature
GarageBand streamlines the fade out process with its automatic feature, thoughtfully designed for the entire song rather than individual tracks. This effortless approach requires us to navigate to Mix > Create Volume Fade-Out on Main Output, where GarageBand conscientiously places four volume points on our behalf. The automation controls are now visible, allowing us to toggle the automatic garageband fade out for our song at any given time with just a few clicks.
Customizing Fade Out Timings and Intensity
While the automatic fade out serves us admirably, we often hunger for a personalized touch, customizing the fade out to match the unique spirit of our track. GarageBand empowers us with the ability to alter the automatically set volume points. We can manually adjust these points vertically to vary the fade’s intensity or slide them horizontally to fine-tune the timing, ensuring our artistic signature resonates through the fade out’s crescendo and decrescendo.
In Section 4, we will explore the nuances of performing manual fade outs in GarageBand, a skill that will greatly enhance the individuality of each track within our audio projects. Stay tuned as we continue our tutorial, deepening our mastery of GarageBand’s rich suite of features.
Manual Fade Outs: Enhancing Your Tracks One by One
Delving into the world of GarageBand tips and tricks, let’s explore the art of manual fade out in GarageBand. This technique paves the way for us to infuse each segment of our music with individuality and emotion. When the automatic fade out does not cater to our specific needs, it’s the manual fade out that steps in, giving us precise control over how and when our tracks diminish into silence.
To establish a manual fade out, we begin with the master track, the cockpit from where we orchestrate our song’s volume dynamics. Our first step is to make the master track’s automation features visible by choosing Track > Show Master Track. Here, we are met with the volume line, a powerful tool allowing us to precisely manipulate our track’s audio narrative.
Understanding how to fade out in GarageBand is crucial for any audio editor looking to bring depth to their production. Once the master track reveals its volume line, we can click to insert volume points along this line, akin to plotting our course on a sonic map. Each point symbolizes a moment for potential alteration, an opportunity to tailor the fade out to the contours of our music’s landscape.
Fine-tuning the fade out is akin to an artist adding delicate brush strokes to a painting. Adjusting the volume points along the vertical axis changes the fade’s intensity; dragging them horizontally shifts its timing. By engaging with these points, we draw the listener into a dynamic conclusion, one that complements the flow of our creation and brings a custom-tailored closure to each piece.
With manual fade outs, we not only enrich our own understanding of GarageBand’s capabilities but unlock a greater potential for emotional connection with our audience. As we gesture our tracks to gracefully bow out, we leave our listeners in a lingering ambiance, hungry for the next auditory experience we craft.
Tailoring Individual Track Fades for a Unique Mix
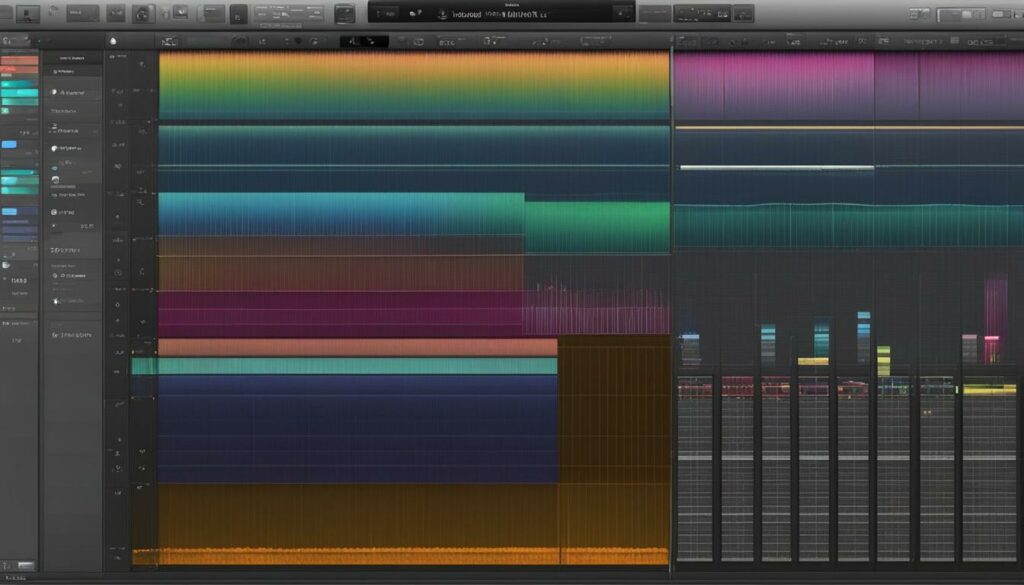
As we dive deeper into the sophisticated realm of GarageBand tips and tricks, we uncover the flexibility and creative richness of individual track fades in GarageBand. Distinct from a uniform fade-out across an entire mix, these selective fading techniques allow us to chisel away at the sonic landscape of each track, ensuring every instrumental voice and harmonic layer can subtly recede or emerge according to our artistic direction.
Isolating Tracks for Selective Fading Techniques
When we approach individual track fades in GarageBand, we begin by isolating the track that requires our attention. With the track separated, we step forth into the intricate process of volume automation—a feature that is key to sophisticated audio engineering within GarageBand. By enabling volume automation, we grant ourselves the power to place volume points strategically on the track’s timeline, thereby dictating the exact moments of the fading process.
Through this granular control, we can execute fades with precision that reflects the emotional rhythm of our music. Whether it’s to bring a gentle end to a resounding chorus or provide a whispering start to a soulful verse, crafting these fades on a per-track basis enhances the auditory journey for our listeners. It is here that our proficiency with GarageBand tips and tricks truly blossoms, turning a simple compilation of tracks into a cohesive and emotive opus that’s as unique as our creative vision.
Let’s not underestimate the allure of this process. It is by directly manipulating each individual fade that we attain a mix emanating our artistic identity; a piece that speaks volumes of our dedication to the craft. Through harnessing the capability of selective fading techniques, the potential for a nuanced, one-of-a-kind audio experience is right at our fingertips—an experience where our passion and GarageBand’s robust functionality merge to craft something truly extraordinary.
Executing a Smooth Fade In for Dynamic Intros
Creating a compelling introduction to a song sets the stage for an immersive listening experience. In our pursuit to master music production in GarageBand, we’ve discovered the power of the fade in effect. Although GarageBand does not feature an automatic fade in effect in GarageBand like it does for fade outs, we’re unfazed. We’ve honed the craft of manually enhancing the entry of each musical element, thus shaping dynamic intros in music.
The process begins by manually adding volume points at the very start of the master track within GarageBand, which allows us to dictate the initial presence of our tracks. This manual method is not only simple but also grants us full control over the intensity and timing of the fade in. This technique is especially valuable as we guide our listeners from silence into the heart of our music, establishing an emotional connection from the first note.
As we delve deeper into the nuances of dynamic intros, our expertise in how to fade out in garageband comes full circle with our ability to reverse the process at the onset of a track. We acknowledge that while fading out may help a song exit stage left, a graceful fade in is all about making an entrance. With each project, we refine our use of volume automation, ensuring that the fade in transitions are as smooth as the fades out we’ve meticulously engineered in the past.
Whether we’re crafting a gentle rise or gearing up for an explosive start, our careful manipulation of volume points empowers us to deliver dynamic intros in music with precision. Manual fade ins in GarageBand become an expressive tool, one that we manipulate with intent and strategy to initiate the narrative of our songs with impact. So, let’s continue to leverage the flexibility of GarageBand to orchestrate intros that are not just heard, but felt.
Utilizing GarageBand Fade Effects on iOS Devices
As we explore the vast functionalities of GarageBand iOS, we find ourselves captivated by the versatility it offers, particularly with fade effects in GarageBand. The ease with which we can craft a professional-caliber intro or outro on our mobile devices exemplifies the innovation at the heart of this application. We can effortlessly add an automatic fade out to our entire song, ensuring the narrative of our music concludes with the sophisticated touch that only a proper fade can provide.
Embarking on the task of how to fade out in garageband on iOS, we uncover a simple yet impactful technique hidden within the song settings. Here, a convenient slide adjustment becomes our tool of choice, granting us the ability to dictate the song’s finale with a mere swipe. This feature exemplifies the fluidity of controlling audio dynamics, further showcasing GarageBand as a stalwart in the world of mobile music production.
However, our ambition often leads us to desire more nuanced control. That’s where our mastery of manual volume point adjustments comes into play. By engaging with these points, we can fines poison the fade ins and modify fades to our precise liking. Each volume point we place and adjust becomes a testament to our dedication to the craft, enabling us to sculpt soundscapes with professional precision.
Our journey through GarageBand iOS illuminates the seamless integration of these audio editing capabilities right at our fingertips. We navigate through the tracks with confidence, knowing that our mobile studio is equipped with comprehensive tools to deliver fade effects that resonate with listeners. As we continue to harness the power of these iOS features, we not only elevate our music but also our role as architects of sound.
Navigating GarageBand’s Interface for Efficient Audio Editing
As we delve into the intricacies of audio editing in GarageBand, we uncover the user-friendly nature of its interface, designed meticulously to streamline the editing process. With an array of automation features at our fingertips, we effortlessly fine-tune each slice of audio to our liking, ensuring our production quality never falls short of remarkable.
Adjusting Volume Points with Precision
One of the most potent tools in our editing arsenal is the ability to adjust volume points in GarageBand with exceptional precision. A mere click on the automation line—whether on the Master Track or any individual track—spawns a volume point, ripe for manipulation. We further these tweaks by dragging each volume node, shaping the volume dynamics of our fades with surgical exactitude. As we orchestrate these subtleties, we edge ever closer to that enigmatic ‘9’—a reference to the pinnacle of audio refinement and expertise in production.
Ensuring Seamless Transitions with Overlapping Regions
The hallmark of a refined audio piece is the smoothness of its transitions—a feat achieved in GarageBand through the adept use of overlapping regions. To achieve seamless transitions in GarageBand, we utilize crossfading, blending the tail end of one region with the starting notes of the next. This pivotal practice stands guards against any abrupt intrusions that could jolt the listener, instead escorting them gently down the river of our musical narrative.
Our commitment to meticulous audio editing in GarageBand brings into focus our ethos as craftsmen and craftswomen in the sphere of sound. We merge technical prowess with the artistic, crafting audio that conveys emotion and story, one click, one drag, one fade at a time.
From Amateur to Pro: Tips and Tricks for Music Production in GarageBand
Embarking on our music production in GarageBand journey, we swiftly realize the pivotal role of nuanced audio effects in carving our professional edge. Essential to this pursuit are the garageband tips and tricks that, when mastered, facilitate a smooth transition from amateur to seasoned pro. Among these, the utilization of fade effects stands as a cornerstone of sophisticated audio editing.
Our approach begins with the master track—a gateway to global control over our project’s volume dynamics. We unveil the deep waters of volume automation, where subtle manipulations ripple out, transforming our tracks from raw to refined. As we delve into our personalized GarageBand tutorial, we comprehend the significance of custom fades—those precise dips and swells in volume that paint our auditory vision across the canvas of time.
To tailor a unique listening experience, we synthesize our knowledge, meticulously curating the volume points of individual tracks. It’s here, in the manual weaving of intensity and timing, that our compositions take on a life of their own, telling a story that transcends the boundaries of sound. This skillful integration of fades not merely improves our music—it reinvents it, infusing each track with our distinct signature.
We become fluent in the language of transitions, leveraging GarageBand’s seamless interfacing to orchestrate fades that serve not as mere endings, but as emblems of aural mastery. Our expertise in this domain is not just technical; it’s a narrative craft, enabling our listeners to traverse the auditory spaces we create, accompanied by the thoughtful guide of volume dynamics.
Guiding our tracks to rise and fall with intentional grace, we harness the power of GarageBand’s fade effects. Each strategy we employ—be it the gradual introduction of an element with a fade in or the skillful resolution of a track with a fade out—elevates the caliber of our productions. As we refine these methods, the distance between amateur and pro narrows until the delineation is but a distant memory, and we stand amidst the ranks of accomplished creators, courtesy of our relentless pursuit of music production in GarageBand.
Accessing GarageBand Tutorials for Improved Learning
As we delve into the world of GarageBand, acquiring in-depth knowledge of GarageBand becomes a quintessential part of our growth as audio editors. Official GarageBand tutorials stand as invaluable resources, guiding us through the often intricate features of GarageBand. It is through these tutorials that we find structured and comprehensive learning paths, ideal for both newcomers and seasoned users aiming to refine their skills.
Exploring Official Resources for In-Depth Knowledge
We recommend starting with the official tutorials to gain foundational knowledge and to understand the full scope of what GarageBand has to offer. With a step-by-step approach, these tutorials are crafted to help us navigate through the basics and advanced aspects of the application. Whether we’re aiming to learn how to adjust EQ settings or master the automation of tracks, the official GarageBand tutorials provide us with the tools and knowledge necessary to produce quality audio content.
Finding Additional GarageBand Tips on External Sites
Beyond the official resources, we often find ourselves seeking additional GarageBand tips and creative solutions that are not covered in the standard tutorials. This is where we turn to the myriad of external sites that offer unique perspectives on GarageBand’s functionality. These external resources can be a treasure trove of external GarageBand tips, presenting novel hacks, detailed explanations of lesser-known features, and advanced production techniques that encourage us to push the boundaries of the application.
Whether we’re looking for advice on crafting the perfect mix or searching for trick to enhance the depth and clarity of our recordings, these additional GarageBand resources can be instrumental in elevating our audio projects to professional levels. Importantly, they offer us the opportunity to learn from a diverse community of GarageBand users, each sharing their expertise and contributing to a broader collective understanding of this versatile app.
Fade Out vs. Fade In: When to Use Each Technique
When immersing ourselves in the world of audio effects in GarageBand, we often encounter the crossroads of choosing between a fade out transition and a fade in effect. The decision to employ each is not arbitrary; it’s dictated by the desired emotional impact and the structure we intend for our musical venture. A fade out transition in GarageBand typically acts as a narrative conclusion, offering a gentle receding wave goodbye that brings a track or section to its natural end. It’s a time-honored technique that can leave listeners in a reflective trance or provide a smooth segue to another auditory chapter.
Conversely, a fade in effect in GarageBand is the soft light of dawn in audio form, slowly illuminating the expanse of a song’s landscape. It builds anticipation, coaxing the listener’s ear into the forthcoming musical narrative. Opting for fade in at the beginning of a track or section can be just as effective and stirring as fade out, particularly when introducing new elements or themes. Both techniques should be viewed as essential strokes on the canvas of audio effects in GarageBand, enabling artists to manipulate silences and sounds with the same finesse as colors in a painting.
Evidently, our creative intentions guide the application of these dynamic tools within GarageBand. Understanding the strategic use of both fade out and fade in allows us to weave a more profound auditory tale. Within our arsenal of GarageBand capabilities, we possess not just the skill to mute and amplify, but the power to evoke and inspire. So as we tread along our audio editing paths, we should embrace the versatility and artistic expression afforded to us through the thoughtful use of these effects.
FAQ
How do I create a fade out in GarageBand?
To create a fade out in GarageBand, you need to use the master track’s volume automation. Reveal the master track by choosing Track > Show Master Track or using the shortcut SHIFT-COMMAND-M. Then click on the automation icon (looks like a graph) to activate volume automation, where you can add points by clicking on the automation line and dragging them to create a fade effect.
What is the purpose of a fade out in music production?
A fade out in music production can signal the end of a song, help transition between sections, or create a smooth conclusion if a song lacks a definitive ending. It can also minimize unwanted sounds like clicks or pops, and provide a polished, professional touch to a musical project.
Can I automatically create a fade out in GarageBand?
Yes, GarageBand offers an automatic fade out feature. Go to the Mix menu, select “Create Volume Fade Out on Main Output,” and GarageBand will automatically generate volume points at the end of your song. You can modify these points for customization.
How do I customize the timing and intensity of a fade out in GarageBand?
You can customize your fade out by manually adjusting the volume points created during the automatic fade out process or by adding new points on the master track’s volume automation line. Move the points up or down to change the fade’s intensity or drag them left or right to adjust the timing.
Can I manually fade out only specific tracks in GarageBand?
Yes, you can manually fade out individual tracks by enabling the track’s volume automation feature (by clicking the automation icon), then adding and adjusting volume points on that track’s automation line individually.
How do I isolate tracks for selective fading techniques?
To isolate tracks for selective fading, click on the specific track to select it, enable the volume automation mode for that track, and adjust the volume points directly on that track’s automation line, independent of the master track’s settings.
Can I create a fade in effect at the beginning of a GarageBand project?
While GarageBand doesn’t have an automatic fade in feature, you can create a fade in by manually adding volume points at the start of the master track or individual tracks and adjusting them to gradually increase the volume.
Are fade effects possible on GarageBand for iOS devices?
Yes, on iOS devices, you can add an automatic fade out to a whole song through the song settings. Additionally, you can manually adjust volume points on the master track or individual tracks for custom fade ins and outs.
How can I ensure smooth transitions between audio regions in GarageBand?
To ensure smooth transitions, overlap audio regions slightly, then use the track’s automation feature to create volume points that allow you to fade out one region while fading in the next, creating a crossfade effect.
Where can I find GarageBand tutorials for more in-depth learning?
Official GarageBand tutorials are available on Apple’s website and within the app itself, offering comprehensive knowledge of the software. Additionally, you can find a wealth of tips and tricks on various external websites and video platforms like YouTube.
When should I use a fade out vs. a fade in within a GarageBand project?
The decision to use a fade out or fade in depends on your project and the effect you wish to achieve. A fade out is traditionally used at the end of a track, while a fade in is effective at the beginning to gradually introduce the listener to the music.
