Welcome to our definitive garageband beat making tutorial. Here, we shed light on the essential building blocks that will guide you—a burgeoning music creator—on how to make beats on GarageBand. This beginner’s guide to making beats on GarageBand is designed to take you from the peripheries of music production into the very heart of beat-making. With GarageBand’s intuitive tools and our structured approach, you will uncover the simplicity and creativity of crafting your first beat.
Whether you’re aiming to produce the next chart-topping hip-hop track or simply experimenting with different genres, we’ve got you covered. Let us embark on this sonic adventure together, and turn your musical dreams into palpable rhythms and grooves.
Introducing GarageBand: The Free Beat Making Powerhouse
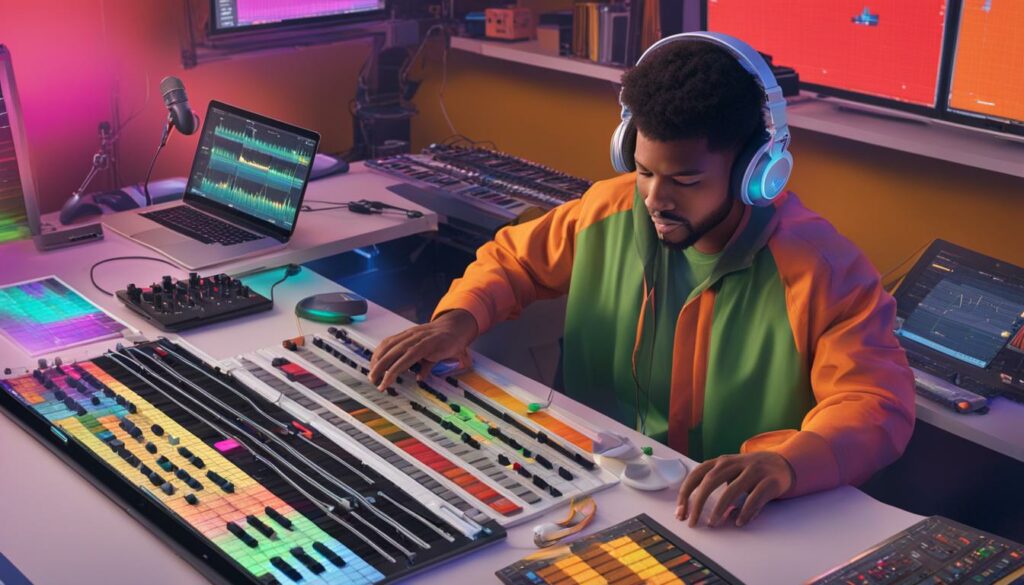
As we delve into the world of music production, one free digital audio workstation that stands out is GarageBand. A creation hub for both armature and experienced music producers, this robust platform serves as a starting point for countless artists who are eager to create music on GarageBand. Initially launched for Apple’s Mac and iOS devices, GarageBand’s array of instruments, loops, and user-friendly interface fosters an environment where creativity meets technology.
While GarageBand for Windows PC is not directly available due to its Apple exclusivity, the passion for production knows no bounds, with various workarounds involving emulation now part of the beat-making community’s conversation. Our emphasis here, however, will be on the native experience—one that Apple has refined over the years through continual updates and enhancements to GarageBand’s rich sound library and features.
GarageBand simplifies the beat production process with intuitive controls that aid in molding your musical ideas into reality. Whether you are tapping out drum rhythms, layering melodic structures, or recording live instruments, GarageBand’s toolkit is poised to cater to your creative needs. We’ll present valuable GarageBand beat production tips to open up the spectrum of possibilities for producing quality music using this accessible yet powerful software.
With a plethora of royalty-free loops at your disposal, the app enables producers to infuse unique sounds into their pieces. The beat-making process in GarageBand transcends genres, inviting you to explore beyond the typical confines of preset patterns and encouraging producers to instill their distinct aural signature using both software and physical instrument recordings. Truly, in GarageBand’s ecosystem, your imagination is the only limit.
Join us as we navigate through the core features of GarageBand, your digital gateway to crafting beats and producing music that resonates with listeners around the globe. Whether you are aiming for a polished masterpiece or a raw musical sketch, our guide will offer insights and guidance that align perfectly with your production journey.
Setting Up Your Workspace: Starting a New GarageBand Project

If you’re seeking easy steps to make beats on GarageBand, the journey begins by laying the groundwork—a process that unfolds with simplicity and precision. We’ll guide you through the foundational steps to ensure that your foray into music creation is as smooth as the beats you’ll soon be producing.
First, starting a new GarageBand project is akin to setting the stage for a performance. It’s where your musical inspiration will take physical shape. Open GarageBand and navigate to the top menu, click on ‘File > New’, or use the quick and efficient shortcut COMMAND+N, and there you’ll find the option for an ‘Empty Project’—a blank canvas awaiting your touch.
Upon initiating your project, GarageBand will present you with a pivotal decision: selecting your track type. Variations such as guitar or bass are readily at your disposal, empowering you to craft audio tracks that resonate with your artistic visions. This important step is your entrance into the realm of personalized music creation, where every element aligns with the narrative you wish to tell through your beats.
With your project space primed, it’s time to unleash your creativity. These easy steps to make beats on GarageBand are designed to seamlessly merge technical know-how with the expressive domain of music production. Let’s embark on this sonic crafting journey, with the spark of your imagination as the guiding light.
Exploring GarageBand’s Sound Library: Choose Your Instruments
Embarking on the journey of making beats in GarageBand, one of the thrilling moments is diving into the extensive GarageBand sound library. It’s a playground of sonic possibilities where choosing instruments in GarageBand can be as diverse and creative as your imagination allows. With an ever-expanding collection that encompasses everything from sharp electronic synths to the warm timbres of classical strings, the sound library is your oyster.
As we venture through the rich tapestry of sounds, we come to appreciate the vast range of options that are on offer. The GarageBand sound library doesn’t only cater to those with a penchant for modern beats but also to aficionados of classical music and everything in between. Whether it’s the deep resonating sounds of a bass guitar or the high clarity of a violin, each choice lays down a foundation for your track’s distinctive character.
Selecting the right instruments is pivotal in shaping the atmosphere of your composition. Picture a canvas where each stroke of color adds depth and emotion; similarly, each instrument in GarageBand enriches the sonic palette of your song. We advise not rushing this process, as the art of music production is akin to a fine wine — taking time to develop and refine.
Embrace the experimentation with different textures and layers that the GarageBand sound library offers. You might find that an electronic beat paired with a grand piano brings an unexpected edge to your track, or the inclusion of a String Ensemble elevates the melody to new heights. In understanding the power of choosing instruments in GarageBand, we begin to realize the potential that lies within a few clicks and drags.
By the end of this exploration, you’ll find yourself equipped with the knowledge to navigate this plethora of instruments and manipulate them to compose a beat that truly speaks your musical language. With each instrument’s distinctive sound, your track will glean an identity that is quintessentially yours, ready to captivate the ears of listeners worldwide.
Creating Your First Track: Utilizing Apple Loops

Welcome aspiring music producers! As we turn our creative attention to creating tracks in GarageBand, it’s vital to acknowledge the richness of Apple Loops within this versatile application. The Apple Loops library is a treasure trove for any artist looking to quickly and efficiently craft compelling tracks without starting from complete silence.
These pre-made audio loops are a powerful starting point for constructing your soundscapes. By utilizing Apple Loops, not only do we draw from a reservoir of high-quality recordings vetted by Apple’s exacting standards, but we also step into a workflow that accelerates the production process. Here’s how to leverage these loops to your creative advantage and set the stage for your musical masterpiece.
Navigating through the loop browser, we encounter scores of sounds that span genres, moods, and instruments, all meticulously tagged and tempo-synchronized for ease of layering and sequencing. With such a repertoire at our fingertips, the process of creating tracks in GarageBand becomes truly intuitive.
Picture this: there’s a synthetic groove that resonates with your project’s vibe—you simply drag and drop this loop onto the timeline in GarageBand’s Tracks Area. As effortless as this seems, the true delight is in discovering that you can stretch and mold these loops further. Want a longer sequence? Extend it by dragging the loop edge to duplicate it for the desired length.
In the entrancing dance of loops, we intricately build upon them to create the rhythmic spine of our track, layering various loops to eloquently speak to each other in harmonic and rhythmic symphony. Most importantly, remember that these loops are royalty-free, meaning that the beats crafted are yours to distribute and exhibit without reservation.
Let’s celebrate the beginning of this journey where, together, we walk through the gateway of music production; with utilizing Apple Loops as our chosen path, the promise of creating captivating tracks is brightly on the horizon in GarageBand.
Layering Beats: Making an Audio Track from Scratch
At the heart of music production in GarageBand lies the potential for layering beats to create something unique and dynamic. As we dive into making an audio track from scratch, our approach intertwines individual elements, layer by layer, crafting a rich tapestry of sound that begins with the basics and escalates to the multifaceted. Imagine painting with sound, where each stroke adds a new dimension to the evolving auditory landscape.
Our initial step is to lay down a foundation. Within GarageBand’s interface, we start by selecting a loop that resonates with our creative vision. With a simple click and drag, we pull this loop into the track area, where an individual stroke of sonic color comes alive against the canvas of silence. We define its scope, extending the loop to form an 8-bar phrase that will serve as our baseline.
The architecture of our track begins to rise as we add a new software instrument track. Here, we handpick an instrument from GarageBand’s extensive library that complements our initial loop. It can be a pulsating bass, a delicate string ensemble, or a bright piano—the choice mirrors our creative direction. With the instrument selected, it’s time to breathe life into our composition.
Through GarageBand’s interface, we can engage with musicality in its purest form—playing and recording MIDI sequences that add melodies and rhythms atop our foundational loop. This part of the process is akin to weaving; as we layer each thread, or in this case, beat by beat, our audio track begins to take a distinct shape, one that is deeply ours.
Weaving through the fabric of sound, we see our track growing, evolving from a simple loop into a complex and harmonious structure. With the seamless transition between these layers, creating an audio track from scratch becomes an experience that is both invigorating and rewarding. It’s in these moments that the true essence of making music in GarageBand shines brightest.
As we conclude this section, remember that the art of layering beats in GarageBand is not just about the mechanics of production, but the expression of creativity. It’s about taking raw, unformed sounds and sculpting them into a piece of art that speaks, that moves, and ultimately, that resonates.
The Role of MIDI in Beat Making: Recording with Software Instruments
Embarking on the journey of beat creation, we recognize the pivotal role of MIDI in beat making. As a cornerstone in the architecture of modern music production, MIDI basics are integral for harnessing the full potential of GarageBand’s capabilities. When we dive into recording with software instruments, it’s MIDI that serves as the crucial thread weaving together our musical ideas.
Understanding the Basics of MIDI
We understand MIDI, short for Musical Instrument Digital Interface, not as a sound, but as a language—a protocol that communicates note and expression information among various devices and GarageBand MIDI recording software. It doesn’t transmit audio; it sends data about the performance to software instruments, making it foundational in MIDI basics for aspiring producers. This data includes not just pitch and duration, but also dynamics and tempo, allowing for a nuanced reproduction of musical expression.
Recording MIDI in GarageBand starts with either connecting a MIDI controller or utilizing the built-in ‘musical typing’ feature. Here, you begin to add the notes that will form the melodic and harmonic structures in your composition. Accessing the vast array of virtual instruments within GarageBand’s library, we have the opportunity to inject a diverse range of sounds into our project—from powerful synthesizers to delicate pianos—each breathes life into the beats we craft.
Adding Melody and Harmony with MIDI
With the prowess of MIDI, adding melody with MIDI becomes a brisk and intuitive process. We maneuver within the Piano Roll editor, a grid-like space that graphically displays the notes played, to embed blossoming melodies into the fabric of our track. The notes here are not set in stone; we can move, stretch, and fine-tune each note’s velocity and position, ensuring that every chord and melodic line nestles perfectly within the rhythmic structure.
The harmonious aspect of our beat thrives through harmony in GarageBand. By choosing chords that complement the existing loops, we bolster the emotional impact of our creation, infusing our track with depth that resonates with listeners. It’s here, in the realm of MIDI recording, that we cautiously sculpt the sounds that will define our beat, and with the available tools, polish our creation until its every note exudes the exact feeling we intended to capture.
Through the conscientious crafting of MIDI sequences, and the intricate layering of MIDI’s melodic and harmonic elements, we steadily march towards the completion of a sonorous landscape. It’s in this process that our beats gain their distinct characteristics and stand out in a sea of digital creations. With these insights into the role of MIDI in beat making, we lay down the tracks for boundless creativity, ready for the next steps in manifesting our musical vision.
Navigating the Beat Sequencer: Crafting Custom Drum Patterns
When we delve into the realm of navigating the beat sequencer, we unlock the potential for crafting custom drum patterns on GarageBand that are limited only by our creative impulses. The Beat Sequencer is where precision meets art. Each row signifies a different drum sound; each column signifies a beat in your pattern. Step into the universe of advanced beat making on GarageBand, and transmute your rhythmic concepts into palpable, striking drum patterns.
With the Beat Sequencer, initiating a pattern is as simple as tapping squares to activate beats. This grid-based interface is intuitive, yet it affords the complexity needed for advanced beat making on GarageBand. Here, each selected step can undergo manipulation—altering volume for dynamic emphasis, tweaking attack for the right punch, setting repeats for lively rolls, or assigning probability values for that human touch, ensuring your patterns evolve with a life-like quality.
As we journey through the sequencer, we encounter the transforming power of velocity adjustments. This isn’t just about loudness; it’s about feeling the beat. Understand that in the nuances of volume lie the vibrancy and the pulse that give a track its beating heart. With a simple gesture, raise the stakes on a snare hit or bring a hi-hat into the background—distinctions that leave a listener compelled and immersed.
Let us not forget the allure of rhythmic variety—variations in beat repetitions can turn a rigid pattern into a groovy, complex tapestry. A technique we find particularly engaging is setting note repeats for creating snare rolls or double kicks, which surge through a track with exciting bursts of energy.
For a groove to truly groove, it must escape predictability. This is where we appreciate the innovation of the Beat Sequencer’s ‘Chance’ function. By assigning probability values, some beats may skip, others may strike, like a seasoned drummer adding spontaneous flairs that keep the rhythm section lively and utterly unpredictable.
Enthusiasts of GarageBand’s sequencer understand that it’s about painting patterns that fluctuate between uniformity and variation, creating rhythms that feel meticulously planned yet playfully random. The Beat Sequencer isn’t just a tool; it’s an invitation, a challenge to explore the depths of our rhythmic innovation and to transform our listeners’ experience from mere hearing to deeply feeling.
In our collective voyage of crafting custom drum patterns on GarageBand, we become both composers and inventors. Whether starting a beat, laying down a groove, or designing intricate percussive orchestrations, the Beat Sequencer is a cornerstone for manifesting the rhythmic soul of your music. With every beat crafted, GarageBand users are reminded that this is more than just beat making—it’s an act of sonic alchemy.
Recording Live Instruments: Injecting Organic Sounds into Your Beat
Embarking on recording live instruments on Garageband, we explore the fusion of digital realms with the vibrant, unrefined essence of organic sounds. The act of injecting organic sounds into our beats is not just an augmentation, but a transformation that enhances the overall texture, warmth, and authenticity of the music we create.
Preparing to Record a Physical Instrument
When we begin recording physical instruments, the connection between the musician and the instrument through GarageBand becomes a conduit for creative expression. The first step in this integration is to ensure that the instrument, be it a guitar, a bass, or any other that speaks the language of your soul, is properly connected. Aspiring beat producers must appreciate the nuance of Garageband live recording tips that stand between a good take and an exceptional one.
Choosing an audio track on GarageBand, then navigating through the sound-shaping amalgam of amps and effects plugins, we layer our beats with a myriad of aural landscapes. Whether it’s a mellow rhythm or a fierce solo, the tools at our disposal are both vast and precise. Tweaking the gain, adjusting the tone, and exploring modulation, we find that our control interface is a painter’s palette.
GarageBand’s emulation options fill the room with the echo of amplifiers and the resonance of effects, granting a live feel to the sonic environment we dwell in. One may sculpt the input, dialing it to perfection, and then, like a potter with clay, mold and shape the raw audio in post-recording—the tones, the sustain, the decay—all essential elements embraced in our pursuit of sound.
As we wrap up this section dedicated to recording live instruments, we cherish the organic hues and textures that blossom within our beats. Our track now breathes with life, a testimony to the robust nature of GarageBand’s capabilities and our pursuit of musical authenticity.
Mixing and Mastering: Polishing Your Beat to Perfection
As we journey deeper into the world of music production, the skilled art of mixing and mastering on GarageBand awaits. It’s here that our beat creation truly begins to shine. Mixing is where we bring together the various elements of our track to ensure each instrument and loop coexists harmoniously. Mastering, on the other hand, is the final gloss—a crucial stage to ensure our beat makes an impact on any system it’s played on. Our goal is to polish each beat to perfection, ensuring every part shines through with balance and clarity.
GarageBand provides an intuitive platform for polishing your beat, ensuring that the mixing and mastering process is accessible to all levels of music creators. From equalization, which allows us to adjust frequency levels and carve out space for each part of our beat, to panning, which enables us to place sounds within the stereo field, the possibilities are extensive. We can tweak the levels to ensure no single part overwhelms the others, maintaining the delicate equilibrium that quality mixing requires.
Our arsenal also includes a host of effects—reverb for adding depth, delay for nuanced echoes, and compression for leveling dynamics. With each adjustment and effect application, GarageBand’s mixing techniques elevate our beats from mere compilations of sounds to a cohesive audio experience. The mastering phase enhances this further by refining the overall loudness and ensuring consistency across all platforms.
In our own GarageBand projects, we revel in the sheer power of these tools. Equalization becomes a strategic game where frequencies either find their unique spot or get gently carved out to allow others to emerge. We pan with precision, knowing that positioning can often make the distinction between a flat and a dynamic mix. Level adjustments are meticulous; we nurture each volume fader as though it’s a delicate dial, sensitive to the slightest touch.
Through persistent tweaking and listening, we arrive at that sweet spot where each element of our beat is distinct yet part of a greater whole. The result? A polished musical narrative that flows seamlessly from the first beat to the last, capable of standing proudly on any stage or platform.
Join us as we push the boundaries of what can be achieved on GarageBand. Together, let us craft sounds that not only resonate technically but also emotionally, bringing our musical visions to life with a finish that speaks to both the mind and the soul.
Exporting and Sharing: From GarageBand to the World
Our creative journey in GarageBand culminates in the crucial steps of finalizing your musical project and exporting from GarageBand. It’s a wrap-up stage where the elements of our tracks are carefully assessed and tweaked to perfection. This finalizing process is more than just a technical formality—it’s a moment of celebration, recognizing the transformation from an idea into a polished, completed piece ready for listeners’ ears.
Finalizing Your Project
To ensure that our beats groove exactly as we envisioned, we meticulously go through each track, making adjustments where needed—be it the balance of levels, the harmonics of EQ, or the dynamics of compression. It’s imperative that during this stage, we embody the role of a critical listener, discerning even the slightest elements that might need refinement or enhancement. With every adjustment, we edge closer to finalizing your musical project, giving it the finesse it requires to make a solid impact.
Once we’re thoroughly satisfied, we usher in the GarageBand exporting tips we’ve gathered along the way, and proceed to render the project into an audio file format such as MP3 or AAC—the digital keys that open doors to countless listening devices across the globe. This step isn’t just about converting a project into an audio file; it’s about preparing our creation for the grand stage of the world.
Sharing Your Beats Online
After our beat graduates from the cozy quarters of GarageBand, it craves the vast expanse of the internet—a world teeming with music enthusiasts waiting to tap their feet to fresh rhythms. Sharing your beats online is made effortless, thanks to GarageBand sharing capabilities, which integrate seamlessly with online music platforms. It’s a gift to have at our disposal such accessible means to broadcast our creative expressions far and wide.
We leverage the power of social media, online music communities, and professional networks that not only exhibit our work but also encourage discourse, constructive critique, and collaborations. This sharing is not merely about exposure; it’s an exchange of ideas, the sparking of inspiration, and maybe, the birthing of an opportunity that could revolutionize our musical trajectory.
The pathways of online music distribution are wide and varied, offering different audiences and prospects. Whether we aspire to connect with fellow music producers, attract potential fans, or catch the attention of industry professionals, we have the freedom to navigate these avenues as we share our art with the world. Here we stand, at the precipice of potential—poised to release our beats from the nurturing nest of GarageBand into the embracing arms of the world’s soundscape.
Advanced GarageBand Tricks: Elevating Your Beat Making Skills
For those who aspire to excel in mastering beat making on GarageBand, it’s essential to explore the advanced tools that foster growth beyond basic production. As we delve deeper, we discover that GarageBand’s limitless potential is unlocked through advanced beat making on GarageBand. By tapping into intricate MIDI editing, sophisticated sequencing, and boundary-pushing sound design, we transform standard tracks into audial artworks. This exploration not only showcases GarageBand’s advanced capabilities but also exemplifies the creative prowess of its users.
The journey of a beat maker grows increasingly fascinating as we navigate through GarageBand advanced techniques. Experimenting with automation can enliven a track with evolving dynamics that ebb and flow with precision. Delving into layered effects, we can add textured depths that tease the ear. Tweaking EQ settings and applying compression catered to each instrument elevates the sonic quality, providing that professional sheen. Our expertise in beat development culminates as we master these methods, refining every beat into a polished, compelling ensemble.
Ultimately, our dedication to advanced beat making on GarageBand is a testament to our passion for the craft. It’s about embracing the complexities, challenging ourselves to innovate, and creating music that resonates on a higher echelon. As we continue to push the boundaries within GarageBand’s creative suite, we not only enhance our skillset but also assert our place in the diverse community of music producers forging their unique audio identities in the digital age.
FAQ
What is GarageBand and why is it a good choice for making beats?
GarageBand is a comprehensive and free digital audio workstation (DAW) that’s designed for Mac and iOS platforms, making it an excellent choice for music creators of all levels. With its vast sound library, intuitive interface, and diverse set of tools, it simplifies the beat-making process and empowers users to create professional-quality music across various genres.
Can I use GarageBand on a Windows PC?
GarageBand is primarily designed for the Mac and iOS platforms and is not natively available for Windows. While some workarounds involve emulation software, they may not provide the most stable or complete experience compared to using a native Apple device.
How do I start a new project in GarageBand?
To start a new project, open GarageBand, select ‘File > New’, or use the shortcut COMMAND+N, and choose an ‘Empty Project’. You can then select the preferred track type to begin crafting your composition.
How do I choose instruments in GarageBand?
In GarageBand’s sound library, you have access to various instrument sounds, from synths to orchestral samples. You can browse the library and select an instrument that matches the style and feel of the beat you intend to create.
How can I use Apple Loops in my tracks?
Apple Loops is a feature in GarageBand that houses an extensive collection of pre-recorded loops. You can browse these loops by genre, instrument, or mood, then drag and drop your chosen loops into the Tracks Area. You’re free to manipulate and arrange these loops to build your track’s foundation.
What are the basics of layering beats in GarageBand?
Layering beats involves starting with a foundation, such as a drum pattern or a loop, and then adding additional elements one by one. This could include bass lines, melodies, and harmonies, each placed on separate tracks which can then be edited and arranged to create a full, textured beat.
What role does MIDI play in beat making on GarageBand?
MIDI (Musical Instrument Digital Interface) is essential in digital music production as it allows for recording musical note information. In GarageBand, you can use MIDI to play and record notes with software instruments, creating melodies and harmonies that can be easily edited and arranged.
How do I navigate and utilize the Beat Sequencer?
The Beat Sequencer in GarageBand is a powerful tool for crafting custom drum patterns. It presents a step-by-step grid interface where you can design drum beats by toggling steps. It allows precise control of the rhythm, allowing you to create unique drum tracks.
How do I record live instruments in GarageBand?
To record live instruments, you need to connect your instrument to your Mac, select a new audio track in GarageBand, and ensure your instrument is properly set up and recognised by the software. You can then use GarageBand’s built-in amps and effects to shape your sound as you record.
What are some tips for mixing and mastering beats in GarageBand?
During the mixing and mastering phase, focus on balancing your track’s levels, panning individual elements for spatial diversity, and applying equalization and effects to enhance the overall sound. The aim is to create a polished final mix with clarity and depth.
How do I export and share my GarageBand beats?
Once your beat is complete and you’re satisfied with the mix, you can export your project by going to ‘Share’ and selecting the appropriate format for your needs. You can then share your beats online through various platforms to reach your audience.
How can I elevate my beat making skills in GarageBand to a more advanced level?
To advance your skills in beat making, explore GarageBand’s advanced features such as automation, layered effects, and complex MIDI editing. Experiment with different techniques and tools to enhance your creativity and develop a more sophisticated production style.