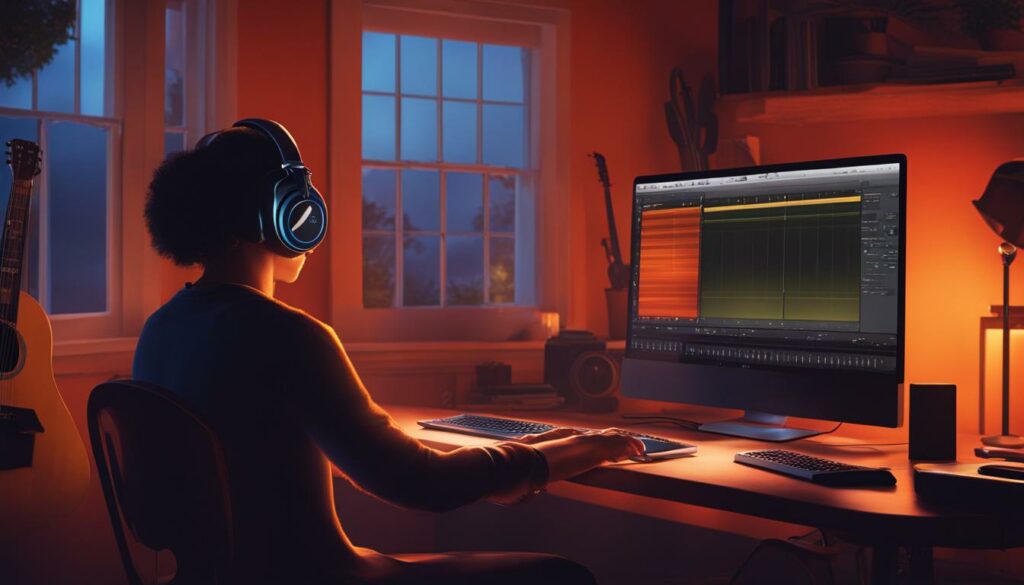
Welcome to the world of music creation with GarageBand, where we’ll embark on an informative journey, guiding you on how to record guitar on GarageBand. Whether you are playing the first chord on your beloved six-string or dreaming of laying down your own tracks, our GarageBand tutorial is specifically tailored for beginners like you. Our beginner’s guide to recording guitar on GarageBand will equip you with all the necessary knowledge to make your musical visions a reality.
Through this comprehensive guide, you’ll learn how to navigate GarageBand’s versatile platform, giving you the confidence to work the strings and the software. We stive to ensure you won’t just sound like a maestro, but you’ll be producing like one too. Let’s strike a chord together and begin your trailblazing journey into guitar recording.
Introduction to GarageBand Guitar Recording
Guitarists of all expertise levels, when we talk about GarageBand guitar recording, we’re referring to an inviting space where simplicity meets creativity. GarageBand, the highly praised digital audio workstation (DAW), promises an engaging and effortless experience in the realm of music production. It’s not just about hitting the record button; it’s about embracing a platform designed to escort you from the initial steps of setup to the rewarding moment of playback.
For those seeking a comprehensive guitar recording on GarageBand tutorial, look no further. GarageBand’s user-friendly interface is harmoniously tailored to support a variety of guitar types—acoustic, electric, or classical. This app extols the virtue of a beginner’s mindset, ensuring your dive into the sonic ocean is one of exploration and enjoyment rather than complexity and confusion.
Regardless of whether you’re setting up a microphone to capture the robust timbre of your acoustic guitar, or plugging directly into the app for a more modern approach, GarageBand stands ready to accommodate. We’re not here to just explain the process; we’re here to walk alongside you as you discover the joy of layering chord upon chord, riff after riff, all within GarageBand’s nuanced ecosystem.
With us, you’ll find that recording your guitar on this platform is not just about documenting sound—it’s about crafting your personal artistry. Submerge into the waves of audio technology with us, and let the digital shores of GarageBand be your newfound home for guitar recording.
Choosing Your Recording Method: Mic or Direct Input
When preparing for a GarageBand guitar recording setup, we’re presented with two distinct paths that cater to different preferences and sound expectations. Each approach, whether using a microphone or going through direct input, offers unique advantages that can significantly shape the sound of your recording on this versatile platform.
Utilizing Microphones for an Authentic Guitar Sound
To grasp the full richness and acoustic essence of your guitar, authentic guitar recording techniques often rely on the use of microphones. This method is ideal for those who appreciate the natural resonance of their instrument and aim to capture a sound that’s true to life. For acoustic guitarists, or those using an amp with their electric guitars, microphone recording is akin to painting with fine brushes, allowing for a detailed sonic expression. Remember, GuitarBand microphone recording isn’t just about placing any mic in front of your strings; it requires a thoughtful setup and strategic positioning to truly capture the depth of your instrument.
Direct Input Recording for Easy Experimentation
Alternatively, utilizing GarageBand direct input recording can simplify the process significantly. It’s the equivalent of sketching with bold strokes, providing a clear and direct sound that’s easy to manipulate within GarageBand’s digital environment. Especially convenient for electric guitars, this method enables you to experiment with various presets, amp designs, and pedalboard plugins. It’s essentially a playground for sonic exploration within GarageBand, offering a plethora of options without the hassle of microphones and external noise concerns.
We advise weighing the pros and cons between these methods in accordance with your artistic vision and the practicality of your recording environment. Whether you’re veering towards a pure, unadulterated acoustic tone or seeking the diverse sonic landscapes that direct input provides, GarageBand guitar recording techniques are flexible enough to serve your creative impulses. While both methods may diverge in technique, they converge in their capacity to turn your melodic ideas into aural realities.
As we continue, remember that whatever option you choose isn’t set in stone. Experimentation is key in finding the setup that resonates best with your style. Care to move between microphone clarity and direct input ease? Absolutely. That’s the beauty of GarageBand – it’s not just a tool; it’s an extension of your creative process, facilitating an effortless workflow that echoes your musical journey.
Preparing Your Guitar for Recording in GarageBand
As we venture into the realm of GarageBand guitar recording preparation, we recognize how essential it is to embark on this journey fully equipped. Setting up guitar GarageBand requires meticulosity and adherence to a methodical approach. Whether you’re a seasoned guitarist or a curious novice, the first melodious step in your recording expedition is to choose the suitable recording method for your artistic goal and to establish a seamless connection between your equipment and GarageBand.
We’re here to simplify the setting up guitar GarageBand process, no matter the recording path you elect—acoustic finesse with microphone capture or the modern precision of direct input. If you’re leaning towards microphone recording, position your microphone(s) thoughtfully near your guitar to embrace the sighs and roars of its acoustic vibrations, then connect them to your Mac using an audio interface or, if available, directly via USB. The location and direction of the microphone significantly impact the texture and quality of the sound captured—moving towards a world where each strum resonates as intended.
For aficionados of the crisp and clean, direct input proffers a different brand of convenience. Establish a conduit from your electric or electro-acoustic guitar directly to your Mac with an interface that transmundane digital gateways like GarageBand recognize, capturing your performance with singular clarity and ease of manipulation. This method, starkly different from mic recording, opens doors to a virtual trove of GarageBand’s presets and effects, ready to morph your sound into uncharted territories of timbral topography.
In both scenarios, one constant remains paramount—headphones. These auditory chaperones invite you into an intimate sonic sphere where you can monitor the intricacies of your recording and playback in real-time, free from extraneous distractions. Headphones serve as your studio confidant, ensuring that what you play is accurately represented in your auditory canvas.
With these preparations embraced, we confidently step closer to capturing the essence of your guitar’s voice. What awaits us is not just a recording, but a tapestry of sound, woven with the threads of your expression, facilitated by the harmony of well-prepared equipment and the undying potential of GarageBand.
Setting Up Your Project in GarageBand

When we begin the exciting task of setting up GarageBand project, it’s akin to laying down the first stone before constructing a house; this foundational step is critical for the success of our musical endeavours. So, we ensure that the GarageBand recording project setup process is meticulously attended to, allowing for a smooth and unobstructed creative workflow.
Selecting the Correct Audio Interface or USB Mic
Selecting the proper audio interface GarageBand recognizes or ensuring that your chosen USB mic selection is aptly connected is paramount to your project’s integrity. We advise you to attentively navigate through GarageBand’s preferences, making certain that your audio interface or USB mic is set as the Input Device. This ensures that every chord plucked and every note strummed is faithfully captured by GarageBand.
In instances of ambitious recordings that require the use of a stereo setup or multiple USB mics, be prepared to undertake some additional configuration steps. These are essential to maintain the fidelity of your guitar’s tone and to accurately portray its sonic character in the final mix.
With an unwavering focus on detail, we configure both input and output devices, fortifying the connection between our hardware and software. It’s this level of precision in setup that facilitates the authentic replication of every guitar string’s vibration, ultimately culminating in a project setup that is as robust as it is receptive.
Once your audio interface or USB mic is selected and any necessary configurations are made, you can proceed with peace of mind, knowing that your GarageBand project is primed to manifest your musical imaginings. At this juncture, we’re not just preparing a recording space; we’re conjuring a digital auditorium, awaiting the reverberation of your guitar’s soulful voice.
Creating and Configuring Your New Track
Once we have settled on our project settings, our next mission is to dive into GarageBand new track configuration. For those of us ready to create audio track GarageBand styles, we’re looking at a process as smooth as the strumming of a finely tuned guitar.
We begin by selecting ‘New Track’ from the ‘Track’ menu, which opens the doorway to our creative space. Here, we choose the type of track that resonates with our recording method—be it using a microphone for that authentic, acoustic sound or leveraging the convenience of direct input for that polished electrical vibe.
In the instance where our setup includes multiple microphones or instruments, we might find ourselves needing more than one track. No fret, we simply add additional tracks by using the command shortcut or through the ‘Track’ menu, always mindful of the symphony we’re about to compose.
GarageBand’s Sound Library is our next stop on this tour, a place where presets await to breathe life into our compositions. We can audition different styles, apply what fits, and remember, we can always mold and shape these presets later to better suit our masterpiece.
As we orchestrate our GarageBand session, let’s not forget the sage advice of musicians and producers alike—save your work, and save often. With a swift command, we secure our progress, ensuring that our creative achievements remain intact as we move forward in the recording process.
We are making great strides in our GarageBand journey. Our tracks stand ready, like blank canvases, inviting our musical brush strokes. Let’s charge ahead, knowing that our new track configurations are the foundations upon which our guitar recording aspirations will be built.
Adjusting Input Monitoring and Enabling Record

As we navigate the dynamic interface of GarageBand, ensuring optimal recording conditions is pivotal. A critical step in achieving this is adjusting GarageBand input monitoring, which is instrumental in shaping our recording experience. By enabling input monitoring, we allow ourselves to hear our guitar track through our headphones as we lay down each note. This feature becomes the bedrock of real-time auditory feedback, allowing us to make on-the-fly adjustments to our performance.
The essence of a well-orchestrated recording session lies in its setup. When working with multiple tracks, it’s essential that we enable the Input Monitoring setting for each. This ensures a cohesive sound, allowing us to experience the full breadth of our musical arrangement as we create it. Our commitment to detail extends beyond the auditory to the tactile, with the ease of a control-click on the track header bringing us to the necessary configurations.
Simultaneously, enabling record on GarageBand with the Record Enable feature is just as crucial. This functionality grants us the flexibility to select between recording individual tracks or the full ensemble in one harmonious outpour. Each track can be primed with a simple toggle, prepared to capture the soul of our music the moment inspiration strikes.
What we create within an arm’s reach should also be within an earshot. Thus, we diligently control-click and refine our settings. Input Monitoring and Record Enable become the guiding lights illuminating our recording path in GarageBand. As we harness these tools, we stand shoulder to shoulder with every musician who seeks not just to record, but to witness their creation unfold with clarity and precision.
Selecting and Customizing Guitar Presets
Embarking on the journey of recording guitar on GarageBand brings us to a crossroads of creativity—the selection and customization of guitar presets. GarageBand guitar presets customization is a pivotal step in defining the sound and tone of your recorded guitar. The choices we make here sculpt the aural personality of our tracks, lending character and nuance that resonate with our artistic vision.
Our exploration commences in GarageBand’s Sound Library, where an extensive collection of presets awaits our perusal. These presets serve as starting points, each embodying a distinct sonic profile that can be tailored to our preferences. Guitar presets GarageBand provides are not merely static; they can be transformed with ease, thanks to the intuitive Smart Controls area where EQ adjustments unfold with gratifying immediacy.
After delving into the preset options and pinpointing those that best complement our melodic intentions, we are greeted by the potent capabilities of the GarageBand Amp Designer. This innovative feature ushers us into a world of bespoke amplifier creation. Here, we can forge our custom amps, experimenting with varying amp types, cabinets, and microphone setups, all converging to fashion a distinctive tonal landscape that’s unmistakably ours.
In tandem with the Amp Designer, we encounter the versatility of the GarageBand Pedalboard plugin. This virtual sanctuary of stompboxes offers a playground for sound sculpting, allowing us to drag, tweak, and reorder an array of pedals. Each adjustment, each configuration, imparts a new dimension to our guitar’s voice, achieving a soundscape as unique as our creative fingerprint.
As we immerse ourselves in the process of personalizing guitar presets, we uncover the true power of GarageBand—a suite of tools that empowers guitarists to render their sonic dreams into reality. With each nuanced edit, we draw closer to the perfect expression of our musical ethos. So let us relish in the art of soundcraft, knowing that each choice we make in GarageBand’s palette of possibilities brings our guitar’s narrative to life.
Recording Your Guitar Performance
Embarking on the adventure of GarageBand guitar performance recording, we now reach the stage where every string vibration needs to be captured with absolute clarity. If we’re to record guitar track GarageBand style, meticulous attention is mandatory for every step of the recording session. Let’s ensure your music is heard just as you envision it.
First, we engage the monitoring button in GarageBand. This feature is indispensable as it lets us hear our guitar in real time through our headphones. It’s the critical auditory link between our performance and the recording process; one that allows us to adjust our playing based on direct feedback. Monitoring ensures that we maintain the aural integrity of our performance, and it should not be overlooked.
Gain setting on the audio interface is the next vital step before we send the strings humming into GarageBand’s digital realm. We have to set the gain carefully to avoid any distortion. The signal should be strong and clear, landing in the sweet zone, neither too low nor peaking into distortion. It’s a balancing act, one that we perform with precision to honor the voice of your guitar.
Selecting the right amplifier preset comes next. We navigate through GarageBand’s myriad of options to find the sound that best reflects the character of your performance. Whether opting for a crisp, clean tone or a heavy distorted growl, we ensure the levels are checked and the tone is tested.
Throughout the recording process, we regularly monitor our signal. Our vigilant ears are locked in, ready to make adjustments to the track as it unfolds. This constant vigilance in GarageBand guitar performance recording is our commitment to earning a high-quality output, one that captures the passion and precision of your guitar play.
Armed with this knowledge and focus on detail, we are ready to hit ‘record’. As the red light beckons, we embark on the journey of laying down the tracks that will soon echo your musical prowess. In GarageBand, every chord struck, every harmonic elicited, and every riff played becomes part of a timeless tapestry that we are eager to weave alongside you.
GarageBand Features for Recording Without Emulators
In the realm of digital audio workstations, GarageBand has solidified its reputation as a haven for musicians and producers alike, particularly for its robust features that facilitate seamless guitar recording. However, a question often aris from the community of Windows PC users: Can one access GarageBand for Windows PC without the complications of emulators? We’re here to shed light on the possibility of engaging with an official GarageBand for Windows download that offers a native ‘click and play’ experience.
Traditionally, Windows users have had to explore various workarounds, including emulators, to bridge the gap between platforms. However, cater to these users looking for GarageBand without emulators, an authentic GarageBand for Windows solution is a welcomed advancement. This direct approach not only streamlines the creative process but also ensures that the full spectrum of GarageBand’s capabilities is at your disposal, devoid of the performance issues that can accompany emulation.
It’s worth noting that while enthusiasts often search for GarageBand for Windows without emulators, the official status of such an adaptation requires confirmation from legitimate sources. We advise our readers to stay informed about the latest developments from official Apple channels. As we continue to explore and harness the power of GarageBand on macOS, we remain vigilant for any official release or announcement that may expand the horizons for Windows users with an official GarageBand for Windows download.
FAQ
What do I need to start recording my guitar on GarageBand?
To start recording your guitar on GarageBand, you’ll need a computer with GarageBand installed, a guitar, and depending on your chosen method, either a microphone with a stand and audio interface for acoustic recording or an electric guitar with a USB or audio interface for direct input. Headphones are also recommended for real-time monitoring.
How do I set up my project in GarageBand for guitar recording?
Begin by launching GarageBand and creating a new Empty Project. Then, go to the Preferences section and make sure the correct audio interface or USB microphone is selected as your Input Device. After setting your preferences, create and name a new audio track that matches your recording method and adjust the settings accordingly.
Should I use a microphone or direct input to record my guitar on GarageBand?
The choice between using a microphone or direct input depends on the type of sound you’re aiming to capture. A microphone is ideal for recording acoustic guitars or capturing the sound of an amplified electric guitar in a more natural setting, while direct input is great for electric or electro-acoustic guitars and allows you to use GarageBand’s built-in amps and effects for sound shaping.
What are some tips for positioning a microphone when recording guitar on GarageBand?
When using a microphone to record guitar on GarageBand, aim to position the microphone close to where the neck meets the body for a balanced sound. Experiment with the distance and angle to get the best sound for your specific guitar and room conditions. Be mindful of reducing background noise and preventing the mic from picking up unwanted sounds.
How do I use GarageBand’s Amp Designer and Pedalboard plugins?
GarageBand’s Amp Designer and Pedalboard plugins can be accessed once you’ve created a new track with a guitar preset. Select your track and open Smart Controls, where you can click on the Amp or Pedalboard icons. This brings up interfaces that allow you to design custom amps and pedalboards, where you can adjust settings and rearrange pedals to your liking.
Can I use GarageBand to record guitar on a Windows PC?
While GarageBand is designed for iOS and macOS devices, there are unofficial methods to run GarageBand on a Windows PC. However, these methods may involve the use of emulators or other complex setups. Apple does not officially support GarageBand on Windows, so it’s vital to ensure any workaround is safe and effective before attempting it.
How do I monitor my guitar recording in GarageBand?
To monitor your guitar recording, ensure that Input Monitoring is enabled on your track. This will allow you to hear your guitar through headphones as you play. Be careful with the monitoring volume to avoid feedback. It’s also important to set up the correct levels on your audio interface or USB mic to prevent clipping and distortion.
How can I create a new audio track for my guitar recording in GarageBand?
After setting up your GarageBand project, click on the “+” button at the top left corner of the GarageBand window to create a new track. Choose ‘Real Instrument’ if you’re using a microphone or ‘Guitar/Bass’ if you are using direct input. You can name this track and modify the input and output settings before starting your recording session.
What should I do if my guitar signal is too low or too loud in GarageBand?
If the guitar signal in GarageBand is too low or too loud, adjust the input gain on your audio interface or USB microphone until you achieve a strong, clear signal that doesn’t clip. It’s crucial to ensure the level meter occasionally peaks around the yellow section and never hits the red to prevent distortion.
How can I enhance my guitar recording in GarageBand?
To enhance your guitar recording, GarageBand offers various built-in features. You can use the EQ settings to shape the tone of your guitar, add effects with the Pedalboard, or simulate different amp sounds with the Amp Designer. Additionally, you can use the Smart Controls to dynamically adjust and automate various parameters during playback.