For aspiring musicians, podcasters, and anyone looking to capture sound with professional flair, learning how to record on GarageBand is a skill worth mastering. Our GarageBand audio recording tutorial is designed to navigate you through every tap and swipe needed to bring your sonic vision to life. Whether you’ve dabbled in recording before or are standing at the threshold of your first project, this step-by-step guide to recording on GarageBand empowers you to create with confidence and ease. Let’s unlock the full potential of your iOS device and transform your ideas into audio realities. Join us as we delve into the world of digital recording – where your creativity meets GarageBand’s innovative technology.
Getting Started with GarageBand Recording
Welcome to our beginner’s guide to recording on GarageBand, where we make the process of setting up GarageBand for your first recording session as straightforward as possible. With a host of GarageBand recording tips at your disposal, your journey from novice to seasoned audio producer is about to begin. We’ll be using real-time application strategies to unfold the most efficient GarageBand recording techniques. So let’s get started.
Introduction to GarageBand for Beginners
If you’re new to the world of digital audio workstations, GarageBand is the perfect place to start. Intuitive and user-friendly, it equips you with a suite of tools to record anything from podcasts to musical masterpieces right on your iOS device. Switching between ‘Fun’ view and ‘Studio’ view adapts the interface for simplicity or enhanced control, providing tailored GarageBand recording experiences based on your comfort level. Recording in GarageBand is essentially one tap away, so let’s set up your session without delay.
Setting Up Your GarageBand Session
When you first open GarageBand, familiarize yourself with the main interface. Begin by selecting the right view for your needs: ‘Fun’ for a more playful, easy-to-use interface with big, bold controls, or ‘Studio’ for advanced recording settings. It’s essential to bear in mind the length of your project; you have the option to extend the section length to accommodate recordings that go beyond the default setting.
Assuming you’re utilizing an external microphone or audio device, GarageBand allows you to adjust the input settings. Touch the Input button to set these levels automatically or manually control them using the ‘In level slider’. Be conscious of peaking levels—indicated by the slider turning red—to avoid distortion. The application also offers a ‘Noise Gate’ feature to reduce ambient and unintended noise, creating a crisp and clear recording.
Monitoring your input in real-time is especially useful. Simply tap the ‘Monitor’ button below the ‘Out level slider’ when an external device is connected. As you navigate through the initial steps, your excitement grows—this is the moment where you transform your creative thoughts into audible artistry.
The final touch to perfect introductory vocals involves fiddling with the ‘Extreme Tuning’ preset after you determine the song’s key and scale. It’s like autotune in your pocket, refining your recording for that professional sheen. There, you’re now set up and ready to capture your creativity. With just a handful of pointers, GarageBand’s accessible platform guides you from initializing to actualizing the recording.
Remember, we’re here to ensure that your GarageBand recording journey starts on the right note!
Navigating the GarageBand Interface
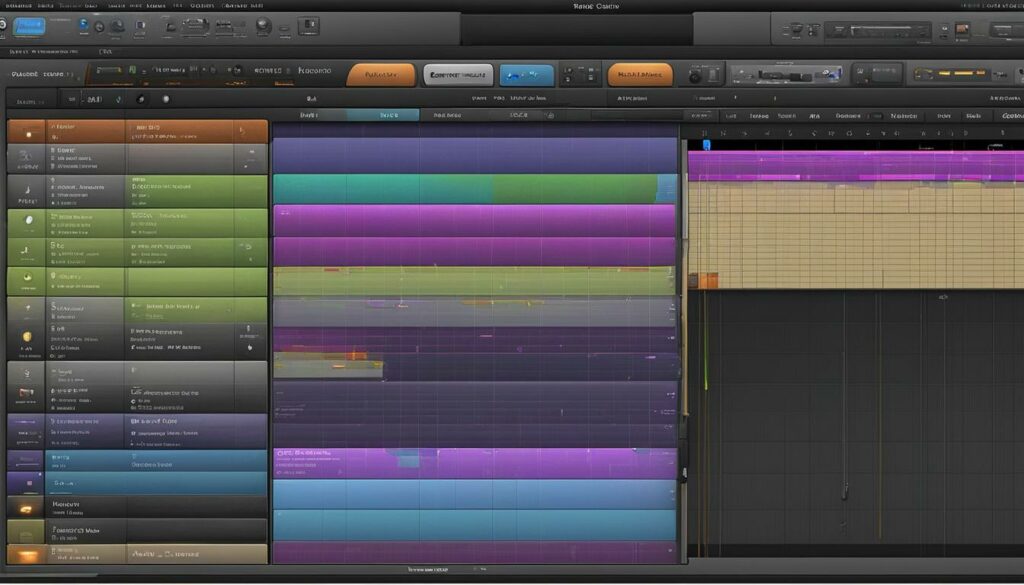
Embarking on a GarageBand interface walkthrough, we’ll explore how effortlessly you can navigate the robust and dynamic workspace of GarageBand. It’s designed with both the beginner and seasoned audio enthusiast in mind, so let’s dive into the controls and features that make this software such a pleasure to use.
The heart of GarageBand’s usability lies in its versatile interface, which seamlessly adapts to suit your creative mood. Whether you choose the Fun view with its quick and playful adjustments or the Studio view for a more comprehensive array of tools, the transition is just a tap away. Look for the Controls button to switch between these two views as needed.
At your disposal is a ruler, prominently displayed across the tracks area, providing a visual representation of your recording region. It turns red during recording sessions, offering an at-a-glance confirmation of which sections you’ve captured. Nearby, the all-important In level slider allows precise adjustment of input volumes, vital for maintaining the integrity of your sound. Remember to keep your levels out of the red to prevent unwelcome audio distortion.
While you navigate through the interface, you’ll discover indispensable tools, such as the Noise Gate for silencing background noise, and the Input Settings for automatic adjustments. And with an external microphone connected, monitoring your input becomes a toggle away with the Monitor button. This suite of features positions GarageBand as a top-tier choice for creators looking to harness their sound with finesse.
Incorporating professional techniques during setup, such as tweaking the Noise Gate or sampling the presets to change up your track’s sound, is streamlined within the GarageBand environment. Each adjustment is a step towards perfecting your audio piece, whether it’s vocal or instrumental, and it’s all done within the intuitive interface of this powerful app.
As we explore further, our goal is to showcase how navigating GarageBand is not just about learning software; it’s about mastering a canvas that brings your sounds to life.
Recording Your First Audio Track on GarageBand
Embarking on your musical journey with GarageBand begins with the simple yet powerful Audio Recorder tool in GarageBand. This is where your raw creativity gets transformed into a tangible audio track that you can shape and refine. Let’s ease into this process and start laying down your first recording.
Understanding the Audio Recorder Tool
The very first step to capturing your sound is to get acquainted with the Audio Recorder. It’s a versatile feature that enables you to record a wide range of sounds using either the built-in microphone on your iPhone or an external microphone that connects to it. As soon you tap the record button, the magic starts to happen, and your recording gets underway. Just play or sing into the microphone, and GarageBand begins to commit your performance to memory.
Once you’ve performed your piece, a mere tap on the play button continues your odyssey, allowing you to replay and relish what you’ve accomplished. It’s not just about recording; it’s also about reviewing and perfecting your art.
Adjusting the Microphone Input Level for Optimal Sound
To ensure a recording free from distortion, we focus on the Microphone input level. It’s imperative to adjust the In level slider so it remains green, avoiding any hint of red that signifies peaking levels. Should your connected microphone support it, you’ll have the luxury of toggling between mono and stereo with the channel button for an even richer sound, or adjusting the levels to your heart’s content for that optimal sound recording in GarageBand.
Mastering the Recording Controls
With the fundamentals of recording down, mastering GarageBand recording controls becomes your focus. Here, tools like the Input Settings allow for tailoring the input level response—automatic or manual—ensuring seamless integration with your external devices. A Noise Gate option stands ready to diminish unwanted ambient noise, enhancing the clarity of your recording. Don’t forget, monitoring your sound can be toggled on or off for immediate feedback through the Monitor function.
Familiarity with the recording controls in GarageBand, such as starting and stopping with the control bar buttons and employing various presets to tweak your audio, is the key to mastering GarageBand recording. It’s about bringing precision and professionalism to your sound at the touch of a button.
By now, you should feel prepared to record audio with confidence. You’re not just using an app; you’re wielding a potent tool designed to capture every nuance of your sound. Go ahead—strike that chord, belt that note, narrate that story—and make it truly your own.
Perfecting Your Recording: Tips and Techniques
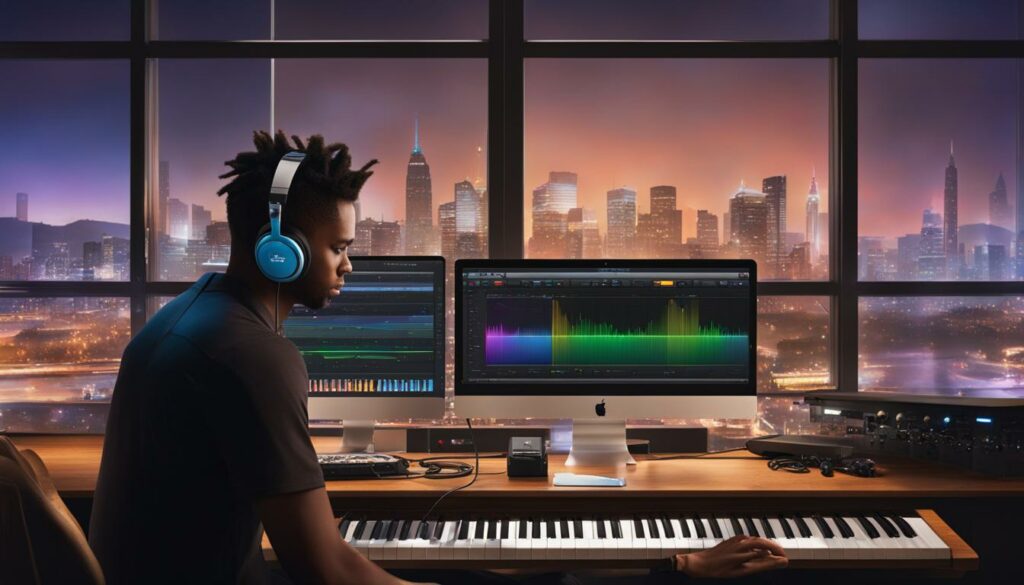
As we venture further into the auditory realm of GarageBand, the crucial phase of perfecting GarageBand recordings comes into play. It’s where the subtle nuances of your track take shape, transforming a good recording into a great one. With a few strategic adjustments, employing GarageBand recording best practices will lead to superior sound quality and the satisfaction of a job well done. Here are our insider tips to ensure your tracks stand out.
Firstly, optimizing the input settings is essential. Whether you’re recording vocals or instruments, setting the input levels sets the foundation for a clear and dynamic recording. Be vigilant about the In level slider; it’s your first defense against distortion, indicating when levels are too high. Keep it out of the red to maintain the purity of your sound.
Noise can be an unwelcome guest during recording sessions. Employing a noise gate is like adding a bouncer to your tracks, ensuring that only the sounds you want are heard. Start by tapping the Input Settings button, and turn the Noise Gate on. Adjust the slider until you achieve the clean sound space that allows your recording to be heard without low-level distractions.
Engage with different presets to discover unique sound characteristics that embellish your tracks. These presets offer tailored sounds ranging from bright and punchy to warm and atmospheric. Experimentation is key here; keep adjusting until you find the preset that elevates your recording’s emotional impact.
For those using external microphones, monitoring is an invaluable tool. With monitoring enabled, you can hear exactly what’s being recorded in real-time, allowing you to make real-time adjustments for the high-quality input your work deserves. Simply tap the Monitor button and witness your recording evolve as you adjust and perfect.
Our commitment to you is to present these strategies as the gateway to professional-sounding recordings. Adjust input levels to avoid distortion, use a noise gate to cut out what’s not needed, and delve into the diverse range of presets for a signature sound. Keep these best practices in mind, and your recordings will not just sound good; they will resonate with the clarity and definition of a masterfully crafted audio production.
Recording Vocals on GarageBand with Precision
As we delve into the nuanced world of audio production, recording vocals on GarageBand stands as a pivotal undertaking for artists and producers alike. The versatility and exceptional functionality provided by GarageBand allow for a streamlined and meticulous approach to vocal recording. With judicious setup and utilization of its powerful tools, from setting up vocal tracks to applying the Extreme Tuning effect, we’re here to guide you through each step to ensure your vocal takes are captured flawlessly.
Setting Up for Vocal Recording
Before hitting the record button, getting your setup right is imperative to achieve that perfect take. It all starts with adjusting your input levels—the cornerstone of any good recording. Swiftly navigate to the In level slider within GarageBand and perform modifications to sidestep any distortion. If you’ve connected an external mic, remember to select the appropriate input channel—whether it be Input 1, Input 2, or a balanced stereo configuration—to lay the groundwork for your vocal masterpiece.
Background noise can be quite the adversary in getting a clean recording, but with the noise gate feature at your disposal, you can quiet those pesky, unwanted sounds with finesse. And for those of us who prefer to monitor as we record, enabling the real-time listening function provides an immediate reflection of the auditory magic you’re creating—bringing an added layer of control to your recording session.
Using the Extreme Tuning Effect for Vocals
Now for the magic touch—the Extreme Tuning effect. Picture this as your secret weapon for that contemporary, polished vocal sound heard across top-charting hits. By setting your song’s key and scale appropriately, this Autotune-esque tool gently nudges your vocals to align harmoniously with the structured musical backdrop of your track. This effect doesn’t just refine; it transforms your vocals into a tuned, professional-sounding piece that will resonate with your audience.
Through these initial steps, we set the stage for a vocal recording experience defined by precision and quality. Enable the GarageBand vocal effects, adjust the input thresholds, and utilize the groundbreaking features such as the Extreme Tuning effect. Now you’re more than ready to take your vocals to new heights and let your creativity soar within the realms of music production.
Together, we embark on this journey to harness the full potential of GarageBand for a stellar vocal showcase.
Recording Instruments on GarageBand
When we talk about creating music on an iOS device, recording instruments on GarageBand stands out as a feature-rich platform for musicians of all levels. The process mirrors that of vocal recordings, but with a fine-tuned approach that caters to the unique qualities of each instrument. Whether you’re capturing the deep resonance of a cello or the bright twang of an electric guitar, our shared insights will help you navigate the nuances of instrument audio recording.
First, let’s look at the input levels—a critical factor in ensuring your instrument’s sound is captured with clarity and richness. Here, we find ourselves revisiting the In level slider, adjusting it to prevent those peaks from turning red and retaining the dynamic range of your instrument.
Diving deeper into GarageBand’s toolbox, we encounter a variety of audio effects and presets designed to enhance your recordings. From clean amplification to outlandish effects, GarageBand turns your iPhone into a sonic playground. These presets can fundamentally alter or subtly adorn the natural sound of your instrument, offering a breadth of options to experiment with until you hit the perfect tone.
Moreover, the art of instrument audio recording isn’t just about the initial capture; it’s also about how you navigate the subsequent. The instrument’s character comes to life as you refine the input settings—chiseling away at the sound until it slots perfectly into your mix. With the right balance and a bit of creativity, the resulting audio feels both wide-ranging and intricately detailed.
Together, as we explore these capabilities, we uncover the simplicity and power of GarageBand. Bringing forth vivid instrumental recordings is just a matter of tapping into this rich resource, letting you convey the emotion of every note played. Follow along as we continue to unravel the potential of this dynamic app, shaping our sonic explorations into polished, professional recordings.
The journey of your instrument from a mere concept to a fully realized track is waiting; let’s create with GarageBand.
Editing Your Tracks: Split, Move, and Delete
When it comes to editing tracks in GarageBand, having the knowledge to split, move, and delete audio regions is crucial for a crisp, well-structured production. It’s our go-to method for refining the narrative of our music or podcasts, ensuring that every transition is seamless, and every segment sounds exactly as intended. Let’s delve into how we can accomplish this with precision.
How to Split and Cut Audio Regions
A common task in editing tracks in GarageBand is splitting audio regions. This is a simple yet powerful technique to make precise edits or remove parts from our audio. To achieve this, we place the playhead at our desired location on the blue audio track. Then we execute the command to split the region, either by using the Edit menu and clicking on ‘Split Regions at Playhead’ or by pressing the ⇧⌘T keyboard shortcut. This action grants us the flexibility to isolate, rearrange, or eliminate specific portions of tracks without disrupting the entire piece, ensuring our GarageBand clips organization is on point.
Managing Multiple Tracks and Clips
After splitting audio regions on GarageBand, managing multiple tracks and clips becomes the next critical step toward a polished final product. Meticulously adjusting the edges of our tracks enables us to refine the beginning and end points of our audio clips. If we need to fill a gap or reposition a segment after removing a part, it’s as simple as selecting a clip and dragging it to the desired location. For bulk actions, we utilize the capability to select and move multiple clips simultaneously—holding the ‘Shift’ key allows us to select additional clips. If an edit doesn’t go as planned, the option to undo with ⌘Z is always a click away. Through these methods, managing multiple tracks becomes a straightforward process, empowering us to create smooth transition and maintain a cohesive narrative flow in our projects.
Through these editing techniques, our mastery of GarageBand not only allows us to produce work with professional standards but also elevates our capability to convey our intended message or musical idea. Whether we’re crafting the next viral podcast or an aspiring chart-topper, these fundamental skills in track manipulation are our building blocks to a compelling audio experience.
Enhancing Your Tracks with GarageBand’s Built-In EQ
When it comes to producing music that resonates and connects with the listener, GarageBand EQ settings play a crucial role in enhancing tracks with equalization. With the precision of a surgeon’s tools, the built-in Equalizer (EQ) in GarageBand enables us to sculpt the frequency spectrum of our tracks, giving us the ability to highlight or diminish specific elements of the sound.
Our first step towards enhancing tracks with equalization is to select the track that requires EQ adjustments. From there, clicking on the Smart Controls button brings up an array of options, where we find the key to unlocking the potential of our audio—the EQ settings.
The EQ graph is the canvas upon which we paint our sonic masterpiece. Sliding our fingers across the available frequencies, we can boost the bright trebles for a more airy sound or attenuate muddy bass frequencies for a cleaner mix. It’s a tactile and intuitive approach that GarageBand provides, making the often complex task of equalization surprisingly straightforward and fulfilling.
As we tweak the GarageBand EQ settings, we’re not just moving sliders; we’re shaping the mood and tone of our music. EQ presets offer a springboard into the world of frequency adjustment, tailored for different instruments and vocals. These presets serve as a fantastic starting point, especially when we eagerly seek to define our own unique sound.
By utilizing these EQ presets effectively, we enhance the clarity and intensity of our tracks. Whether we are looking for the warm thump of a bass guitar or the crisp articulation of a spoken word piece, these tailored settings help us navigate towards that perfect sound. And with each adjustment, our tracks morph closer to the professional quality that stands out in a crowded musical landscape.
We embrace each opportunity to refine our tracks, knowing that with GarageBand’s EQ settings, we hold the power to elevate our music from the ordinary to the extraordinary.
Adding Depth with Apple Loops and Sound Effects
As we delve deeper into the dynamic world of music creation, we discover the powerful role that Apple Loops in GarageBand play in adding depth and richness to our projects. These loops serve as a treasure trove of sonic elements that can enhance any musical endeavor we embark on. Let’s uncover the ways in which these features allow us to enrich our music with diverse auditory elements.
Within GarageBand, we find an inclusive library brimming with a variety of loops that can catapult our tracks into new territories. With a simple preview and drag action, we can seamlessly integrate these Apple Loops onto any track, instantly creating layers of sound that can be the difference between a flat composition and a textured soundscape.
Our creative flow in music production is amplified by the intuitive filters within the Apple Loops browser. Cultivating the perfect mood or complementing the musical genre we’re targeting becomes an effortless quest. These filters help us scout for loops based on the instrument type, music genre, and mood, ensuring that ever-elusive sound we hear in our heads is now at our fingertips.
In addition to musical loops, the aspect of adding sound effects with GarageBand cannot be overstated. It’s astonishing how a well-placed sound effect can transform a project from a mere background track to a pivotal focal point that grabs the listener’s attention. GarageBand gives us the capability to layer in these effects with precision, so we can construct an auditory experience that is both immersive and memorable.
The true beauty of using Apple Loops and sound effects lies in the seamless integration and the inspiration it kindles within us. As we experiment and explore, we’re often led to creative avenues previously untraveled. By embracing the rich palette of sounds offered by GarageBand, our music ascends to a new level of intricacy and appeal, resonating deeply with our audience.
We rejoice in the boundless creative potential that Apple Loops and sound effects offer, bringing us closer to realizing the full scope of our musical visions.
Incorporating Video into Your GarageBand Project
Integrating visuals with audio opens up a new horizon of creativity, and GarageBand video projects make this fusion effortless and eloquent. For those of us looking to enrich our audio work with a visual narrative, syncing audio with video on GarageBand provides a harmonious solution. We’ll explore how to add the dimension of sight to sound, transforming your project into a synchronized audio-visual experience.
When we import a video file into GarageBand, a track containing the video’s original audio is created automatically. This seamless integration ensures that the synchronization between auditory and visual elements is maintained, allowing us to focus on the creative aspect of layering additional sounds. Whether it’s dramatic sound effects, atmospheric dialogue, or an evocative music score, we’re equipped to enhance the video without the hassle of manual syncing.
The process is simple: through the File menu, we import our chosen video and GarageBand handles the rest. A dedicated video track aligns with our project timeline, enabling us to add and adjust audio elements in real time as the video plays. This robust feature set positions GarageBand as a valuable tool for filmmakers, YouTubers, and multimedia creators aspiring to produce content with a compelling audio-visual synergy. Together, we revel in the power to shape not just the auditory, but also the visual story within our productions.
FAQ
How do I start a new recording project on GarageBand?
To start a new recording project, open GarageBand, select ‘File’ from the top menu, and click on ‘New’. Choose the type of project best suited for your recording, such as an audio track, and you’ll be ready to begin recording.
What are the different views available in GarageBand?
In GarageBand, you can switch between the ‘Fun’ view and the ‘Studio’ view. The Fun view provides basic recording features, while the Studio view offers advanced controls for detailed sound manipulation.
How do I ensure optimal sound quality when recording?
Ensure optimal sound quality by setting the microphone input level correctly, so it doesn’t peak into the red, which can cause distortion. Use the In level slider to adjust the input level, and if you’re using an external mic, enable the monitoring feature to hear the input clearly as you record.
What is the Audio Recorder tool in GarageBand?
The Audio Recorder is a feature in GarageBand that lets you record live audio using your device’s built-in microphone or an external microphone. It allows you to capture vocals, instruments, or any other sounds directly into your project.
Can I record using an external microphone with GarageBand?
Yes, GarageBand supports external microphones. To use one, connect it to your device and select it as your input source in GarageBand’s settings. You can then monitor and adjust the input level as needed before recording.
How do I apply the Extreme Tuning effect to my vocals in GarageBand?
To apply the Extreme Tuning effect, first ensure you have set the key and scale of your song in the project settings. Then select your vocal track, go to the Smart Controls, and choose the Extreme Tuning preset from the available vocal effects.
How can I edit an audio region in GarageBand?
To edit an audio region, move the playhead to where you want to make a split or edit, then use the ‘Split at Playhead’ command under the Edit menu. You can then delete, move, or adjust the region as required.
What are Apple Loops and how can I use them in GarageBand?
Apple Loops are pre-recorded music snippets that you can add to your project to enhance your track. You can browse through various loops in different genres and drag your chosen loop into the project timeline.
How do I sync my music project with a video in GarageBand?
To sync music with a video, import the video file into your GarageBand project. The audio from the video will automatically align with the playhead’s current position, and you can then begin adding additional music or sound effects.
Can I fix timing issues in GarageBand?
Yes, GarageBand provides quantization features that can help you correct timing issues in your recordings. You can select a region and apply the quantization setting, which aligns the notes to the nearest beat or subdivision.
What should I do if I’m experiencing latency during recording?
If you’re experiencing latency issues, try reducing the buffer size in GarageBand’s preferences, close other apps running in the background, and use a lower track count or fewer plug-ins. For external audio interfaces, check if there’s a direct monitoring option available.
Is there a way to automate volume or pan settings in GarageBand?
Yes, automation can be used to change volume, pan, and other effects over time. To use automation in GarageBand, select the track you wish to automate, choose ‘Show Automation’ from the mix menu, and adjust your settings on the automation curve.
Can I share my GarageBand project with others?
Yes, GarageBand allows you to share your projects. You can export your finished song to your music library, share it via email, or upload to platforms like SoundCloud, depending on the version of GarageBand you’re using.
