We understand the allure and necessity of seamless voice recording, whether for podcasts, music, or professional voice-overs. With our comprehensive GarageBand voice recording tutorial, we’ll guide you through the nuances of capturing clear and impactful audio. Our voice recording tips on GarageBand are designed to empower you, no matter your skill level, to make the most out of your recording sessions on this robust platform.
The intuitive controls and versatile features of GarageBand offer a symphony of tools at your fingertips, perfect for crafting the high-quality sound you aspire to achieve. Follow us as we delve into the art and science of how to record voice on GarageBand, providing you with actionable insight to elevate your audio recordings.
Introducing Voice Recording on GarageBand
As we venture into the realm of digital audio creation, GarageBand stands as a beacon of simplicity and depth, perfectly suited for both musical novices and seasoned pros. For anyone eager to embark on a journey of sound exploration, our beginner’s guide to recording voice on GarageBand is your quintessential first step. GarageBand, Apple’s cutting-edge digital audio workstation (DAW), simplifies recording vocals, instruments, and an array of sounds, offering a suite of tools for users at all levels.
GarageBand’s intuitive platform is designed to ensure that even beginners can optimize voice recording on GarageBand with ease. The DAW provides the capability to record using your device’s built-in microphone or an array of external microphones, broadening the horizon for sound capture. We understand the importance of creating high-quality recordings effortlessly and offer insights into the numerous features that make this possible.
Navigating through GarageBand’s multitude of views and presets allows for versatility and control in the recording process. Whether you’re in need of quick fun sound changes or more comprehensive enhancements to your recording, the choice is at your fingertips. GarageBand comes equipped with two notable views—the Fun view and the Studio view—each offering a distinct level of control over your audio recordings.
The ‘Fun view’ tends to attract users with its immediate sound-changing capabilities, providing an entertaining and straightforward way to alter your recordings. On the other hand, ‘Studio view’ digs deeper, offering tools and settings that promise to augment your audio with a more polished touch. Knowing when and how to leverage these tools is key to optimizing your audio projects, and we’re here to help you master this art.
In this guide, we’ll also shed light on the pivotal task of adjusting the microphone input levels. It’s a critical step, as setting the levels appropriately can significantly influence the purity and clarity of your recording. By understanding how to adjust the ‘In level’ slider and use the noise gate feature, you can confidently curtail the intrusion of unwanted noise, ensuring your voice remains in the spotlight.
We’ll delve into the mechanics of your microphone settings, discussing how you can alter and set input levels manually—or even automatically—to achieve the best possible sound. It’s about empowering you to create recordings that are not only clear but also free of distortion or other audio artifacts. This approach reaffirms our commitment to equipping you with knowledge that will elevate your audio recording experience.
Our endeavors guide you through every step, ensuring that your path to becoming proficient with GarageBand is as seamless as the platform itself. Stay tuned as we traverse the landscape of voice recording on GarageBand, providing you with the insights to create, adjust, and truly make the most of your vocal tracks.
Getting Started with GarageBand Voice Recording
We’re thrilled to share our step-by-step guide to record voice on GarageBand, a fundamental resource to help you on your journey through the innovative platform of Apple’s renowned DAW. Let’s dive into the initial steps of setting up GarageBand for voice recording to ensure your sessions unfold with precision and ease.
Launching the App and Selecting the Proper Template
To commence the voice recording process, we begin by launching GarageBand and navigating to the “Project Templates” section. Select the “Voice” tab to initiate your aural adventure. By tailoring your workspace from the outset for vocal recording, you can harness GarageBand’s full suite of features for crystalline audio output. Furthermore, as we step forth, take a moment to close any extraneous windows, focusing solely on the editing timeline – akin to an artist regarding a blank canvas before the first stroke.
Setting Up Your Project for Optimal Voice Recording
We cannot overemphasize the importance of configuring your project settings with vigilance. It encompasses everything from ensuring the section length in the song section controls accommodates your longest recordings to finetuning the ‘In level’ slider under GarageBand input settings to avoid distortion. So whether you set the input level to automatically detect optimal settings or manually guide it to the sweet spot, taking control of these parameters is vital for audio brilliance.
Understanding the Interface Before You Record
As we inch closer to hitting that red record button, a clear understanding of the GarageBand interface is critical. Become acquainted with the lay of the land, from the playhead used for precise track placement to the monitoring icons that keep tabs on your input levels. Finesse your approach by navigating the noise gate slider to trim unwanted background noise, and if you’re utilizing an external microphone, ensure you’re comfortable with the monitoring function. After all, the know-how of these GarageBand voice recording techniques is what separates a good recording from a great one.
Through these initial setups and interface explorations, we are preparing not just to record, but to capture sonic excellence. Remember, this journey of sound with GarageBand is one of discovery, and every step is a move towards mastering your own voice recordings.
Step-By-Step Guide to Recording Your Voice

Embarking on the journey of perfecting vocal tracks with GarageBand, we find that mastering the initial steps is crucial for a flawless recording session. In this segment, let’s unveil the sequential process pivotal for creating impeccable voice recordings.
Positioning the Playhead for Recording
The blue audio track in GarageBand is where all the magic begins. At the heart of your recording session is the playhead, a long vertical bar navigable with a simple drag and drop. Here’s what you need to know:
- To commence, place the playhead precisely where you desire your recording to start – positioning is everything when it comes to capturing voice on GarageBand.
- Envision the playhead as your maestro’s baton, dictating the start and end points of your daily performance.
- Seeking to refine your masterpiece? Effortlessly split the audio region at the playhead to segment your tracks, which can then be edited to your heart’s content.
Meticulous adjustments to the playhead allow for the creation of personal audio regions, providing the finest degree of control over your recorded material.
Hitting Record: Capturing Your Voice
The iconic red ‘Record’ button stands out on GarageBand’s dashboard – a beacon signaling the start of your voice capture. Engaging this function is straightforward yet pivotal:
- With your audio track selected, hit the ‘Record’ button and witness your session spring to life, now embarking upon the path to capturing voice on GarageBand.
- As the recording progresses, immerse yourself in the performance, knowing that GarageBand is diligently chronicling every nuance and inflection.
- Complete your session with a tap, pausing to witness the evolution of sound you’ve just created – it’s the perfect symphony between technology and talent.
Once the voice capture is complete, engage with the playback controls to review your work, providing an immediate opportunity to appreciate your vocal rendition.
Monitoring Input Levels During Recording
The alchemy of recording is not solely in the act itself but also in the vigilant monitoring of input levels to prevent distortion and achieve audio nirvana:
- As you record, keep a discerning eye on the ‘In level’ slider. This control helps you adjust input levels on GarageBand in real-time, ensuring balance and quality.
- GarageBand provides channel options for stereo recordings, available at your discretion to enhance the dimensional depth of your voice.
- It’s essential to mitigate the risk of peaking – keep the input levels in the green zone, for when it ventures into the red, you’re at the precipice of distortion.
We advocate for constant vigilance during recording, as prevention is more prudent than having to fix distortion in post-production.
Adjusting GarageBand’s Input Settings for Clarity
When we embark on producing crystal-clear voice recordings, mastering the GarageBand input settings is non-negotiable. It’s the bedrock upon which pristine sound quality is constructed, and we’re here to guide you through each meticulous adjustment. Every nuanced tweak within the input settings can be the difference between amateur sound and polished professionalism.
First and foremost, we must address the cornerstone of clear recordings—adjusting input levels for clarity. The In level slider becomes our steadfast ally in this mission. You’ll find it conveniently positioned to the left, eagerly waiting for your discerning adjustments. This nimble little control allows you to manually elevate or reduce the mic input level with precision, avoiding the unwelcome hiss of distortion by keeping an eye out for any red peaking signals.
But we don’t stop there. In the event that you’re utilizing an external microphone, GarageBand intelligently offers an automatic input level setting. A simple tap on the Input Settings button and a toggle of the Automatic switch, and you’ve just commanded GarageBand to take the wheel, determining the optimal input level for your current environmental conditions.
Now, let’s talk about noise—specifically, the kind we don’t want in our recordings. A noise gate stands as a vigilant guard between our voice and the cacophony of unwanted background noise. Adjusting this feature within GarageBand is as straightforward as tapping the Input Settings button and empowering the Noise Gate function. A thoughtful slide to the right and you’ll witness a significant diminishment in the ambient noise that previously dared to muddy your pristine vocal tracks.
Soothing silence can be golden, but when it’s time for your voice to shine, having GarageBand’s input levels finely tuned is paramount. Through these detailed instructions, we’re confident that whether you’re a seasoned audio engineer or taking your first steps into recording, you’ll achieve the sonic clarity your voice deserves.
We leave you with this assurance: our expertise in orchestrating the symphony of GarageBand’s settings harmonizes perfectly with your dedication to quality. Together, we are setting the stage for voice recordings that resonate with clarity and professionalism.
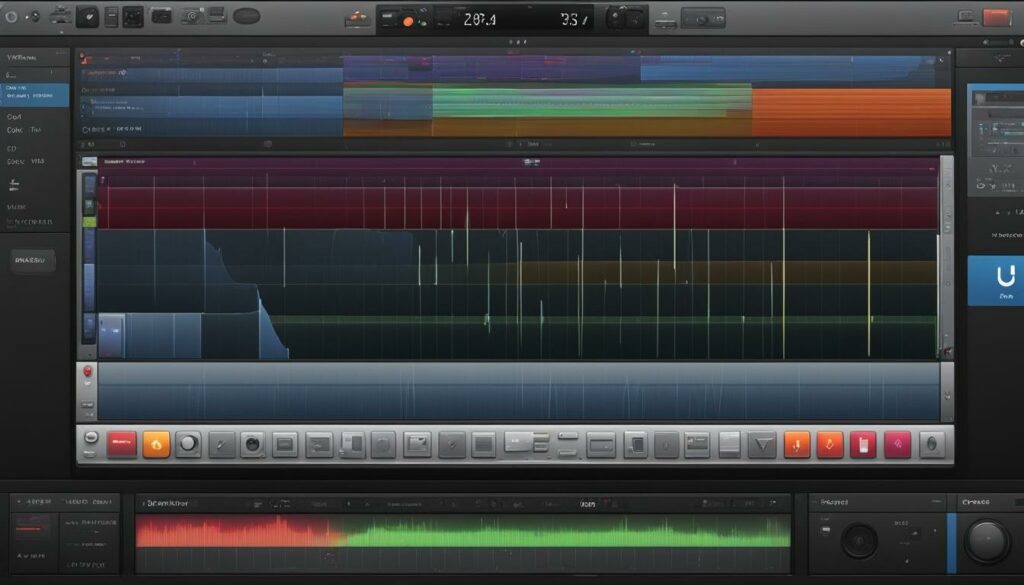
Utilizing the Audio Recorder Controls
In our ongoing quest to demystify the complexities of recording with GarageBand, we move toward mastering the audio recorder controls. These tools are instrumental in crafting the perfect sound. Immerse yourself in the multifaceted world of GarageBand audio recorder controls and learn the art of utilizing recorder controls to their full potential.
The heart of GarageBand’s allure lies in its ability for users to shift between two dynamic views: the Fun view and the Studio view. Each of these views offers a unique set of controls tailored to fine-tune your recordings. Exploring the characteristics of these interfaces, we’re equipped to beckon forth the precise tonal qualities we seek.
In the Fun view, tapping or rotating the dial to explore different presets transforms recordings with an array of sonic personalities. This approach offers an intuitive and immediate way to alter the character of your sound. Whether you’re looking to imbue your recording with a touch of grit or a dash of echo, the Fun view presets instantly gratify your creative urges.
Alternatively, the Studio view delves into a deeper level of customization. Here, the array of knobs and dials grants a more granular control over various audio parameters. The key to harnessing the power of the Studio view lies in your ability to intricately mold the presets to match your vision of the perfect sound.
Learning to proficiently use the audio recorder controls within GarageBand is a skill honed over time. Our aim is to empower you with the knowledge to confidently select, try out, and personalize these sound-shaping tools. With these skills at your fingertips, you’re well on your way to creating recordings that not only sound professional but are imbued with your unique artistic signature. Let us ensure that your journey in utilizing recorder controls in GarageBand is filled with both discovery and enjoyment.
Optimizing Voice Recording on GarageBand

When we embark on the path of recording voice on GarageBand, we understand that the journey to auditory perfection begins with selecting the right microphone for recording. Whether it’s a built-in option or an external device, optimizing microphone use is foundational to achieving the clarity and quality that can captivate listeners.
Selecting the Right Microphone
Our choice of microphone is a pivotal decision that directly reflects in the caliber of our recordings. For those who value convenience and spur-of-the-moment creativity, the built-in microphone of your iPhone or Mac can suffice. However, for aspiring audiophiles seeking to maximize their recording’s potential, an external microphone serves as a vital upgrade, amplifying the finesse and depth of your vocal tracks. We recommend researching microphones that complement your recording environment and the type of voice work you’re undertaking—be it podcasting, singing, or narration.
Choosing Studio View for Advanced Controls
When 8 minutes of your best take hinge upon precision and nuance, GarageBand’s Studio view becomes your command center. The Studio view opens a world of advanced recording controls, allowing us to sculpt our voice recordings with meticulous attention. This is where we can engage the Extreme Tuning preset and modify the pitch of our recordings, based on the song’s key and scale settings. The beauty of Studio view lies in its breadth of customization, presenting us with an array of options that breathe life into every syllable recorded.
Using the Fun View for Creative Voice Filters
For those moments when our voice recordings call for a touch of imagination, the Fun view is our playground. Here, we apply creative voice filters by navigating the vibrant selection of presets, transforming ordinary recordings into engaging pieces of audio art. Steering through the Fun view is an effortless affair, with each filter just a tap away—ready to infuse our projects with character and color. It’s an embodiment of GarageBand’s approach to accessibility, making complex audio effects both fun and approachable for creators of all levels.
Our guide walks with you through these considerations and choices, ensuring that your use of GarageBand becomes a more informed and artistic endeavor. Go ahead, seize the full potential of your voice recordings, and let the fine-tuning begin.
GarageBand Voice Recording Techniques and Effects
GarageBand empowers us with a rich array of voice recording techniques and built-in effects, providing an exceptional canvas for creatives to produce outstanding vocal audio. We delve into the heart of GarageBand voice recording techniques, guiding you to navigate through various presets, and apply effects for captivating vocal tracks that echo with professionalism and flair.
One of the essential elements in harnessing the power of GarageBand is understanding how to utilize its comprehensive set of tools for applying effects on vocals. Effects such as reverb, echo, and pitch correction can transform your raw recordings into polished masterpieces with just a few clicks.
Imagine broadening the emotional impact of a song with just the right amount of reverb, or crafting a haunting narrative through a meticulously dialed-in echo. With GarageBand’s vocal effects, these creative possibilities become second nature. Our role is to shed light on the process, making it as intuitive as the platform itself.
We advocate for creative experimentation – encouraging you to explore various combinations of these effects to truly discover what resonates best with your project. GarageBand provides preset effects specifically designed for voice recordings, but we advise not to shy away from customizing these presets for a more tailored auditory experience.
Dabble in the art of audio enhancement by adjusting the dial within the Fun View, or for a more refined touch, immerse yourself in the granularity of Studio View’s controls. Twist and turn the virtual knobs, and play with the array of sliders that GarageBand offers, to meticulously sculpt the timbre and tone of your vocals.
Through this guide, we lay the foundations for you to embark on your journey of vocal exploration within GarageBand. By blending your unique voice with GarageBand’s extensive suite of effects, your recordings are set to soar beyond the ordinary, carving out soundscapes that resonate with your audience and leave a lasting impression.
We venture forth together, ensuring that your passage along the path of vocal recording and sound design is filled with enlightenment, creativity, and exceptional audio outcomes.
Editing and Refining Your Voice Recordings
Embarking on the refining phase of our auditory journey, we recognize that the true artistry in voice recording emerges during editing. Our guide to editing voice recordings in GarageBand is designed to empower you with precision and creative control. Let’s explore the transformative processes of splitting and trimming audio, working with multiple tracks, and applying noise reduction to polish your sound.
Splitting and Trimming Audio Regions
We dive into the granularity of GarageBand by tackling the critical task of splitting and trimming audio regions. With a mere click on the Toolbar under Edit, we discover the ‘Split region at playhead’ function, a tool that seamlessly bifurcates our recordings. Should our creative impulse call for reversion, the comfort of the ‘Undo Split Regions’ command is just a shortcut away.
Our aim is to wield the full potential of GarageBand, and thus, gifting you the agility to adjust your cuts with drag-and-drop ease. By manipulating the edged trim of your audio with the dexterity that the split function affords, we ensure that every second of your audio is honed to perfection.
Working with Multiple Tracks and Arrangements
In the dynamic soundscape of multiple tracks, GarageBand affords us the latitude to arrange voice recordings with masterful fluidity. The convenience of selecting and dragging tracks to fill gaps makes for a fluid composition process, turning what may seem like disparate audio pieces into a cohesive auditory story. Whether you’re harmonizing clips or distilling the essence from multiple takes, the shift-and-click mechanism to select them en masse simplifies the orchestration process tenfold. We chart a pathway towards an optimal workflow that accommodates the complexity inherent in layering and arranging a multitude of tracks.
Applying Noise Reduction for a Polished Sound
To conclude our editorial symphony, we introduce the subtleties of noise reduction—a crucial step in polishing sound recordings in GarageBand. Engaging the noise gate feature becomes second nature as we adjust the slider to exclude the unwelcome interruptions of ambient interference. With each incremental motion, the clarity of your recordings ascends, achieving a level of refinement that is truly auditory silk to the ears. Embrace the finesse that these noise abatement techniques contribute to your final masterpiece.
We leave you with a compendium of newfound skills in editing and refining so that you can curate audio with a professional sheen, confident in your ability to make the most of GarageBand’s powerful toolset.
Best Practices for GarageBand Voice Recording
As we delve into the intricate world of audio production, our collective experiences have taught us that being proactive is essential when it comes to preventing recording problems on GarageBand. By arming ourselves with the best practices, we can effortlessly navigate through common challenges and ensure our voice recordings are clear, crisp, and free of interruptions.
Preventing and Troubleshooting Common Recording Issues
Dealing with technical hiccups is an inevitable part of the recording process, but with the right knowledge, troubleshooting voice recording issues on GarageBand can be a breeze. Our first line of defense involves monitoring input levels diligently. Keeping an eye on the visual indicators within GarageBand allows us to preemptively tackle clipping and distortion.
Maintaining the ideal input level is not just about avoiding the red zone on the meter; it’s also about making adjustments that suit the dynamic range of the performance. When we encounter issues, it’s usually prudent to return to the basics. We check that our device settings are optimized and that no background applications are causing unexpected interference.
Enhancing Your Voice Recordings with Presets and Plug-Ins
Once we’ve conquered the common recording challenges, our journey in enhancing voice recordings on GarageBand truly begins. The platform’s plethora of presets and plug-ins serve as a palette from which to craft our sonic masterpieces. The built-in presets offer a starting point, which we can further refine to our taste, experimenting with each nuanced adjustment.
Moreover, we encourage venturing beyond the basic presets, exploring the myriad of plug-ins available within the GarageBand universe. It’s these tools that provide that extra layer of polish, allowing us to fine-tune equalization, compression, and ambient effects, ultimately elevating our recordings from ordinary to extraordinary.
Exporting and Sharing Your Finished Voice Tracks
The culmination of our voice recording process in GarageBand is marked by the act of sharing our audible creations with the world. Be it for podcast streaming, email distribution, or inclusion in a dynamic musical composition, the exporting phase is crucial. As we navigate the export menu, we choose the appropriate file format and quality, ensuring that our work is presented in its best light.
We walk you through the process of exporting voice tracks from GarageBand, offering guidance on file naming conventions and storage practices. Whether your intent is to archive or to share, our methods guarantee that your finalized voice tracks are ready for their intended audience. And with the plethora of sharing options at our disposal, our voice recordings reach far and wide, connecting us to listeners across the globe.
Recording with GarageBand on Windows: Official Solutions
For creatives who are searching for an efficient way to produce music and podcasts, the question of whether there is an official GarageBand download for Windows PC is a common one. We understand the allure of GarageBand, a staple in audio recording and production for so many Apple users. However, it’s essential to clarify that there is no official native version of GarageBand for Windows PC.
In our dedication to provide workable solutions, we’ve discovered that although an official GarageBand for Windows does not exist, users can explore alternative methods to operate similar software on their PCs. These methods ensure that the absence of a direct GarageBand counterpart doesn’t hamper the creative flow of music enthusiasts who prefer the Windows operating system.
While emulators are often suggested as a go-to for running non-native applications on different operating systems, we advise against this for a robust application like GarageBand. Instead, our focus shifts to finding compatible software that offers a parallel experience to GarageBand’s rich feature set for those who operate primarily on a Windows platform.
We understand that the integrity and functionality of music production software is paramount for artists and podcasters alike. That’s why we emphasize the importance of seeking out authorized and reputable sources that provide similar capabilities as GarageBand but are designed to function optimally on Windows PCs.
Rest assured, our insights and guidance aim to align Windows users with an audio recording experience that meets their needs, even in the absence of an official GarageBand download for Windows. The journey of music creation continues unabated, as we explore the vast landscape of digital audio workstations suitable for Windows users.
Alternatives to GarageBand for Voice Recording
As we explore the realm of digital sound creation, we recognize that while GarageBand is a superb tool, it’s not the only player in the game. In our pursuit to offer you the best in voice recording, we present two standout GarageBand alternatives for voice recording: EaseUS RecExperts and Audacity. Each platform brings its own unique features and capabilities to the table, allowing for a diverse range of audio projects. Whether you’re a podcaster, a musician, or a voice-over artist, these alternatives can enhance your recording experience, providing high-quality tools that cater to various audio recording needs.
Exploring Other Software Options: EaseUS and Audacity
We understand the importance of having options that fit every creative endeavor. That’s why we delve into the specifics of EaseUS RecExperts and Audacity – two potent software choices with intuitive user interfaces and powerful features. EaseUS RecExperts excels with its straightforward design, making it simple for users to record and edit audio on Mac. Its sound cancellation feature is particularly notable for capturing clean, crisp audio. On the other hand, Audacity, an open-source powerhouse, affords you the flexibility and depth needed for more complex editing and effects. We weigh each application’s strengths, allowing you to select the tool that aligns best with your project’s demands and your personal workflow.
Differences in Features and User Experience
Comparing GarageBand alternatives can be a revealing exercise. EaseUS RecExperts offers a user-friendly environment with hassle-free recording capabilities, meanwhile, Audacity provides an extensive range of editing tools for those willing to dive deeper. The user experience differences between these platforms and GarageBand are significant; each alternative serves distinct preferences and skill levels. While GarageBand might come with the allure of seamless Apple integration, EaseUS and Audacity bring their own unique advantages to the table, effectively broadening your toolbox for voice recording on Mac.
How to Record with Alternatives on Mac
For Mac users seeking diversity in their voice recording applications, we guide you through the nuances of recording with these GarageBand alternatives. Starting with EaseUS RecExperts, the process is as easy as selecting ‘Audio’ and commencing with a single click. Audacity, while boasting a steeper learning curve, rewards users with robust functionality and precise control over every aspect of the recording. From setting up microphones to fine-tuning input levels and finally exporting your audio masterpiece, these applications ensure that the distinctive qualities of your voice are captured and conveyed with clarity and impact. Moreover, these tools stand as testaments that high-quality voice recording on Mac is not confined to a single software suite, but can be realized through a variety of proficient platforms.
FAQ
How do I record my voice using GarageBand?
To record your voice on GarageBand, launch the app, create a new project, and choose the ‘Voice’ template. Use the built-in microphone or connect an external microphone, position the playhead at the desired starting point, and press the red record button. Monitor input levels as you record to ensure clarity and prevent distortion.
What are the best settings for voice recording on GarageBand?
For optimal voice recording on GarageBand, adjust the input levels to avoid peaking, implement a noise gate to reduce background noise, select an appropriate microphone, and choose the correct preset or plugin to enhance your recording. Utilize the Fun or Studio views for creative control over your sound.
Can I record high-quality vocals with my device’s built-in microphone?
Yes, you can record high-quality vocals with your device’s built-in microphone, especially if you optimize your recording environment and GarageBand settings. However, for professional-grade quality, using an external microphone is recommended.
How can I add effects to my voice recording in GarageBand?
You can add effects to your voice recording in GarageBand by utilizing the Audio Recorder’s controls. In Fun View, you can quickly apply various voice filters, while Studio View offers more intricate settings like compression, reverb, and echo to edit your recordings.
What should I do if I encounter issues while recording in GarageBand?
Get started by checking your microphone connections, adjusting your input settings, and ensuring that no other apps interfere with GarageBand. You can also reset GarageBand’s audio drivers or restart your device. If problems persist, consult Apple’s support documentation or seek online community advice.
Where can I find GarageBand for Windows?
Unfortunately, there is no official version of GarageBand for Windows. Apple only provides the software for macOS and iOS platforms. Windows users can look into alternatives like LMMS, Cakewalk, or Audacity for similar recording capabilities.
How do I export my GarageBand voice recordings?
To export your voice recordings in GarageBand, click on ‘Share’ in the menu, then choose ‘Export Song to Disk’. Select the desired file format and quality, name your file, and choose a location to save. You can also share your recordings directly via email or to your iTunes library from within GarageBand.
Are there any high-quality alternatives to GarageBand for recording voice?
Yes, there are several high-quality alternatives to GarageBand for voice recording. Audacity is a free, open-source option that works across different platforms, and EaseUS RecExperts offers robust recording features. Each has its unique set of features, so you should choose the one that best fits your needs.
How do I work with multiple tracks and arrangements in GarageBand?
To work with multiple tracks in GarageBand, simply add new tracks using the ‘+’ button, and drag audio regions to arrange them as you see fit. Align tracks, adjust their lengths, and use the editing options to split and trim them for the perfect arrangement. The track header controls allow for easy muting, soloing, and locking of tracks.
How can I reduce noise during voice recording in GarageBand?
Use the Noise Gate feature in GarageBand to reduce noise during voice recordings. Access it through the Smart Controls pane, adjust the threshold slider to filter out the unwanted noise, and test different levels to find the right balance without affecting your vocal quality.
Can I use GarageBand to create a podcast?
Absolutely, GarageBand is an excellent tool for podcast production. With its various features for voice recording, editing, and sound effects, you can produce high-quality podcast episodes. Once finalized, you can export them in the preferred format for podcast distribution.
What are some tips for a beginner recording voice on GarageBand?
Beginners should start by familiarizing themselves with the GarageBand interface and settings. Use a pop filter to improve audio clarity, monitor input levels to avoid peaking, practice with different microphone positions, and explore GarageBand’s presets and plugins to enhance your recordings.