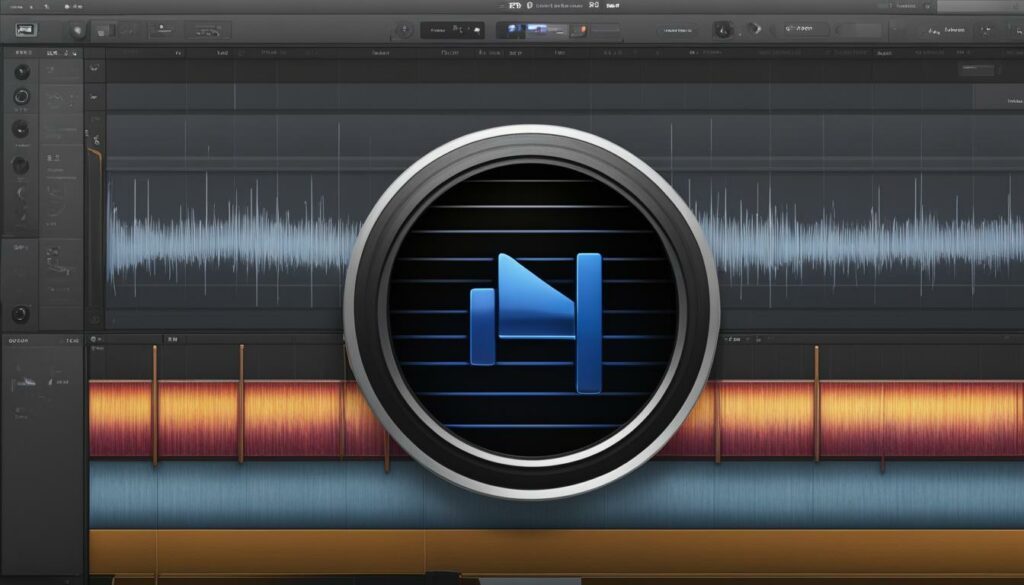
As we explore the world of digital audio workstations, GarageBand by Apple stands out as a versatile tool for musicians and audio engineers alike. One of the creative challenges often faced by audio enthusiasts is the removal of vocals from a song. This could be for a range of purposes, from creating karaoke tracks to sampling music for a remix. Achieving this in GarageBand invites us to delve deep into the realm of EQ settings and Smart Controls, opening up possibilities previously limited to professional studios.
Our journey through GarageBand’s intuitive interface begins with an understanding that the work involves much more than a few clicks. Here, we’re specifically targeting those of you embarking on the adventure of manipulating tracks to reduce—or perhaps completely isolate—the vocal components. Although it can be complex when navigating a mixed stereo track without separate stems, we are here to guide you through this nuanced process.
Introduction to Vocal Removal in GarageBand
Vocal removal is a technique that often becomes a necessity in the realm of audio editing, especially when the goal is to enhance a soundtrack for various creative projects. For those of us who immerse ourselves in the world of remixing and DJing, the removal of vocals from a track is not just about stripping away the human element—it’s about crafting a soundscape that better suits our artistic visions.
Among the plethora of tools available, GarageBand is highly praised for its user-friendly interface, making it accessible to both novices and professionals alike. The software’s built-in features allow for a degree of vocal reduction or complete isolation, depending on the intricacy of the mixed tracks we are working with.
Our venture into GarageBand’s capabilities involves smart control adjustments and EQ manipulation, diving into an effective layer of mixing that can significantly alter the audio output. The process requires a thoughtful approach, as we delicately navigate through the various controls to selectively diminish the vocal tracks without compromising the overall quality of the music.
In the following paragraphs, we’ll explore the smart ways by which GarageBand empowers us to remove or reduce vocals from songs. It’s a testament to the power of digital audio workstations that even complex processes such as these can be made user-friendly, inviting more music enthusiasts to experiment, create, and innovate.
Note: Our exploration of GarageBand’s features is limited to its capabilities and should not be interpreted as an exhaustive guide for all possible audio editing scenarios.
The Basics of GarageBand’s Interface for Vocal Isolation
Vocal isolation within GarageBand’s sophisticated landscape can seem daunting at first glance. However, by unraveling the interface’s intricacies, we’re able to uncover a streamlined process for detaching vocals from a composite track. Accurate identification of track elements is our foundation, allowing us to deftly maneuver through the software’s capabilities. It’s necessary that we familiarize ourselves with the track layout, where each component is isolated or merged with others, and this can have a significant impact when we dive into vocal reduction or removal.
Understanding the Track Layout
We start by examining the track layout in GarageBand, a critical step for vocal isolation. It is essential to recognize how vocals integrate with other instruments in the song’s mix. A separate vocal track simplifies the process, allowing for a clean isolation. Nonetheless, when working with a song mixed into a single stereo track, such as an MP3 or WAV file, the challenge intensifies. Our expertise lies in navigating these complexities to single out the vocal elements seamlessly embedded within the track.
Accessing Essential Tools for Vocal Editing
The craft of vocal reduction or isolation in GarageBand is made feasible utilizing the Smart Controls. Broadening our audio editing toolkit, we access this feature by selecting the Smart Controls button, revealing a realm of possibilities for meticulous track adjustments. When engaging with these essential tools, we utilize EQ settings to intricately adjust frequencies that represent the human voice—typically in the range of 86 to 350Hz. The interface’s graphic EQ display provisioned in GarageBand becomes our precision instrument, allowing us to zero in on these vocal frequencies for significant reduction or removal.
As we delve into the broader capabilities of GarageBand, it is important to remember that practice will refine our approach to vocal isolation. The intuitive nature of GarageBand’s interface is there to ensure that we can achieve the desired sound with patience and experimentation.
Preparing Your Song for Vocal Extraction in GarageBand
Before we dive into the intricacies of vocal extraction in GarageBand, it’s pertinent to ensure the song is aptly prepared within the software’s layout. This stage is crucial, as the complexity of preparation varies significantly based on the resources at our disposal. If we’re fortunate to have an isolated vocal track, the extraction process is relatively straightforward. However, discerning vocals from a composite track demands a more nuanced and intricate approach to manipulation.
Our process of preparation begins with loading the track into GarageBand and recognizing whether the vocals are already isolated. When dealing with an isolated vocal track, the extraction is often a simple task of muting or deleting as needed. But, when presented with a composite track, typically seen with most mainstream music downloads in MP3 or WAV format, our tasks become more detailed.
We need to strategically employ GarageBand’s Smart Controls and sophisticated EQ adjustments to isolate the vocals. This is a process not to be rushed, requiring a measured hand and keen ear to determine the specific vocal frequencies amid the rich tapestry of sound.
Let us bear in mind that patience and attention to detail are our allies in this phase of preparation. With each effort, we gain greater insight into the characteristics of the track, helping us move one step closer to achieving a clean vocal extraction in GarageBand.
Step-by-Step Guide to Removing Vocals with GarageBand

Embarking on the journey to remove vocals using GarageBand, we find ourselves intrigued by the capabilities this software unleashes. Let’s walk through a systematic approach that will help us navigate the audio labyrinth and isolate vocals from a song. Our goal is to ensure the preservation of the track’s integrity while extracting the vocal elements.
Firstly, we initiate our process by importing the desired track into GarageBand. Our attention swiftly transitions to the Smart Controls, which we activate by selecting the corresponding button—a gateway to the realm of EQ adjustments and sound alterations.
Within the Smart Controls window, we make our way to the ‘Track’ section. Here lies the heart of vocal modification, where our precision and perception are put to the test. We promptly proceed to the EQ subsection, where the vocals typically manifest their presence prominently on the graphic equalizer.
We meticulously search for the vocal frequency peaks, those that contour the unique signatures of human speech and singing. These peaks are likely nestled within the range of 85 to 350Hz, a prominent domain for most vocal tracks.
Our next move involves the deliberate dragging down of these peaks. We aim to diminish them thoughtfully, ensuring that vocals recede into the backdrop of the track’s soundscape. This delicate exercise may demand multiple iterations as we strike a harmonious balance—you’ll soon realize that the quest to remove vocals is as much an art as it is a science.
As we fine-tune and adjust, we may witness the interplay of other instruments within the same spectral space, a reminder of the interconnectedness within the tapestry of any given track.
Throughout this endeavor, our ears serve as both guides and critics. Each adjustment is followed by critical listening, allowing us to ascertain the effectiveness of the vocal suppression. This sensory feedback informs our subsequent actions, ensuring we uphold the track’s overall essence alongside vocal removal.
In the end, what we achieve is a version of the song where the vocals are either significantly reduced or entirely vanished. The instrumental richness that remains becomes a canvas for new creativity, ripe for karaoke nights, backing tracks, remixes, or simply appreciating the musical composition in its instrumental glory.
Using EQ to Minimize Vocal Frequencies
In our exploration of vocal removal using GarageBand, we’ve discovered that the EQ tool is instrumental in achieving our goal. Vocals typically fall within a particular spectrum on the EQ chart, landing generally between 85 and 350Hz. It’s this specific frequency range that we need to pay close attention to as we proceed with the manipulation of our track. By identifying and adjusting these vocal frequencies, we inch closer to that clean instrumental sound we’re striving for.
Identifying Vocal Frequency Ranges
The first step in this auditory quest is isolating the frequency bands where the vocals predominantly reside. As mentioned, this is usually within the 85 to 350Hz range. This crucial stage forms the foundation of our journey; identifying these ranges is what directs us to the appropriate EQ bands we aim to adjust. We listen attentively to the track, knowing that our successes hinge on our ability to discern the vocals from the instrumental accompaniment.
Adjusting Equalization Settings
Once we’ve keyed in on the vocal frequency ranges within our song, our next maneuver involves a careful adjustment of GarageBand’s EQ settings. Our strategy shifts toward pulling down these frequencies thoughtfully. It’s not just about lowering; it’s about crafting, shaping the sound until the vocals are considerably reduced—if not entirely silent—without affecting the integrity of other instrumental sounds that may share this frequency range.
The intricacies of EQ adjustment cannot be understated. Any hasty movement could disrupt the delicate balance of the track. Therefore, we approach each adjustment with patience and precision. As we tweak and refine, the vocals begin to fade, and the true nature of the instrumental begins to unfold. This transformation is nothing short of mesmerizing—the digital metamorphosis of sound under our command.
Our experience in using GarageBand’s EQ to minimize vocal frequencies is a testament to how technology has democratized music production. We’ve harnessed the power of digital software that allows us to manipulate sound with extraordinary finesse and creativity, bringing professional studio capabilities right to our fingertips.
GarageBand’s Smart Controls: A Key Feature for Vocal Isolations

Within the realm of GarageBand, Smart Controls stand as the gateway to intricate adjustments that are instrumental for vocal isolation tasks. We, as creators, leverage this feature to delve into the advanced settings for EQ and other vital adjustments that amplify our ability to influence vocal tracks with exceptional finesse. Stripping away vocals from a track can often feel like a search for hidden treasure, where slight tweaks can reveal the pure instrumental gold we seek.
When we engage with Smart Controls, we are positioned in the driver’s seat with a dashboard of knobs and sliders that bring the power of a professional studio to our fingertips. These controls offer a plethora of fine-tuning prospects that can dramatically change the auditory landscape of any song—particularly when it comes to isolating or removing the human element from a mix.
Through our experience, we have identified the EQ section within Smart Controls as the nexus for achieving the best results. Here, we meticulously manipulate frequency bands, seeking to find and minimize those frequencies where vocals reside. It’s akin to extracting vocals from a tightly woven fabric without unraveling the rest of the auditory tapestry.
Our process starts with an understanding of EQ frequencies—knowing that vocals often inhabit the spectrum from 85 to 350Hz allows us to pinpoint the precise areas within the track that require our attention. By doing so, we can achieve a cleaner and more polished sound with vocals either diminished to a whisper or removed altogether.
As we continue to navigate GarageBand’s Smart Controls, it’s not merely about turning knobs—it’s an interaction with sound, an exploration that underscores our passion for music and technology. The richness of the instrumental tracks that emerge from our sessions is a testament to the capabilities of GarageBand and our continuously evolving skills.
With each song we transform, our expertise in using these sophisticated tools grows, enabling us to craft soundscapes that were once reserved for those with access to high-end studio equipment.
Alternatives to GarageBand for Vocal Removal on Different Platforms
While GarageBand has earned its reputation among Mac and iOS users, it is by no means the only option for those aiming to remove or isolate vocals from songs. Our exploration does not end at the gates of Apple’s ecosystem; there are other applications that our fellow audio manipulators have found just as capable, perhaps even offering their own unique set of features that can better cater to specific needs or preferences.
Audacity, for instance, stands tall as a formidable open-source alternative that runs on multiple operating systems including Windows, Mac, and Linux. This versatile audio editor is not only free but also boasts a variety of plug-ins and effects, making vocal removal a task within reach for everyone.
For those of you working within a Windows or Android environment, FL Studio presents itself as another premium choice. With its comprehensive toolkit designed for state-of-the-art music production, it includes features for precise phase inversion, an essential technique for isolating vocals. Its complexity might demand a steeper learning curve, but the results can be impressively professional.
BandLab, meanwhile, enters the fray as a cloud-based, social music creation platform that is accessible from various devices. This service accommodates the modern user who prefers to work within an integrated online community. With its AI-powered tool, Splitter, BandLab simplifies the process of separating songs into different tracks, including vocals.
As we move on to Logic Pro, Apple’s advanced audio production software, we find a haven for meticulous sound editors who desire a non-destructive way to manipulate tracks. Though its environment may seem familiar to those versed in GarageBand, Logic Pro offers a heightened level of sophistication in audio editing, including vocal isolation.
Melodyne is yet another audio editing marvel, revered especially by music professionals. Known for its note-based editing capability, it provides an insightful way to work with polyphonic material, which includes isolating vocals. Although Melodyne comes with a price, its granular control makes it a staple in many a producer’s arsenal.
Lastly, we have online services like remove-vocals.com, a solution for those seeking the convenience of browser-based vocal isolation tools. While it may not provide the depth of control offered by the aforementioned software, its straightforward interface is ideal for quick, hassle-free vocal removal, and comes especially handy for users on the go.
We have traversed the landscape of vocal removal software, commencing from the familiar grounds of GarageBand and exploring territories beyond. This foray into various platforms underscores our commitment to creative liberation and audio excellence, wherever and however it may be achieved.
Legal Considerations When Removing Vocals from Songs
As we venture into the technical process of removing vocals from songs using GarageBand or any other audio editing software, it is paramount for us to consider the legal implications that come with manipulating copyrighted materials. It’s easy to be preoccupied with the creative and technical aspects, but our responsibility extends to understanding and adhering to copyright laws.
Understanding Copyright Laws
Copyright laws play a significant role in protecting the rights of original creators, and this includes musical compositions and sound recordings. When we extract vocals from a song, create instrumental versions, or make other edits, the derivative work is still under the copyright umbrella of the original song. This means that without the appropriate permissions, our use of these creations could lead to unintended copyright infringement.
As creators ourselves, it is essential to respect the intellectual property of others just as we would expect our own to be respected. Any use of copyrighted music, especially in a public or commercial context, requires us to obtain the necessary rights. Even when a track seems completely transformed, the underlying composition may still be recognized and protected by copyright law.
The Legality of Using Instrumental Tracks
Instrumental tracks derived from copyrighted songs carry the same legal weight as the full songs with vocals. Therefore, using such tracks, particularly for monetization purposes in content such as YouTube videos, podcasts, or public performances, requires explicit authorization from the copyright holders. Without this, we run the risk of facing legal repercussions, which can include takedown notices, fines, or even lawsuits.
In light of these facts, we must exercise due diligence in acquiring the correct licenses or permissions before using these tracks. Various platforms provide royalty-free music or offer clear licensing options which can allow us to use music legally in our projects. Exploring these safer channels can prevent us from stepping on any legal landmines and ensure that our creative endeavors remain on the right side of the law.
We always emphasize the importance of navigating the legal aspects of music editing with as much care and attention as we lend to the creative process. Our integrity as creators depends not only on our artistry but also on our adherence to the law.
Exporting Your Final Track from GarageBand
Once we’ve journeyed through the process of removing or minimizing the vocals using GarageBand, we reach the culmination of our efforts: exporting the final track. This last step is a celebration of our diligence and expertise, transforming a song into a new creation that resonates with our purpose. It marks the completion of a project that started with a simple song and blossomed into a unique instrumental piece tailored by our hands.
The exporting procedure in GarageBand is both streamlined and user-friendly, allowing us to smoothly save our newly crafted version. With the vocals dialed back to our exact preference, we can now share the altered track across various platforms or utilize it within our own audio projects. The satisfaction of clicking ‘Export’ is akin to a painter putting the final brushstroke on a canvas, signifying the readiness of the piece for the world to experience.
Indeed, our time in GarageBand is well spent, for it not only enhances our understanding of sound manipulation but also grants us the power to mold audio to our vision. As we continue to create, each track serves as a testament to our advancing skills in digital music production, and the joy derived from converting raw sounds into refined audio cannot be overstated. We exit GarageBand with a sense of achievement, armed with the knowledge that our creative potential is boundless.
FAQ
Can GarageBand completely remove vocals from a song?
GarageBand can significantly reduce or isolate vocals from a song, but it may not always completely remove vocals, especially if they are in a mixed stereo track with other instruments within the same frequency range.
What frequency range should I focus on to remove vocals in GarageBand?
Vocals typically lie within the 85 to 350Hz frequency range. In GarageBand, you should focus on this range when adjusting your EQ settings to reduce or remove vocals.
Are there any alternatives to GarageBand for vocal removal on different platforms?
Yes, there are several alternatives to GarageBand for vocal removal, including Audacity, FL Studio, BandLab, Logic Pro, Melodyne, and online services like remove-vocals.com, catering to different operating systems and user needs.
Do I need permission to use an instrumental track I’ve created from a copyrighted song?
Yes, even if you create an instrumental version by removing vocals, it’s still derived from copyrighted material. You must obtain proper licensing and permissions to use it legally, especially for monetization purposes.
How do I access the Smart Controls in GarageBand for vocal editing?
In GarageBand, you can access the Smart Controls by selecting the Smart Controls button, usually located near the top-left corner of the interface. This opens a window allowing you to adjust track and EQ settings for vocal editing.
Can adjusting EQ settings in GarageBand to remove vocals affect other parts of the song?
Yes, adjusting EQ settings to target vocal frequencies can also impact other instruments and sounds that share the same frequency range, potentially altering the overall sound of the song.
Is it possible to remove vocals from a song in GarageBand on an iOS device?
While GarageBand’s iOS version may not have all the same features as the macOS version, it still offers tools that can be used to reduce vocals in a song to some extent.
How do I export my final track from GarageBand after removing vocals?
Once you’ve minimized the vocals to your satisfaction, you can export your final track by using the ‘Share’ option in GarageBand’s menu to save and distribute your new instrumental or edited version of the song.
Are there any specific tools in GarageBand that help identify vocal frequencies?
GarageBand does not have a specific tool dedicated to identifying vocal frequencies, but you can use the visual EQ feature in Smart Controls to visually identify and manipulate frequency peaks that may correspond to vocals.
What should I do if the vocals are not completely removed after the first attempt?
If vocals are not fully removed on your first try, you may need to perform multiple iterations, adjusting the EQ settings and experimenting with different frequencies to achieve a better result while maintaining the sound quality of the music.