We’ve all heard the magic that samples can bring to music, transforming sounds and snippets into creative melodies and beats that resonate with audiences far and wide. In our GarageBand sampling tutorial, we’re diving deep into the compelling world of music production, showing you precisely how to sample in GarageBand like a pro. With GarageBand’s intuitive tools, your journey from recording to manipulating sounds becomes a seamless symphony of clicks and taps.
Whether you’re an aspiring music producer or a seasoned artist, GarageBand offers an impressive array of features to slice, dice, and spice up your tracks. Our step-by-step guide will help you navigate through the sophisticated Sampler interface, enabling you to wield sounds and construct audioscapes that showcase your unique style. Stay tuned as we outline essential techniques and secrets that will elevate your GarageBand music production to new heights.
Understanding the Basics of GarageBand Sampling
If you’re stepping into the world of digital music creation, sampling in GarageBand is a fundamental skill that can greatly enhance your productions. As a beginner’s guide, we aim to walk you through the initial steps and provide you with valuable GarBand sample recording tips to ensure your first foray into sampling is a smooth ride. Let’s start with the basics of how to access and use the sampling feature in GarageBand.
To begin, we tap the Browser button, which reveals our instrument options. Here, we navigate to the Keyboard and tap the Sampler button. This takes us to the core area where your creativity begins to unfold. If you have an external microphone, plug it in, otherwise, the built-in microphone is an excellent starting point.
We then tap the Record button, urging you to play, sing, or create the sound you wish to sample. As the sound waves reach your device’s microphone, we keep an eye on the Input Level meter to ensure the signal is strong and clear. Should the meter indicate the need for adjustments, we tap the Input Settings button and slide the Input Level slider to set our input level. It’s almost like directing the volume of your voice on a phone call: too low and you’re a whisper in the wind; too high and you’re causing a racket.
For those with an external microphone, you’ll appreciate the ability to monitor your sound input through headphones or an audio interface. Just flip the Monitor switch to ‘On’ and you’re live, hearing every detail as you record. It’s akin to a chef tasting their dish as they cook, ensuring each ingredient blends perfectly.
Once we’re satisfied with the levels, we strike the chord of creation by tapping the Controls button to access the full Sampler keyboard. This is where our captured sound transforms into a playable instrument, resonating at higher or lower pitches across the keyboard. The sense of achievement we feel as our simple sound recording morphs into a dynamic musical tool is nothing short of exhilarating.
Our introduction to sampling in GarageBand may begin as a small step, but for many, it opens the door to a vast universe of musical exploration. Stick with us as we dive deeper into more advanced sampling techniques and tricks that will set your tracks ablaze.
A Step-by-Step Guide to Recording Your Samples in GarageBand
Embarking on the journey of GarageBand sample recording, we consider harnessing the full potential of the application’s diverse capabilities essential. Through this comprehensive walkthrough, we’re not only going to reveal the foundational aspects of how to sample in GarageBand but equally ensure your path to recording is edged with professional precision for high-quality audio sampling techniques. En route, remember, it’s your keen ear and deft adjustments that will transform a mere sampling attempt into an aural delight.
Setting Up Your Input Source
Every great recording begins with setting up your input source. Optimally positioned, our microphone stands as the gateway for sonic entry. We proceed by choosing the appropriate channel for the microphone, reassuring ourselves that our device has acknowledged the incoming sound properly. This initial selection is critical; it determines the unblemished transmission of audio signals into GarageBand, a precursor to the vitality of the end sample.
Adjusting the Microphone Input Level
With the source securely set, attention turns to optimizing GarageBand audio input. The intuitive interface of GarageBand furnishes us with an Input Level meter, a visual aide that ensures signals are neither feeble nor overwhelming. Here the finesse of GarageBand sample recording tips comes into play—slide gently left or right on the Input Level slider, and watch the meter, a vigilant chaperon guiding us to the sweet spot of audio levels. For those who favor convenience, the Automatic feature is a trusty ally, discerning and adapting to ideal input intensities.
The Art of Recording Quality Audio Samples
Now, well-prepared for the actual act of recording, we tap ‘Record’ with poised anticipation. Careful not to disrupt the clarity, we maintain a vigilant watch over the levels as sounds are ushered in from the connected microphone—this ritual is crucial for high-quality audio sampling techniques. Upon capturing the essence of our desired audio, we triumphantly tap ‘Stop’. All that remains is the playback; our fresh sample, ready for manipulation, awaits its debut on the Sampler’s keyboard, poised to compose the melodies of tomorrow.
By following these meticulous steps, we ensure that our samples maintain their integrity, from inception to integration. Whether you’re exploring how to import samples into GarageBand or laying the groundwork of tunes with your recordings, our advice is this: let your creativity and precision harmonize, and there, within the realms of GarageBand, sonic wonders will be crafted beneath your fingertips.
Navigating the Sampler Instrument Interface
As we delve into the GarageBand sampler instrument, we’re welcomed by an interface brimming with potential. For those of us starting out, it’s crucial to understand the interface’s offerings as part of a sampling in GarageBand beginner’s guide. Let’s embark on navigating through this digital workshop and uncover the suite of tools and settings that bring our creative samplings to life.
The Sampler’s interface is our playground for sonic manipulation; here, we can tailor the keyboard range to fit our musical endeavors, allowing seamless transitions across octaves. The touch sensitivity feature provides dynamic control, enabling us to express nuances in our playback. With our fingertips, we can shape how the sampler reacts to our touch. Whether we’re aiming for gentle melodies or striking chords, the sensitivity setting adjusts to our intention.
Chords and scales serve as the backbone of music theory, and within the realm of the GarageBand sampler instrument, we have the capability to arpeggiate chords and select scales at will. This feature is invaluable, as it opens the door to experimenting with varied harmonic structures and tonal explorations that can define the essence of a track.
We also utilize the navigational controls to dive into the Sample Library, a repository of sounds waiting to be shaped by our artistic vision. Here, we decide with precision whether to work with samples from ‘This Song’ or expand our horizons by selecting from the broader ‘Library’. Once a sample catches our ear, we bring it into our project, ready for playback and further editing. The prospect of choosing new samples to manipulate fuels our imagination, knowing that within the library lies the potential to craft something entirely ours.
Guided by this sampling in GarageBand beginner’s guide, we find ourselves equipped to journey through the Sampler instrument interface with confidence. From stretching the limits of our auditory canvas to finessing the sensitivity of our tools, we now stand ready to create, mold, and infuse our music with samples that resonate with our creative pulse.
Importing and Utilizing Your Own Audio Files
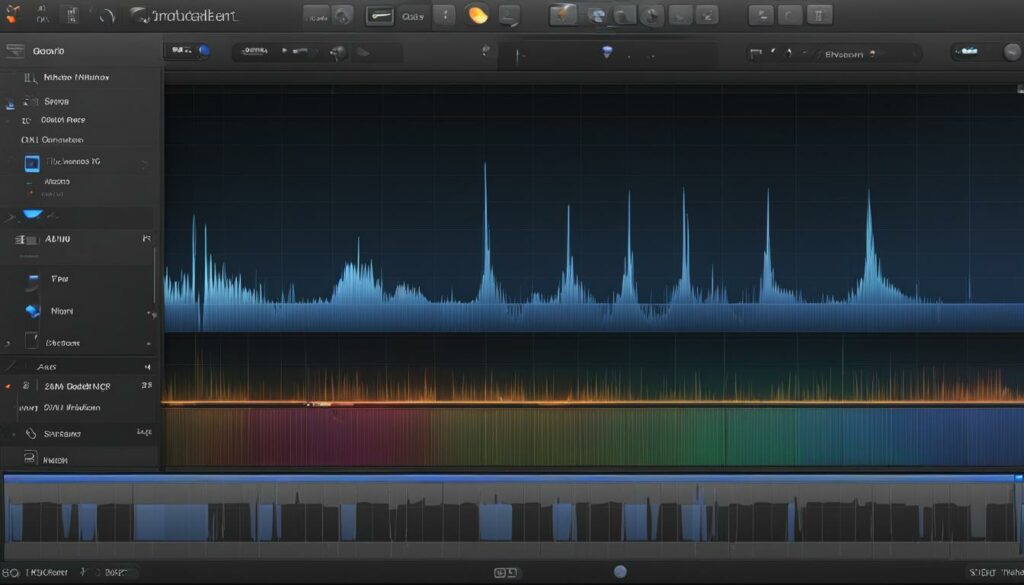
As we venture into enhancing our musical creations, we find that working with Apple Loops and importing external audio files into GarageBand are invaluable skills. These practices not only enrich the texture of our compositions but also inject an unmistakable touch of personalization. The process is refreshingly straightforward, thanks to GarageBand’s user-friendly interface, which invites even novice producers to experiment with sounds pulled from an array of sources.
Working with Apple Loops and External Audio Files
The immersive experience of crafting music is taken to new heights when we add sounds to the GarageBand sampler. By accessing the Loop Browser, we can effortlessly weave Apple Loops into our projects. These pre-recorded music snippets range from drum beats to instrumental riffs, providing a rich tapestry of audio to draw from. We invite you to explore, select, and partake in the vast collection that Apple Loops offers, knowing that each one can be a catalyst for sonic innovation.
Beyond the realms of Apple-crafted loops, our audio odyssey extends to personal archives. Importing external audio files into GarageBand opens a portal to distinctive soundscapes, where the only limit is the breadth of our audio collections. The Sample Library’s Import feature stands ready as our conduit for integrating these sounds, making them readily available for our next masterpiece.
Drag-and-Drop: A Simple Way to Add Sounds to Your Sampler
The sheer simplicity of the drag-and-drop functionality transforms the way we curate our samplers within GarageBand. A swift motion to drag-and-drop audio files removes barriers between inspiration and execution. Whether extracting a segment from an Audio Recorder track or importing the soulful notes of an Amp track, we rejoice in the fusion of diverse elements that fortify our musical narrative. Such seamless interactions with the software underscore why GarageBand remains a favorite among discerning artists and producers alike.
GarageBand not only beckons us to build from within its ecosystem but also to cast our nets wide, drawing from the wealth of audio that resides on hard drives, cloud storage, and physical media. As we amass sounds from the world around us, we discover the true power of GarageBand’s Sampler—a power we harness with each sound we incorporate into our projects.
Editing and Personalizing Your Samples
When we talk about unleashing the full power of GarageBand sample editing techniques, we’re discussing a plethora of functionalities that not only refine our audio pieces but also embed our personal touch. In GarageBand, personalizing samples is an art that allows creative individuals to leave their unique sonic signature on each track.
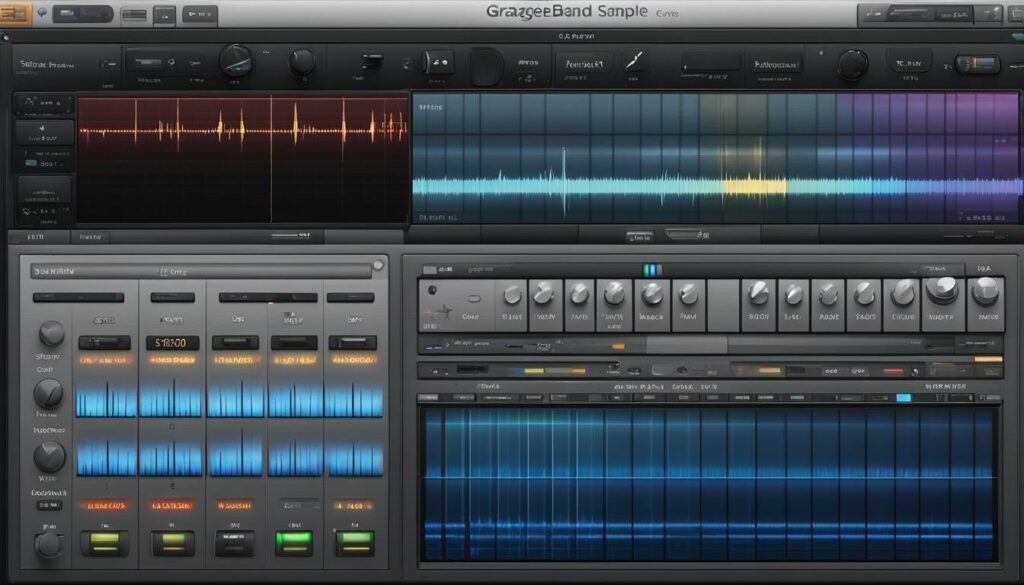
The ability to tailor a sample begins with the basics: the start and the end. By simply dragging the blue handles on either side of a sample’s waveform, we can trim the unnecessary parts, honing in on the exact section we need. This fundamental step in personalizing samples in GarageBand sets the foundation for more intricate editing that follows.
Occasionally, a sample may sound more intriguing when it’s played in reverse. GarageBand’s reverse playback function allows us to flip a sample with a mere tap, a simple action that can drastically alter the mood and texture of a segment. This feature can serve as a catalyst for unexpected inspiration and auditory experimentation.
As we proceed, the idea of continuity and repetition becomes crucial in crafting an engaging musical loop. We can engage the Loop feature in GarageBand, utilizing the yellow handles to define the loop points to perfection. Whether we aim for a hypnotic beat or a recurring motif, this technique ensures a seamless and continuous play.
Dynamicity is key to a compelling sample, and GarageBand’s capability to adjust sample volume over time cannot be overstated. By manipulating the Shape points on the curve within the Details panel, we can alter the volume contour, creating crescendos or diminuendos that breathe life into the static waveforms.
In our mission to personalize our sounds further, pitch adjustments play a pivotal role. The Coarse Tune and Fine Tune knobs present themselves as instruments of calibration, tweaking the pitch to our exact preference, while the ‘Detect Pitch’ function is our safeguard, allowing us to snap back to the original pitch if we wander too far astray.
And the crescendo of our editing process? The triumph lies in the ability to save each meticulous edit with the sample itself, making our customized sonic creations readily available for future compositions. This convenience speaks to the heart of what makes GarageBand a treasured tool for musicians worldwide.
Within this section, we’ve explored just a few of the possibilities within GarageBand’s editing suite. As we move forward with personalizing samples in GarageBand, we invite you to discover even more ways to shape your sounds, ensuring every sample you touch is imprinted with your distinctive musical identity.
Employing Advanced Sample Manipulation Techniques
As we immerse ourselves in the realm of advanced GarageBand sampling, we’re greeted by the thrilling potential of sample manipulation. Our aim is to sculpt soundscapes that are not only audibly pleasing but also strikingly innovative. The canvas of GarageBand offers an extensive palette of editing tools that enable us to inject a dash of originality into our audio pieces. Let’s explore how advanced techniques like reversing loops and meticulous trimming can infuse new life into our compositions.
Reversing, Looping, and Trimming for Novel Effects
Sometimes, the discovery of an enthralling effect lies in revisiting the familiar from a fresh perspective. Enter the ability to reverse audio in GarageBand, where sounds once mundane transform into captivating sonic elements with a mere tap. It’s a transformation akin to revealing the unseen side of a tapestry, where the threads of sound weave together a different story when played backwards, thus reversing loops in GarageBand emerges as an enchanting craft in our toolbox.
Looping is another cornerstone in the architecture of intriguing audio designs. With GarageBand’s sampler, we’re empowered to dictate the rhythm and flow of our audio segments, looping specific sections to create an undercurrent of rhythm or a mesmerizing beat that carries our track into the realms of auditory hypnotism. Such precision in the looped soundscape propels our work from the mundane to the memorable.
And, let’s not forget the scalpel of our toolkit – trimming. By artfully snipping the edges of our sample’s waveform, we chisel away the excess, revealing the core of the sonic gem we wish to showcase. These techniques, when blended, serve as testament to the prowess of advanced GarageBand sample manipulation at our disposal.
Exploring the Details Panel for Fine Tuning
Within the Details panel of GarageBand lies a microcosm of controls, each presenting opportunities for exacting modifications. Here, we tweak and tailor with the subtlety of a master craftsperson, fine-tuning the attributes that give each sample its character. The articulation of volume curves invites dynamics into play, allowing us to orchestrate the rise and fall of sound levels, painting auditory emotions with precision.
Pitch, the backbone of musical identity, is not left untouched. Through the Coarse and Fine Tune knobs, we exercise meticulous control over our samples, determining their placement within the tonal spectrum. Whether it’s the grand gestures of significant pitch shifts or the delicate touch of fine adjustments, our quest for the pitch-perfect sound blossoms in this space of adjustment and alignment.
The mastery of fine-tuning audio samples lies in lovingly turning these knobs and dials, nurturing each sample until it resonates with our artistic vision. This is where samples are no longer just fragments of sound, but rather, they become the nuanced voices of our musical narrative, each meticulously crafted to sing in harmony with the others.
Thus, through this journey of advanced GarageBand sampling, we become maestros orchestrating an ensemble of sounds, each manipulated and fine-tuned to play its part in the symphony we call our track. In our pursuit of audio excellence, GarageBand has proven to be an ally of immeasurable value, and each editing session is a testament to the power it places in our hands.
Utilizing GarageBand Sample Packs for Quick Inspiration
When we’re on the quest for a swift surge of creativity, we often turn to the wealth of GarageBand sample packs. These treasure troves are akin to a muse for music producers, brimming with an eclectic mix of sounds that spark imaginative compositions. Whether in the thick of a studio session or in the flow of a spontaneous jam, these packs are our go-to for quick and inspired sonic diversity.
In the landscape of GarageBand, sample packs emerge as a paramount resource. Drum kits that rock the earth’s core, strings that tug at heartstrings, and electronic blips that send listeners into a digital odyssey—all are but a tap away. GarageBand’s repository of samples is not merely a collection; it’s a curated set of tools designed to catapult our projects into new musical territories.
We understand that sometimes the spark of creativity needs to be ignited swiftly, and sifting through individual sounds can stifle the momentum. This is where GarageBand’s sample packs shine, artfully crafted to offer comprehensive sets of cohesive sounds. A single pack can take our composition from a blank canvas to a detailed soundscape, rich in texture and style. These packs provide not just convenience but also a palette for experimentation, pushing the boundaries of conventional genres.
The diversity of GarageBand’s sample packs extends beyond genre staples. We unearth packs filled with ambient noise samples, offering a backdrop of sonic realism that can transport listeners to rain-soaked cityscapes or a tranquil forest at dawn. It’s these elements, when woven into our tracks, that provide an immersive experience, enticing audiences with their authenticity.
Whether we seek the polished finish of a professional drum kit or the raw edge of experimental instrumentals, GarageBand’s sample packs are reservoirs of inspiration. They empower us to lay down a solid groundwork swiftly, leaving more room for us to finesse and tweak, thus guiding our creative vision to realization with both speed and sophistication. In the realm of digital music production, GarageBand’s sample packs are our secret weapon for inspiration at a moment’s notice.
Integrating Samples into Your GarageBand Projects
For us, the power of GarageBand not only lies in its ability to record new sounds but also in integrating samples into tracks with finesse. The process of using pre-recorded audio—be it a loop, a riff, or even a vocal snippet—is pivotal to crafting a unique soundscape, and GarageBand’s toolkit is designed for just that. We go beyond mere addition of sounds; we embark on GarageBand sample slicing to ensure that each piece perfectly complements our musical narrative.
Cutting and Slicing Samples to Fit Your Track
Embarking upon the intricate task of making the sample fit within the framework of our track is akin to a tailor customizing a garment to the precise measurements of their client. We meticulously cut and slice using GarageBand’s intuitive interface, extracting the essence of sounds and fitting them seamlessly into the tapestry of our melody. It’s a satisfying process, watching how a few clever adjustments can make a world of difference in harmonizing samples with the tempo, rhythm, and soul of our musical projects.
When we delve into our audio files, we isolate specific sections—maybe a bass line that sets the groove, or a vocal hook that’s too catchy to ignore. With tools at our disposal in GarageBand, such as the trimming and looping options, we fine-tune the start and end points. There’s a sort of rhythm to it, with each correction ensuring that every beat and every note serve the larger purpose of the track, thereby integrating samples into tracks with a natural flow.
As crucial as it is to find the right samples, it’s the mastery of integrating them that transforms our projects. With GarageBand, the intricacies of this process become less daunting and more of an artistic pursuit, allowing us to channel our inner producer. So let us embrace the art of GarageBand sample slicing, leveraging these techniques to forge a path towards a polished, cohesive musical experience that’s truly our own.
Exporting and Sharing Your Custom Samples
As you dive deep into the realms of music creation with GarageBand, the moment eventually arrives when you’ve carved your audio into a pristine sample—a signature sound that begs to be heard far beyond your personal studio. It’s at this juncture that the beauty of exporting GarageBand samples comes to light. Not only does this allow for a seamless transition of your sonic creations into other projects or platforms, but it also stands as a bridge for sharing custom samples with collaborators, giving them life within new musical contexts.
GarageBand’s design inherently understands the fluid nature of audio work—how a single sample can travel and transform through its use in various compositions. Therefore, it enables us to save our samples and prepare them for takeoff using a range of export options. Formats like AIFF and WAV are supported, fostering compatibility and ensuring that when we share, the integrity and quality of our sound prevail.
The act of exporting GarageBand samples is imbued with anticipation. Like releasing a message in a bottle into a vast ocean, we send our work out, wondering what new shapes and forms it will assume when it’s discovered by fellow creators. This process of exchange and fusion is the essence of the musical tapestry we all contribute to: a continuous evolution of sound, honed and reimagined by different minds and ears.
Moreover, the ease with which we distribute our sounds symbolizes the collaborative spirit at the heart of music-making. To share is to invite others into our auditory vision, to offer a part of ourselves that may inspire or be reinterpreted into something we never envisioned. By sharing custom samples, we strengthen the bonds of our creative community, each sample a thread weaving us closer together in this global music fabric.
We recognize that our samples are not just sequences of audio—they are expressions of our craft, filled with potential and waiting to be reshaped by the imaginations of others. From the intimate confines of our headphones to the vast reaches of collaboration and beyond, exporting and sharing in GarageBand serves as a vital part of the music-making journey.
GarageBand for Windows PC: Accessing Advanced Features
In our collective journey exploring the capabilities of music production software, we encounter the frequent inquiry about accessing GarageBand on Windows. As seasoned enthusiasts, we know that while GarageBand is synonymous with the macOS and iOS ecosystem, the allure of making it available for Windows users is strong. Despite this interest, however, it’s crucial to note that there is no Official GarageBand for Windows PC; Apple has not released a version for the Microsoft-operated platform.
Often, users gravitate towards emulators as a workaround to replicate the GarageBand experience on a PC. These third-party software create a virtual environment, mimicking macOS within the Windows system, thereby allowing users to install and run GarageBand. While some seek an emulator-free GarageBand experience, it’s essential to discern that such an experience requires official support—something that’s absent in the context of GarageBand on PC without emulators.
Official Download Guide for GarageBand on Windows
Propelled by a drive to aid fellow creators, we must clarify that there is no sanctioned guide or official resource from Apple for downloading GarageBand on Windows. Misinformation abounds, and we urge our community to steer clear of dubious claims of official downloads where none exist. Instead, we advocate for authentic creation, leveraging tools that are legitimately accessible and supported on your platform of choice.
Emulator-Free GarageBand Experience on PC
As we traverse the vast landscape of digital audio workstations (DAWs), we’re constantly on the lookout for pure, unadulterated means to channel our creativity. Yet, the dream of an emulator-free GarageBand experience on PC is, for now, just that—a dream. Such is the reality of proprietary software in a fragmented tech realm. Nevertheless, we rejoice in the plethora of other DAWs available for Windows, offering rich features and alternative pathways to musical excellence.
Our endearing commitment to our craft equally aligns with our responsibility towards factual guidance. Opting for an unofficial method of accessing GarageBand on Windows may introduce risks and is not something we can endorse. We believe in using tools that comply with a platform’s terms and offer legitimate and supported experiences, guaranteeing not just the safety but also the stability of our cherished creations.
Tips for Sampling in GarageBand with Advanced Techniques
In our expeditions through the soundscape of GarageBand, we’ve honed a set of sophisticated GarageBand sample manipulation practices that elevate ordinary samples into extraordinary sonic experiences. Heed these advanced sampling tips and watch as the realm of possibility within GarageBand widens, fostering a playground where creativity knows no bounds.
One might underestimate the impact of fine adjustments, but in our toolbox, enabling Audio Units in preferences is a pivotal move. It’s much like giving wings to our creative intents, allowing them the freedom to soar. As we bring in samples, deciphering the track BPM is a dance of precision, setting the rhythm and ensuring our samples move in lockstep with the beat. Should we yearn for agility, the shortcut Command + K invokes the magical realm of Musical Typing, empowering us to breathe life into our samples with the ease of keystrokes.
The AUSampler is our alchemist’s lab, where samples transmute under our careful manipulation. Here, we intertwine the intricacies of tuning, jest with the balance of panning, and solicit the perfect volume. Custom drum kits loaded into the AUSampler inject a personal signature to our beats, allowing the pitch-shifted echoes of snares and hi-hats to captivate on impact. Remember, every sound is a precious entity; removing its source is akin to erasing its existence from our masterpiece—organization is not merely a convenience, it’s the backbone of our GarageBand sample manipulation flow.
FAQ
How do I start sampling in GarageBand?
To start sampling in GarageBand, tap the Browser button, navigate to the Keyboard section, and select the Sampler. Hit the Record button and use your device’s microphone or an external mic to capture your sample. After recording, the sample can be played and edited within the Sampler’s keyboard interface.
Can I import my own sounds into GarageBand for sampling?
Yes, you can import your own audio files into GarageBand. You can either drag audio regions into the Sampler track from within GarageBand or import files from your personal collection through the Sample Library’s Import function.
How do I adjust the input level for my microphone in GarageBand?
Adjust the input level for your microphone by selecting the appropriate channel for your connected mic and then using the Input Settings to access the Input Level slider. You can manually adjust the level or use the Automatic setting to let GarageBand optimize the level for you.
What are some advanced sample manipulation techniques in GarageBand?
Advanced sample manipulation techniques in GarageBand include reversing samples, creating loops, and trimming sections of the waveform in the Sampler’s waveform editor. You can also explore the Details panel for more minute adjustments like pitch correction and volume curves.
How do I utilize GarageBand’s sample packs?
GarageBand’s sample packs can be accessed from the sound browser. You can add these pre-made sounds to your project for immediate use, which provides a quick way to enhance your tracks with professional sounding elements.
How do I cut and slice samples effectively in my GarageBand projects?
In GarageBand, you can use the editing tools to cut and slice your samples. Select the region you want to edit and manipulate it to fit perfectly in your track. Use the command tools for slicing and rearranging parts until they seamlessly integrate with your music.
Is it possible to export and share samples I’ve created in GarageBand?
Yes, you can export and share your custom samples created in GarageBand. Once you are satisfied with your sample, save it then export it in formats such as AIFF or WAV, which can be easily distributed and used in other projects or shared with collaborators.
Can I use GarageBand on a Windows PC?
GarageBand is an Apple application designed for macOS and iOS. There are emulators and some non-emulator solutions that claim to offer a GarageBand experience on a Windows PC, but they are not officially supported by Apple and may present limitations or risks.
Are there any specific tips for advanced sampling in GarageBand?
For advanced sampling in GarageBand, you can enable Audio Units in the preferences, understand the track’s BPM for better syncing, and use the AUSampler for detailed manipulations. Also, consider loading custom drum kits into the AUSampler for unique percussive sounds and explore the Musical Typing feature to help adapt the samples to your track’s key.
