When it comes to crafting the perfect piece of audio artistry, mastering the essentials of audio editing is non-negotiable. In our perpetual quest for sonic perfection, we often find ourselves confronting the commonplace task of splitting an audio track. Enter GarageBand, Apple’s free DAW, esteemed for its blend of sophistication and user-friendliness, making it the go-to resource for novices and seasoned creators alike.
Whether you’re a burgeoning music producer, aspiring podcaster, or a multimedia content virtuoso, GarageBand provides a robust platform to execute seamless track splitting with ease. And that’s exactly what we’ll navigate today – a step-by-step guide to split a track in GarageBand. With our focused tutorial, the perplexing prospect of track fragmentation will soon transform into a smoothly orchestrated stroke in your audio editing repertoire.
Prep up your MacBook or iPhone, because we’re diving deep into the mechanics of GarageBand’s track splitting feature. We ensure not only to inform but to empower you to optimize this powerful free DAW to your audio production’s advantage. So tighten up those virtual strings, crank up the volume, and let’s slice into the digital tracks with precision and artistic flair.
Understanding the Basics of Track Splitting in GarageBand
Embarking on the journey of track splitting basics in GarageBand is akin to unlocking a gateway to the vast landscape of fundamental audio editing. As we explore the realm of GarageBand track editing, we come to recognize its pivotal role in enhancing our audio projects. With the GarageBand user interface meticulously designed for streamlined navigation, it aids us immeasurably to dive into the core of creative audio manipulation.
At the heart of this pursuit lies the quest to dissect a melody or dialogue into individual segments apt for refinement. This task necessitates a deft hand and an ear for detail; however, GarageBand’s accessibility bolsters even novices to perform this with finesse. Music producers, podcasters, and editors alike, find themselves employing this feature to isolate or excise portions, introduce effects with surgical accuracy, and recalibrate the structure of their auditory endeavor. Understanding and applying track splitting basics is thus, a requisite skill in this digital forge of sound.
As we grasp the essentials, GarageBand’s user interface serves as our companion, intuitive and inviting, making the complex art of track splitting both approachable and enjoyable. It’s where the fusion of technical prowess and imaginative prowess coalesces, where we, as artisans of sound, sculpt the airwaves to our vision. And thus, with GarageBand as our instrument, the manipulation of audio files evolves from mere task to craft, laying down the foundation for a masterpiece in the making.
The Importance of Splitting Tracks for Audio Editing
The significance of mastering track splitting in the realm of audio production cannot be overstated. The ability to separate and manipulate individual sections of audio is fundamental to enhance audio tracks and achieve a standard of cleanliness and professionalism in the final output. In the universe of GarageBand, the functionality to split tracks constitutes an indispensable feature for any editor aiming to elevate their auditory creations.
Embarking on the exploration of audio editing in GarageBand inevitably brings us to the doorstep of track splitting. This powerful tool allows us to meticulously excise errors, eliminate awkward silences, and purify our recordings from intrusive noise – all with the aim of a polished and coherent production. It’s a process that transforms a raw recording into a seamless stream of sound designed to captivate and engage listeners.
As we delve deeper into the importance of track splitting, we come to appreciate its role in the granular customization of audio. Whether we need to adjust volume levels for harmonious consistency, or remove sections that detract from the narrative flow, track splitting is our gateway to pristine audio projects. It’s about wielding control over your work, arming yourself with the capacity to refine each chord, note, and word to perfection.
Moreover, the journey toward clean audio production is part and parcel of the modern audio editor’s repertoire. It’s a journey that GarageBand simplifies, without compromising the sophistication of the end result. By adopting the technique of track splitting, we can assure our audience of an auditory experience that’s both immaculate and profoundly affecting.
Let us then embrace GarageBand’s facile interface, as it guides us to effectively segment our tracks. By doing so, we not only refine our skills but also enhance the very fabric of our artistic outputs. With each split, snip, and edit, we step closer to realizing our vision of aural excellence—a vision that, once achieved, resonates deeply with every beat and word.
Setting Up GarageBand for Track Splitting: Mac and iOS

Before embarking on our journey of track splitting, we must first ensure that our workspace is primed for creativity and efficiency. For those of us juggling the spheres of Mac audio editing and iOS track splitting, setting up GarageBand is a key preliminary step that paves the way towards producing immaculate audio projects.
On a Mac, our setup adventures begin by checking for GarageBand within our arsenal of pre-installed applications. Should it be absent, a quick voyage to the App Store to download GarageBand beckons. Upon securing the software, we import our chosen audio files, which act as the clay from which we shall mold our sonic masterpiece.
Transitioning to iOS, our track splitting setup continues with a similar visit to the App Store where downloading the mobile iteration of GarageBand awaits us. Once the app graces our device, we harness a variety of conduits, be it iCloud Drive or the specially designated GarageBand File Transfer folder, to funnel our audio files into the mobile editing suite.
Irrespective of whether we’re wielding a MacBook or an iPhone, we pay heed to ensuring our song length is meticulously set to automatic. This minor yet crucial step forestalls the premature truncation of our imported audio clips, thus securing the integrity of our tracks for the imminent splitting process.
With these setup essentials addressed, we stand at the precipice of track splitting setup enlightenment. Our software is installed, our files are in place, and our keen sense of audio editing anticipates the fulfillment that comes with transforming raw sound into a symphony of precisely edited audible delight.
Step-by-Step: Splitting Tracks on GarageBand for Mac
Envisioning the end result of an expertly split audio track begins with a fundamental understanding of the process in GarageBand for Mac. We are poised to delve into a detailed, step-by-step track splitting tutorial that both novices and seasoned editors can follow to ensure their projects exude polished professionalism. Let’s unravel this audio file splitting guide together, ensuring that each step is grasped with clarity and simplicity.
Launching our GarageBand for Mac tutorial, our initial endeavor involves project selection and setting up our workspace. The first step is to open GarageBand and create a fresh new audio track within our project by simply right-clicking in the tracks area and selecting New Audio Track. Post this creation; we seamlessly segue into the import phase, where we introduce our audio files into the DAW. GarageBand graciously allows us to either drag audio files directly from Finder or use the interface to browse and open the desired audio files, thereby populating our track with the sounds we wish to sculpt.
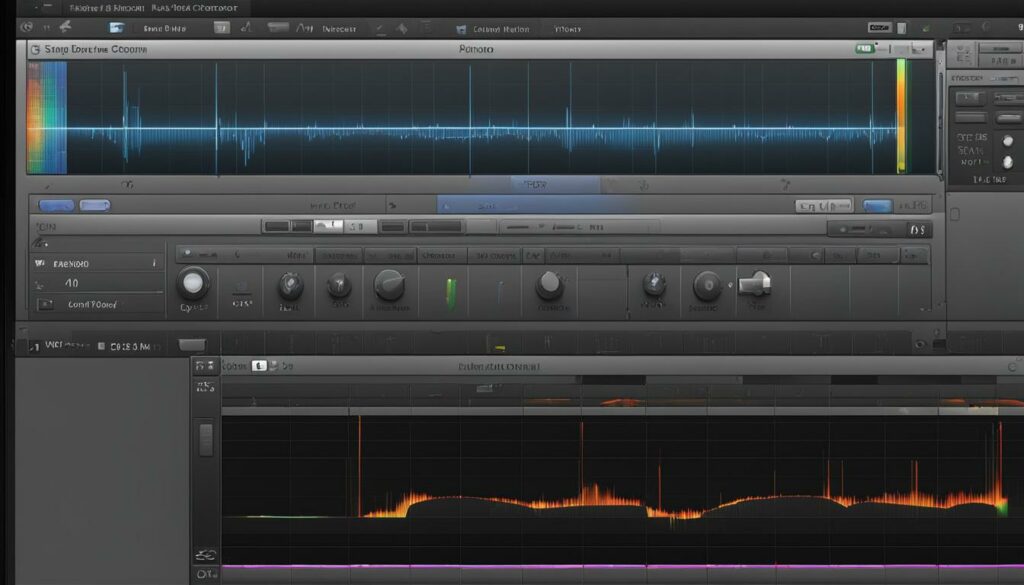
Now that we have our audio placed snugly within the track, we acquaint ourselves with the craft of track splitting. Anchoring our work is the playhead, the vertical line visible in the timeline. As we place the playhead at our chosen location, we ready the track for its eventual division. The careful positioning of the playhead is paramount to ensuring that our splits occur right where we envisage them. Whether it’s to excise a section, create a pause, or simply organize our track into manageable pieces, positioning the playhead precisely where the split is desired is a crucial step.
With the audio track duly highlighted and our playhead in position, we’re presented with several splitting methods. For those who prefer an approach navigated by menus, the Edit option located atop the menu bar offers the command Split Regions at Playhead. If right-click menus are more your style, highlighting the track permits access to an intuitive drop-down menu, where Split at Playhead is among the convenient selections. Lastly, the tactility of a keyboard shortcut can expedite your workflow: with the track selected, simply pressing Command + T activates the split function.
Upon executing one of these commands, presto: you have now carved your audio track into distinct regions. These newly created audio regions in GarageBand are not just segments of sound; they are blank canvases on which to further paint with effects, shifts, and cuts. As we proceed, we bear in mind that any unintentional splits are reversible through GarageBand’s forgiving Undo feature, ensuring we can iterate on our track splitting without the risk of irreversible errors.
By following this audio file splitting guide, you can masterfully transform a single monolithic track into a series of purposeful audio regions, a critical step in assembling your creative audio masterwork.
Tips for Splitting Audio Files Accurately in GarageBand
Embarking on the journey of accurate audio file splitting, we understand the impact it has on the overall quality of our productions. Here, we share key insights that set the groundwork for precision track splitting, allowing us to deliver cleaner and more professional results.
Utilizing the Playhead for Precision
One of the most crucial GarageBand editing techniques involves the strategic placement of the playhead. Our action begins by highlighting the desired section of our track, with the playhead’s exact position clear in our view. This step is foundational; it’s the compass pointing directly to where the cut will be made, setting the stage for playhead precision. If we misstep here, our split might not fall at the intended juncture, potentially disrupting the flow of audio.
The Role of Zoom for Detailed Edits
As we dive deeper, our focus sharpens with the help of zoom functionality in GarageBand. Zooming allows us to magnify the waveform, bringing tiny details into sharp relief – details which are often the boundary between mediocre and stellar splits. Mastering this function is indispensable; it is our finest tool for enabling detailed edits in GarageBand, and it’s a testament to our editing acumen. By deftly adjusting our view, we can execute precision track splitting that not only sounds good but looks impeccably clean on the track itself.
The nuances of track splitting may seem daunting at first, yet they unlock the full potential of our audio projects. With these strategies in hand, our capacity for generating edits that resonate with clarity is boundless. This is our chance to elevate our craft, to turn the myriad possibilities of GarageBand into audible reality.
Alternative Methods to Split Tracks in GarageBand

As we delve into the intricacies of GarageBand, it’s clear that one cannot underestimate the power of alternative track splitting methods. While many users are familiar with the basic approach to splitting tracks, the GarageBand Edit menu harbors additional capabilities that cater to a diverse array of editing workflows. Let’s explore these options to optimize our audio editing endeavors.
Exploring the Edit Menu Options
GarageBand’s Edit menu is a treasure trove for editors looking for alternative track splitting methods. Here lies a method that stands out for its straightforwardness—the ‘Split Regions at Playhead’ command. This feature empowers us to slice our audio track precisely at the playhead’s location with a mere menu selection, elevating our editing precision to new heights.
Making use of this functionality, we find a harmonious balance between ease and accuracy. It allows us to remain in complete control of our editing process while maintaining our focus on creativity. Entrusting our workflow to the robust GarageBand edit menu, we are ushered into a realm where editing is not just a task, but an art in itself.
As we continue to perfect our craft within GarageBand, utilizing various split regions at playhead techniques is integral to achieving the best possible version of our projects. Whether we’re refining a podcast episode or chopping up a melody, we can adapt our approach to fit the unique requirements of each audio endeavor. Embrace these alternative methods and witness how they enhance your track splitting technique in GarageBand.
Editing Tracks After Splitting: Creative Rearrangement
Once we have cleaved our GarageBand project into discrete sections, the artistry of post-split editing begins to shine. It’s akin to assembling a sonic jigsaw where each piece can be positioned with purposeful intent. The creative track rearrangement phase is where our project transforms from a series of fragmented audio clips into a coherent audio narrative, reflective of our envisioned outcome.
At this juncture, GarageBand’s versatile platform significantly streamlines the process of GarageBand track customization. Confidently dragging audio regions across the timeline, we experiment with alternative sequences, emphatically shaping the project’s soundscape. In our pursuit for optimal arrangement, we may find changing the positions of certain segments can dramatically enhance the project’s rhythm and pacing.
Not bound by mere linear adjustment, we can exploit GarageBand’s functionality to clone sections of audio that resonate with particular potency through copying, or conversely, excise those that detract from the overall harmony by deleting. The capability to manipulate these segments without limitations is not only empowering but essential in forging a track that truly aligns with our creative aspirations.
Emphasizing on efficiency, GarageBand simplifies the steps required to navigate through post-split editing. It embraces our creative freedom, inviting us to tinker with the structure until our unique sound takes form. As we navigate through this digital soundscape, we revel in the freedom to manipulate each cut, shuffle sections, and conjure up a final production that is the very epitome of our sonic fingerprint.
How to Split Tracks on GarageBand for iOS
For those of us who embrace the mobility and convenience of importing audio iOS, GarageBand for iOS editing becomes a seamless chapter in our audio file management saga. We recognize the influence of intuitive editing controls as we orchestrate our projects with precision. Let’s delve into the process of track splitting within the fluid interface of GarageBand on your iOS device.
Importing Audio Files for Editing on iOS
Our initial step in track creation involves importing audio to our iOS device. We prioritize simplicity and efficiency by moving audio files into the GarageBand File Transfer folder or gathering them through the Files app. With GarageBand’s integrated nature, we ensure our song lengths are tuned to automatic, circumventing any unintended truncations of our audio files and placing the power of complete creative control back into our hands.
After embracing the embrace of the GarageBand environment, we come face-to-face with the loop browser—a portal to our meticulously curated audio files. A touch, a drag, and with a flourish, we witness our selected audios transition smoothly to the Track view. It’s here, on this platform, where our garageband for iOS editing journey tangibly begins.
Touch Gestures for Splitting Tracks
Immersion into the realm of iOS track splitting is rooted in the finesse of touch gestures in GarageBand. These touches—the tap to select, the double-tap to initiate, embody the genesis of editing. For us, the track is now an open field, ready to be segmented using the intuitive scissor icon, a touch-based guide that effortlessly leads our audio regions to their separate destinies.
It is through these intuitive editing controls, that we, armed with nothing but touch, engage in the artful act of division. With the marker at our command, we split and splice with the assurity that only comes from GarageBand’s gesture-based mastery. Each action is calculated, each split precisely ordained by the sheer will of our creative intent.
GarageBand for iOS thus stands as a testament to the fusion of technology and art—symbolizing the peak of convenience and innovation. Our tracks, once singular and unyielding, now yield to our touch, allowing us to navigate the waters of audio creativity with the deft swipes of our fingertips.
Optimizing Your Workflow While Track Splitting
As we navigate through the intricacies of GarageBand, we consistently strive to enhance our workflow optimization. Our ultimate goal is not only to achieve efficient track splitting but to do so in a manner that boosts our overall productivity. To this end, we’ve gathered a series of practices that promise to augment the enhancing editing efficiency of our audio projects.
Firstly, we recognize the value in utilizing keyboard shortcuts, a method that saves both time and energy. The power of pressing ‘Command + T’ to split a track, for example, propels us into a realm of unmatched expediency. By internalizing these shortcuts, our workflow becomes more fluid, allowing us to make adjustments swiftly and with grace.
In the event of an errant split, we take solace in GarageBand’s ‘Undo’ function. This nifty feature is instrumental in maintaining the integrity of our creative explorations, ensuring that any missteps can be rectified instantly without interrupting the flow of our editing process.
Apart from the reactive measures, we also proactively set up templates that cater to our routine production needs. Templates serve as blueprints for various project types, embedding the preferred settings, and saving us the hassle of repetitive adjustments. This form of preparedness significantly reduces the setup time for new projects, a cornerstone in workflow optimization.
Mastering Efficient Track-Splitting Routes
Our pursuit of efficient track splitting is not a one-size-fits-all approach. We endeavor to understand the multitude of splitting methods afforded by GarageBand and to select the one that aligns best with the task at hand. Whether we use the Edit menu or a swift keystroke, each action is chosen with the intent of streamlining our editorial journey.
Fine-Tuning Your Workflow for Editing Proficiency
Lastly, an underpinning aspect of enhancing editing efficiency is personalization. We refine our workflow by customizing the GarageBand interface to showcase tools and features that we frequent. Organizing the workspace to our liking not only aids in swift navigation but also reduces cognitive load, freeing us to focus on the creative aspects of our projects.
By adopting these strategies, we ensure that our track splitting sessions are not only fruitful but also expeditious, redefining productivity in our musical narrative. Our workflow becomes a well-oiled machine, capable of realizing our artistic vision with both speed and precision. This is how we, as audio artisans, master the art of workflow optimization in GarageBand.
Moving and Aligning Split Audio Regions in Your Project
With the fragmentation of tracks into audio regions complete, our venture into the territory of track organization in GarageBand begins. This phase of post-split refinement is where the significance of moving audio regions and aligning tracks is fully realized. Such manipulations are instrumental in preserving the integrity of our project’s rhythm and maintaining a seamless aural experience.
We commence this crucial part of our editing odyssey by revisiting the GarageBand workspace, where each split section awaits our directive. The process of reconfiguring these segments is intuitive—enabling us to click and drag the regions to new locations. Whether we’re positioning an intro, outro, or ensuring the chords hit just right after a bridge, the ability to realign these regions with a simple drag-and-drop action is a boon to any editor.
The mastery of timely and precise alignment is an art form in itself. Incorrect placement of audio regions can lead to uneven tempos or jarring transitions that disrupt the narrative flow. But fear not, for GarageBand equips us with the necessary tools to measure and align tracks with surgical precision, ensuring that each note, beat, and spoken word is seamlessly woven into the project’s tapestry.
Our collective journey in aligning tracks demonstrates GarageBand’s versatility. We are able to maneuver audio regions across various tracks, effortlessly aligning new segments with existing ones, thus fostering a layer of complexity and richness to our soundscape. This delicate dance of alignment is crucial to achieving a harmonious end result that resonates with the envisioned intent of our audio creation.
As we pore over our project, scrutinizing the placement of each region, the cohesive final product begins to take shape. This digital reorchestration, driven by the imperative of track organization, underscores the significance of a well-tuned ear coupled with GarageBand’s interface. It’s in this nexus of technology and creativity that the once disjointed elements find their rightful place, leading us to a polished and cohesive auditory masterpiece.
Additional Techniques for Enhancing Split Tracks
Once we have the basic understanding of splitting tracks in GarageBand, we begin to unleash our genuine artistic spirit by exploring advanced editing techniques. These advanced maneuvers offer us new dimensions in refining our audio and enhancing split tracks to elevate our projects from the ordinary to the extraordinary.
In our pursuit of sophisticated sound design, we understand the transformational power of GarageBand track manipulation. Adjusting the start and end points of our audio regions becomes an act of precision, enhancing the narrative flow or the rhythmic pulse of our music. This granular level of control allows us to tailor the auditory experience to our exact specifications.
Looping for Extended Play
Looping is among GarageBand’s most dynamic features, permitting us to take a single segment and replicate it across the track for an extended play. This is particularly potent when developing background beats, harmonies, or layering sound effects that require repetition without manual reiteration.
Trimming for Tighter Edits
Conversely, trimming offers us the chance to shave off unnecessary fluff from our tracks, tightening our edits to a professional standard. By trimming, we can nix slight hesitations in dialogue or remove the extra beat that throws off a track’s balance. Finessing these cuts results in an audio piece that feels intentional, seamless, and tailored.
As we delve deeper into GarageBand’s editing suite, we uncover that the skill of track manipulation encompasses more than mere separation of audio. It is about crafting an environment where every note or word sits in perfect harmony with the next. And as our proficiency grows, so too does our ability to infuse each track with newfound complexity and depth, leaving our indelible mark on the auditory arts.
Understanding these intricacies of GarageBand not only expands our toolset but broadens our creative horizons. By mastering the nuances of looping and trimming, along with fundamental track splitting, we ensure that our editing is not just about cutting but also about crafting experiences that resonate on a deeper level with our audience.
Exporting and Sharing Your Edited Tracks from GarageBand
After meticulously splitting, editing, and refining our audio content in GarageBand, we are now at the finalization phase where exporting audio tracks becomes our focus. This critical stage facilitates the transition of our projects from a personal creative space to a format ready for public consumption. GarageBand’s intuitive exporting process grants us the convenience to save and distribute our meticulously crafted sounds with ease. Whether we aim to circulate a polished podcast episode or share a newly minted musical composition, GarageBand equips us with the tools to do so smoothly.
Exporting entails selecting the desired output format catered to our distributing garageband projects strategies, be it on social media, music platforms, or directly to our audience. GarageBand’s flexibility in file compatibility ensures that our final tracks are tailored for optimal playback across various listening environments. The exporting functionality underscores the software’s commitment to not just the creation but also the sharing of edited music, empowering us to share our aural stories far and wide.
Ultimately, our journey within GarageBand culminates in the distribution of our auditory creations. This moment marks a milestone as we release our art into the world, manifesting our sonic imagination for others to experience. With the final exported track in hand, we stand ready to engage with the connections that only music can bridge, transforming listeners into part of a larger narrative woven by our notes and words.
FAQ
What is track splitting in GarageBand?
Track splitting in GarageBand is the process of dividing an audio region or music piece into separate parts. This feature lets you isolate segments, remove unwanted sections, apply effects to certain areas, and rearrange the structure of your project.
Why is it important to split tracks during audio editing?
Splitting tracks is crucial for creating a clean audio production. It allows you to remove mistakes, silence, extraneous noises, and adjust volume levels, which enhances the overall quality and coherence of your audio projects.
How do I set up GarageBand on my Mac or iOS device for track splitting?
For Mac, ensure GarageBand is installed or download it from the App Store. Import your audio files and set the project length to automatic. For iOS, download GarageBand from the App Store and import audio files via the GarageBand File Transfer folder or iCloud Drive, then set the song length properly.
What are the steps for splitting tracks in GarageBand on a Mac?
On a Mac, select the track, move the playhead to where you want to split, and either use the Edit menu, the right-click drop-down menu, or keyboard shortcuts to cut the track at the playhead’s position.
How can I ensure precision when splitting audio files in GarageBand?
Precision in splitting audio files can be achieved by carefully positioning the playhead at the desired point, making sure the track is highlighted and using the zoom function to clearly see the waveform for a more accurate split.
Are there alternative methods to split tracks in GarageBand?
Yes, apart from the standard methods, you can explore the Edit menu options. GarageBand allows you to split regions at the playhead using different menu commands within the Edit menu, offering a variety of editing capabilities.
What can I do with my audio tracks after they have been split?
After splitting your tracks, you can creatively rearrange the audio regions by dragging, adjusting spacings, copying, and deleting segments to customize your project to fit your production goals.
How do I split tracks in GarageBand on an iOS device?
On iOS, you can import audio files into GarageBand, set your song length, and then use touch gestures to activate split mode in the track view. Simply tap the region, select the scissor icon, and drag to split at the desired point.
What tips can optimize my workflow while track splitting in GarageBand?
To optimize your workflow, familiarize yourself with and utilize keyboard shortcuts, quickly undo any unwanted actions, and consider setting up templates. This helps expedite the splitting process, saving you time and improving efficiency.
How do I move and align split audio regions in GarageBand?
Click and drag the split audio regions within a track or across multiple tracks to move and align them. This precise alignment is essential for maintaining the rhythm and flow of your project.
What additional techniques can enhance my split tracks?
Beyond basic track splitting, you can use GarageBand’s tools to loop or trim audio regions, adjust start and end points, refine cuts, or create loops. These techniques allow for more granular sculpting of your audio, adding complexity to your project.
What are the options for exporting and sharing my edited tracks from GarageBand?
Once you’ve completed your edits, GarageBand enables you to export your project in various formats suitable for different platforms. This allows you to easily share and distribute your polished audio tracks to your intended audience.